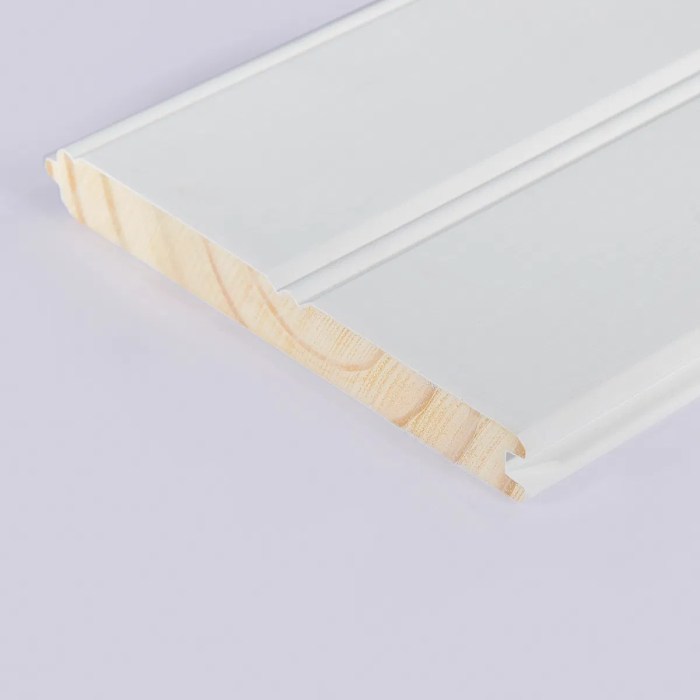
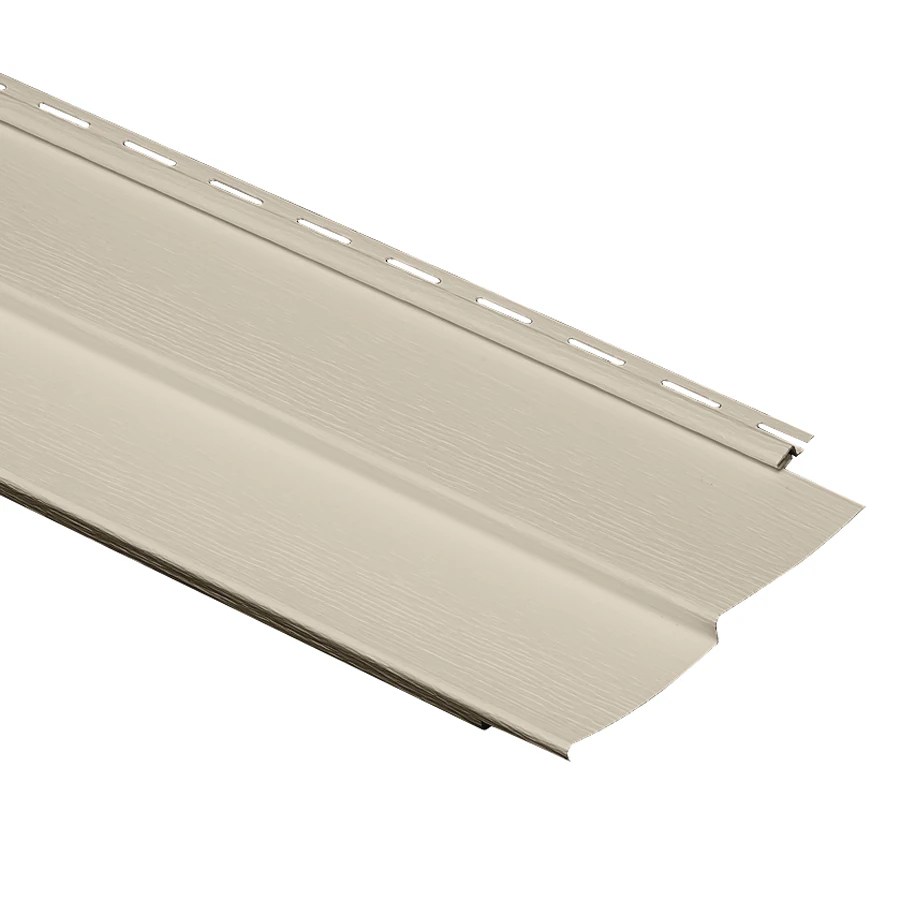
Transforming your home’s exterior with vinyl siding offers a blend of aesthetic appeal and lasting durability. But before you dive into this project, understanding the process is key. From choosing the right type of siding to mastering the installation techniques, this guide will equip you with the knowledge to tackle this home improvement project confidently. We’ll cover everything from preparation and planning to finishing touches, ensuring a professional-looking result that enhances your curb appeal and protects your home for years to come.
This isn’t just a DIY guide; it’s a strategic roadmap to success. We’ll delve into the nuances of vinyl siding installation, providing actionable steps and expert tips to help you avoid common pitfalls and achieve a flawless finish. Get ready to unlock the secrets to a successful vinyl siding installation – a project that will significantly boost your home’s value and visual impact.
Types of Vinyl Siding
Choosing the right vinyl siding for your home is a crucial decision impacting both aesthetics and longevity. Understanding the various types available allows for a more informed selection, ensuring your investment aligns perfectly with your style and budget. This guide will explore the key differences between popular vinyl siding options, helping you make the best choice for your property.
Vinyl Siding Types: Clapboard, Shingle, and Shake
Vinyl siding comes in a variety of styles, mimicking the look of traditional materials while offering the benefits of low maintenance and durability. Three primary types dominate the market: clapboard, shingle, and shake. Each offers a unique aesthetic, suitable for different architectural styles and personal preferences.
Clapboard Vinyl Siding
Clapboard vinyl siding, the most common type, features long, horizontal panels that overlap each other. This classic design evokes a timeless and elegant look, suitable for a wide range of homes, from traditional colonials to contemporary designs. Its clean lines and versatility make it a popular choice for homeowners seeking a clean, refined appearance. The panels typically range in width from 4 to 12 inches and are available in a vast array of colors. For example, a classic white clapboard siding can create a bright, airy feel, while a deep, earthy tone can complement a more rustic setting.
Shingle Vinyl Siding
Shingle vinyl siding replicates the look of asphalt or wood shingles, providing a more textured and visually interesting surface. This style often creates a more dimensional appearance compared to the flat surface of clapboard. Shingle vinyl siding is a good choice for homeowners seeking a more rustic or traditional look. Different shingle profiles are available, ranging from relatively flat to heavily textured, allowing for customization to match various architectural styles. Imagine a charming Cape Cod home with its characteristic, slightly curved shingles replicated in durable vinyl – it creates a visually appealing and low-maintenance exterior.
Shake Vinyl Siding
Shake vinyl siding mimics the appearance of wood shakes, offering a rugged and natural look. This style provides a more textured and irregular surface than clapboard or shingle siding, often featuring a slightly rougher, more rustic appearance. Shake vinyl siding is an excellent choice for homeowners who want a more dramatic and visually striking exterior. Think of a mountain cabin aesthetic, with the rough-hewn look of wood shakes, but with the durability and low maintenance of vinyl. The irregular patterns and subtle color variations in many shake vinyl options contribute to a realistic and attractive wood-like finish.
Vinyl Siding Comparison Table
The following table compares the durability, cost, and maintenance requirements of the three primary types of vinyl siding. Note that prices can vary based on factors such as brand, quality, and installation costs.
| Vinyl Siding Type | Durability | Cost (per sq. ft.) | Maintenance |
|---|---|---|---|
| Clapboard | High; resistant to rot, insects, and moisture | $3-$7 | Low; occasional cleaning |
| Shingle | High; similar durability to clapboard | $4-$8 | Low; occasional cleaning |
| Shake | High; similar durability to clapboard and shingle | $5-$9 | Low; occasional cleaning |
Vinyl Siding Installation Process
Installing vinyl siding is a straightforward process when approached systematically. Proper preparation and attention to detail are crucial for a long-lasting, aesthetically pleasing result. This guide will walk you through each step, ensuring you have the knowledge to tackle this home improvement project with confidence.
The entire process hinges on meticulous planning and execution. Rushing through any stage can lead to costly mistakes, including gaps, misaligned panels, and premature damage. Think of it like building a house of cards – a slight imperfection early on can cause the whole structure to collapse.
Preparation and Measurement
Before you even touch a single vinyl siding panel, thorough preparation is essential. This involves accurately measuring the area to be sided, identifying any obstacles like windows, doors, and corners, and ensuring the underlying structure is sound. Accurate measurements prevent material waste and ensure a perfect fit. You’ll need a high-quality measuring tape, a level, and possibly a chalk line to mark your lines for consistent spacing. Inspect the existing wall for any damage, such as rotting wood or loose sheathing, and address these issues before proceeding. This might involve replacing damaged sections of wood or reinforcing weak areas. A well-prepared surface guarantees a clean, professional finish.
Tools and Materials
The right tools are critical for efficient and accurate installation. Beyond the basic measuring tools, you’ll need a variety of specialized tools to handle different aspects of the job. This typically includes a utility knife, a jigsaw or circular saw (for cutting siding around windows and doors), a hammer, and a nail punch to set nails below the surface. Other useful tools include a level, a speed square, and possibly a caulking gun for sealing gaps. Materials-wise, you’ll need the vinyl siding itself, J-channels, starter strips, corner trim, and appropriate fasteners. Remember to always buy slightly more material than your calculations suggest to account for cuts and potential mistakes. Consider purchasing a high-quality underlayment to further protect your home’s exterior.
Installation Steps
The installation itself follows a logical sequence. Begin by installing the starter strip at the bottom of the wall, ensuring it’s perfectly level. This provides a consistent base for the rest of the siding. Then, install the first row of siding, locking it into the starter strip. Each subsequent row interlocks with the previous one, creating a weathertight barrier. Work your way up the wall, paying close attention to aligning the panels and using the correct fasteners. Around windows and doors, you’ll need to carefully cut and install trim pieces to ensure a neat and professional finish. Remember to maintain consistent spacing between panels for a uniform look. Finally, install the J-channels and other trim pieces to complete the installation.
Quality Control Checklist
A quality installation requires careful attention to detail throughout the process. This checklist helps ensure you’ve covered all the bases:
Before starting the installation, check the following:
- Accurate measurements and material quantities.
- Proper preparation of the wall surface.
- All necessary tools and materials are on hand.
During the installation, regularly check:
- Levelness of the starter strip and each row of siding.
- Proper alignment and interlocking of panels.
- Consistent spacing between panels.
- Accurate cutting and installation of trim pieces.
- Secure fastening of all components.
After completing the installation, conduct a final inspection to verify:
- No gaps or openings in the siding.
- All panels are securely fastened.
- All trim pieces are properly installed.
- The overall aesthetic appeal of the finished installation.
Preparation and Planning for Installation
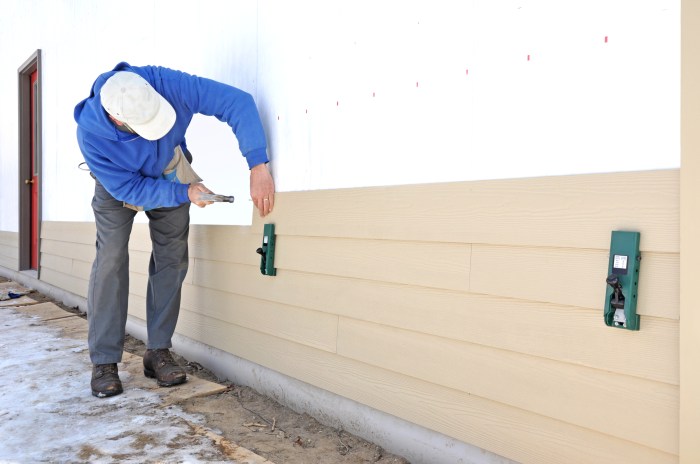
Proper preparation and meticulous planning are paramount to a successful vinyl siding installation. Failing to adequately prepare the site and accurately calculate materials can lead to delays, cost overruns, and a subpar final product. This section details the crucial steps to ensure a smooth and efficient installation process.
Careful planning translates directly into a higher-quality finish and a project completed on time and within budget. Neglecting this phase can result in significant rework, wasted materials, and ultimately, a less aesthetically pleasing outcome. Think of it like building a house – a solid foundation is essential for a sturdy structure. Similarly, a well-prepared surface is the foundation for a professional-looking vinyl siding installation.
Site Preparation
Thorough site preparation is crucial before any siding installation commences. This involves clearing the area around the house, protecting landscaping, and ensuring safe access for workers and materials. A well-prepared site ensures a smooth and efficient workflow. For example, removing overgrown bushes and securing any loose debris prevents damage to the new siding and ensures a safe work environment. This also helps prevent delays caused by unexpected obstacles. Furthermore, properly covering or removing delicate landscaping minimizes the risk of damage during the installation process.
Material Calculation and Measurement
Accurate measurement and material calculation are critical for preventing material shortages or excessive waste. Underestimating the amount of siding needed can lead to costly delays, while overestimating results in unnecessary expenses. A precise measurement approach is essential for a cost-effective project.
Start by meticulously measuring the total surface area requiring siding. Account for all walls, including any projections or recesses. Consult the manufacturer’s instructions for specific overlap requirements and waste factors. These factors vary depending on the siding profile and installation method. For example, a complex house design with numerous windows and dormers will require a more detailed measurement process than a simple rectangular structure. Remember to add at least 5-10% extra to account for cuts, waste, and unforeseen circumstances. This buffer prevents mid-project material shortages and keeps the installation moving smoothly.
Wall Surface Preparation
Preparing the wall surface is a vital step that directly impacts the longevity and aesthetic appeal of the vinyl siding installation. A properly prepared surface ensures the siding adheres correctly and lasts for years to come. This includes removing any loose or damaged materials, repairing any imperfections, and ensuring a clean, level surface. Ignoring this phase can lead to problems ranging from uneven siding to premature failure of the entire system.
Begin by thoroughly inspecting the existing wall surface for any loose paint, damaged wood, or other imperfections. Remove any loose materials using appropriate tools like scrapers and wire brushes. Repair any damaged areas with suitable patching materials, ensuring a smooth and even surface. Fill any gaps or holes with caulk or patching compound and allow ample time for drying. For example, damaged wood sheathing needs to be replaced before siding installation. Once repairs are complete, clean the surface thoroughly to remove any dust or debris that could interfere with the adhesive or hinder proper installation. This ensures the siding adheres properly and provides a clean, professional finish. Finally, ensure the wall is plumb and level, addressing any significant irregularities to prevent future problems.
Underlayment and Flashing
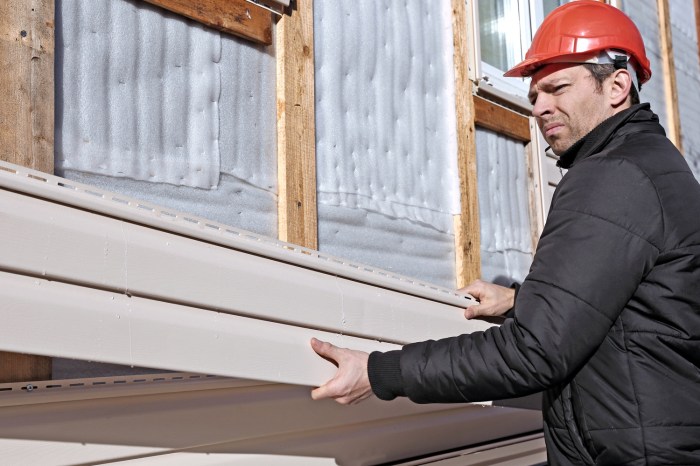
Protecting your home’s exterior isn’t just about the vinyl siding itself; it’s about creating a robust, weather-resistant barrier. Underlayment and flashing are crucial components in this system, preventing water damage and ensuring the longevity of your siding investment. Neglecting these steps can lead to costly repairs down the line, significantly impacting your return on investment.
Underlayment acts as a secondary defense against moisture intrusion, working in conjunction with the siding to keep your home dry. It provides an additional layer of protection against wind-driven rain, snow, and ice, preventing water from seeping behind the siding and into the wall sheathing. This is particularly important in areas prone to heavy rainfall or harsh winters. Properly installed underlayment significantly reduces the risk of mold, rot, and other water-related damage, adding considerable value to your home’s structural integrity.
Underlayment Materials and Applications
Choosing the right underlayment depends on your specific climate and project requirements. Several options exist, each offering varying levels of protection and cost-effectiveness. Consider factors like your budget, the climate in your area, and the type of siding you’re installing when making your selection.
- Felt Paper: A traditional and economical choice, felt paper is a relatively inexpensive underlayment that provides basic moisture protection. However, it’s less durable than other options and may tear more easily during installation. It’s best suited for projects with lower budgets and milder climates.
- Housewrap: Housewrap, also known as building wrap, is a more advanced option that offers superior breathability and water resistance. It’s made from a synthetic material that allows moisture vapor to escape from the wall cavity while preventing liquid water from entering. This makes it ideal for climates with fluctuating humidity levels.
- Foam Backed Underlayment: This combines the moisture protection of a housewrap with the added benefit of insulation. The foam layer helps to improve the thermal performance of the wall assembly, reducing energy costs and improving comfort. It’s a premium option that’s particularly well-suited for colder climates.
Flashing Installation Around Windows and Doors
Flashing is critical for preventing water from entering the building around vulnerable areas like windows and doors. It creates a watertight seal, diverting water away from these openings and preventing leaks. Proper flashing installation is crucial to maintaining a long-lasting, leak-free exterior.
Proper installation involves several key steps:
- Install flashing under the window or door trim. This creates a barrier against water that might penetrate the siding.
- Overlap flashing pieces to ensure a continuous seal. Each piece should overlap the one below it, directing water downward.
- Seal all seams and joints with a high-quality sealant. This prevents water from entering through any gaps or cracks.
- Extend flashing beyond the siding to provide additional protection. This ensures that water is directed away from the wall even if some siding is damaged.
- Use appropriate flashing materials for the specific application. Different materials are available, including aluminum, galvanized steel, and copper, each with its own advantages and disadvantages.
Failure to properly install flashing can lead to water damage around windows and doors, resulting in rot, mold, and costly repairs. A small investment in proper flashing installation can save you thousands of dollars in the long run.
Installing J-Channel and Starter Strips
Proper installation of J-channel and starter strips is crucial for a successful and long-lasting vinyl siding installation. These seemingly small components play a vital role in ensuring a clean, professional finish and protecting your home’s exterior from the elements. Neglecting their correct installation can lead to costly repairs down the line. Think of them as the foundation upon which the entire siding system rests.
J-channel and starter strips provide a clean, finished edge around windows, doors, and corners, and also create a consistent starting point for the installation of the siding panels themselves. They offer a crucial weather barrier, preventing water intrusion and protecting the underlying structure of your home. Investing the time to install them correctly will significantly increase the longevity and aesthetic appeal of your vinyl siding.
J-Channel Installation
J-channel is used to finish the edges of the siding around windows, doors, and corners. It provides a neat, professional look and protects these vulnerable areas from water damage. Proper installation involves aligning the channel with the framing and securing it using nails or screws. This prevents gaps that could compromise the weather resistance of the siding.
A step-by-step guide for J-channel installation includes: First, measure and cut the J-channel to the appropriate length, ensuring a snug fit. Second, position the J-channel flush with the exterior framing, ensuring it is plumb and level. Third, secure the J-channel using appropriate fasteners, typically nails or screws, spaced every 6-8 inches. Finally, ensure that the channel is properly aligned and securely fastened to avoid any gaps or movement.
Starter Strip Installation
The starter strip provides a consistent and level base for the first row of siding panels. This is especially important for maintaining a straight and uniform appearance across the entire wall. The starter strip ensures the bottom edge of the siding is perfectly aligned, preventing gaps and ensuring a clean, professional finish. Incorrect installation can lead to misaligned siding and potential water penetration.
Installation begins with measuring and cutting the starter strip to the appropriate length for the wall section. The strip should be installed horizontally, usually a few inches above the ground, ensuring a level surface. Secure the strip using nails or screws, spaced appropriately, ensuring it is firmly attached to the wall framing. This provides a stable base for the first course of siding panels.
Visual Representation of Correctly Installed J-Channel and Starter Strip
Imagine a corner of a house. At the corner, a length of J-channel is neatly installed, its open side facing outward. The J-channel is perfectly aligned and securely fastened to the framing. Along the bottom edge of a wall, below the first row of siding panels, a starter strip runs horizontally, perfectly level and straight. The siding panels fit neatly into the channel created by the J-channel and the starter strip. The nails are neatly countersunk and spaced evenly, ensuring a secure and professional-looking installation. The entire assembly is clean, straight, and shows no gaps or misalignments. This visual representation shows the crucial role these seemingly small components play in a successful siding installation.
Installing Vinyl Siding Panels
Installing vinyl siding panels is the core of the project, demanding precision and attention to detail. Proper installation ensures a long-lasting, attractive, and weatherproof exterior. This section details the techniques for efficient and effective panel installation, covering everything from overlapping and fastening to handling challenging areas.
The key to successful vinyl siding installation lies in understanding the mechanics of overlapping and proper fastening. Each panel is designed to overlap the one beneath it, creating a weather-resistant barrier. This overlap should be consistent throughout the installation to maintain a uniform appearance and prevent water penetration. Fastening is equally crucial; using the correct nails and spacing prevents damage to the panels and ensures a secure fit. Over-fastening can cause warping, while under-fastening can lead to loose panels and potential damage from wind.
Panel Overlap and Fastening
Vinyl siding panels typically overlap by approximately 1 inch. This overlap provides the necessary weather protection and ensures a seamless look. The panels are fastened using galvanized nails, specifically designed for vinyl siding. These nails are typically driven slightly above the panel’s surface and then carefully tapped down to prevent damage. Avoid driving the nails completely flush with the panel; this can cause the panel to warp or crack. Consistent spacing between nails, generally 6 to 8 inches apart, is essential for maintaining the panel’s structural integrity and preventing stress points. Over-fastening can cause the panel to buckle, while under-fastening can lead to loose panels, allowing wind to get underneath and cause damage. The correct technique involves placing the nail slightly above the panel’s surface, then tapping it down just enough to secure the panel without damaging it.
Maintaining Consistent Spacing and Alignment
Maintaining consistent spacing and alignment throughout the installation is paramount for achieving a professional and visually appealing finish. Inconsistent spacing leads to an uneven appearance and compromises the weather resistance of the siding. Using a level and measuring tape frequently is essential. Check alignment regularly, both horizontally and vertically, adjusting as needed. For large projects, consider using a chalk line to create reference points to maintain straight lines and consistent spacing.
Installing Siding Around Corners and Challenging Areas
Corners and other challenging areas, such as windows and doors, require specific techniques to ensure a clean, professional finish. J-channel and corner trim are typically used to provide a neat and weathertight finish around corners. For windows and doors, specialized trim pieces are used to create a smooth transition between the siding and the window or door frame. Accurate measurements and precise cuts are crucial for achieving a seamless integration of the siding around these areas. Carefully following manufacturer instructions for the specific trim pieces used will guarantee a proper installation and prevent water penetration. Pre-planning and careful cutting of panels will minimize waste and ensure a professional finish around these complex areas.
Finishing Touches and Trim
Adding trim pieces is the final, crucial step in vinyl siding installation. Properly installed trim not only enhances the aesthetic appeal of your home but also protects it from the elements, ensuring a long-lasting, weather-resistant finish. This section details the installation of various trim pieces, ensuring a professional and durable result.
Precision and attention to detail are paramount during this phase. Incorrect installation can compromise the integrity of the siding and lead to water damage or other issues down the line. Therefore, carefully following manufacturer instructions and using the right tools is essential for success.
Corner Board Installation
Corner boards provide a clean, finished look at the exterior corners of your home. They also protect the corner from damage. Begin by measuring and cutting the corner board to the desired length, ensuring a snug fit. Apply a bead of construction adhesive to the back of the board, then firmly press it into place, aligning it with the existing siding and ensuring it overlaps the end caps of the siding panels. Use nails or screws to secure the corner board at regular intervals, taking care not to puncture the vinyl. The finished corner should be straight, flush, and firmly attached. Remember to maintain consistent spacing between the nails or screws.
J-Channel Installation
J-channel is used to finish edges where siding meets other materials, such as around windows, doors, and at the bottom edge of the house. To install J-channel, measure and cut the pieces to fit. Then, position the J-channel flush with the framing, and secure it with nails or screws, ensuring it’s level and straight. The flange of the J-channel should face outward, providing a clean edge for the siding to overlap. For windows and doors, ensure the J-channel is installed perfectly square and plumb to provide a solid base for the surrounding siding.
Soffit Installation
Soffit vinyl siding covers the underside of the roof overhangs. Measure and cut the soffit panels to fit, allowing for a slight overlap between each panel. Start at one end and work your way across, snapping the panels together to create a seamless appearance. Secure the panels to the fascia board with nails or screws, ensuring a tight fit and avoiding gaps. The final soffit installation should be flush and even, creating a visually appealing and protective barrier.
Vinyl Siding Around Windows and Doors
Installing siding around windows and doors requires careful measuring and cutting to ensure a precise fit. Begin by measuring the opening, adding extra length for overlap. Use a sharp utility knife to cut the vinyl siding panels to the exact measurements. Carefully fit the panels into the J-channel or starter strip around the window or door frame, ensuring a tight, weather-resistant seal. The finished installation should look seamless and professional, with no gaps or visible seams. Imagine the siding panels precisely framing the window or door, fitting snugly against the trim and perfectly aligning with the surrounding siding. The result should be a clean, finished look that integrates seamlessly with the rest of the exterior.
Troubleshooting Common Issues
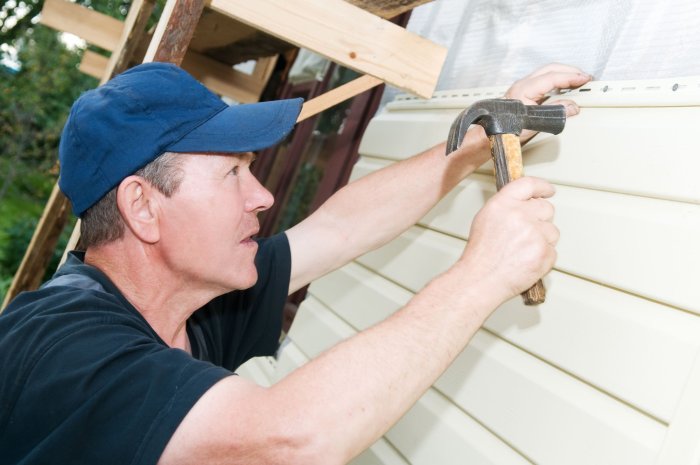
Vinyl siding installation, while seemingly straightforward, can present several challenges. Understanding these potential problems and their solutions is crucial for a successful and long-lasting installation. Proactive measures and a systematic approach to troubleshooting can save you time, money, and frustration. This section details common issues, their causes, and effective solutions.
Panel Warping or Buckling
Warping or buckling of vinyl siding panels is often caused by improper handling, exposure to extreme temperatures, or insufficient expansion space. Panels should be stored flat and protected from direct sunlight before installation. During installation, ensure adequate expansion gaps are maintained to accommodate temperature fluctuations. These gaps allow the siding to expand and contract without causing damage. Failure to provide these gaps can result in buckling, especially in long, uninterrupted runs of siding. To correct minor warping, carefully remove the affected panel and reinstall it, ensuring proper expansion gaps. Severe warping may necessitate replacing the damaged panel.
Gaps Between Panels
Uneven gaps between panels can detract from the overall aesthetic appeal of the installation. This problem typically stems from inconsistent measurement, improper nailing, or neglecting to use appropriate starting and finishing pieces. Accurate measurement and consistent spacing are paramount. Using a level and spacing blocks will help maintain uniformity. Overly tight nailing can also distort the panels, leading to gaps. Use the recommended nail spacing and avoid over-driving nails. Inspect the installation regularly to identify and correct any inconsistencies early.
Difficulty Fitting Panels Around Corners or Obstructions
Fitting panels around corners, windows, and doors often requires precise cutting and careful fitting of J-channels and other trim pieces. Improper cutting or inadequate preparation can lead to gaps, misalignment, and a less-than-professional finish. Accurate measurements and the use of sharp, clean cutting tools are essential. Use a miter saw for precise cuts, especially for angles. Pre-plan the cuts and test fit the pieces before committing to the final cuts. Proper use of corner trim and J-channel is crucial for a seamless finish around these obstructions.
Table of Common Vinyl Siding Installation Problems and Solutions
| Problem | Cause | Solution | Preventive Measures |
|---|---|---|---|
| Panel Cracking | Improper handling, excessive force during installation, or exposure to extreme cold. | Replace the cracked panel. | Handle panels carefully, avoid bending or dropping them. Use appropriate installation techniques and ensure panels are not subjected to extreme temperatures during installation. |
| Nail Holes Showing | Nails driven too far or too close to the edge of the panel. | Use a nail hole cover or putty to conceal the nail holes. | Use the recommended nail spacing and avoid over-driving nails. |
| Water Leakage | Improper flashing or inadequate sealing around windows and doors. | Inspect and repair flashing and sealants around all openings. | Ensure proper flashing and sealing around all openings during installation. |
| Loose or Falling Panels | Insufficient or improper nailing. | Remove and re-nail the loose panels, ensuring proper nailing technique. | Use the recommended nail spacing and type, ensuring nails are properly driven into the sheathing. |
Safety Precautions
Vinyl siding installation, while seemingly straightforward, presents several potential hazards if proper safety precautions aren’t diligently followed. Ignoring safety can lead to serious injuries, project delays, and increased costs. Prioritizing safety from the outset is crucial for a successful and incident-free installation.
Implementing a robust safety plan is paramount. This involves not only understanding the inherent risks but also proactively mitigating them through the use of appropriate personal protective equipment (PPE) and safe work practices. Remember, a safe work environment is a productive work environment.
Personal Protective Equipment (PPE) Usage
The correct use of personal protective equipment is non-negotiable. Different tasks require different levels of protection, and neglecting this can have severe consequences. Proper PPE selection and consistent use are vital for minimizing risk.
- Safety Glasses or Goggles: Protect your eyes from flying debris, such as shards of siding or small tools. Consider using goggles with side shields for enhanced protection.
- Work Gloves: Protect your hands from cuts, abrasions, and splinters. Choose gloves appropriate for the task; heavier-duty gloves might be needed for handling sharp tools or rough materials.
- Hearing Protection: Power tools used in vinyl siding installation can generate significant noise. Ear plugs or ear muffs are essential to prevent hearing damage over time. Consistent exposure to loud noises without protection can lead to irreversible hearing loss.
- Respirator: When working with certain materials or in dusty conditions, a respirator is vital to prevent inhalation of harmful particles. This is particularly important when cutting or sawing vinyl siding.
- Work Boots: Sturdy work boots with steel toes provide protection from dropped objects and potential foot injuries on uneven terrain.
Safe Working Practices
Beyond PPE, adhering to safe working practices is critical. These practices create a safer environment and minimize the risk of accidents and injuries. Consistent application of these practices is essential for both the short-term and long-term safety of the workers.
- Proper Tool Usage: Always use tools according to the manufacturer’s instructions. Regularly inspect tools for damage and replace any damaged or worn-out equipment. Improper tool use is a leading cause of workplace accidents.
- Ladder Safety: When working at heights, always use a properly secured ladder. Ensure the ladder is on stable ground and extends at least three feet above the work surface. Never overreach while on a ladder. A three-point contact should always be maintained (two feet and one hand, or two hands and one foot).
- Fall Protection: For work at significant heights, consider using appropriate fall protection equipment, such as harnesses and safety lines. This is particularly important when working on roofs or scaffolding.
- Electrical Safety: Be aware of overhead power lines and avoid any contact. If working near electrical wiring, always de-energize the circuits or consult with a qualified electrician. Electrocution is a serious risk and should be avoided at all costs.
- Material Handling: Use proper lifting techniques to avoid back injuries when handling heavy materials. Avoid twisting or bending while lifting. When possible, use mechanical lifting devices to move heavy loads.
Cost Estimation and Budgeting
Accurately estimating the cost of your vinyl siding installation is crucial for a successful project. Underestimating can lead to budget overruns and project delays, while overestimating might mean you’re unnecessarily spending more than needed. This section breaks down the key cost factors and provides a framework for creating a realistic budget.
Factors Influencing Vinyl Siding Installation Costs
Several factors significantly impact the final cost of your vinyl siding project. Understanding these will allow you to make informed decisions and avoid unpleasant surprises.
Material Costs
The cost of vinyl siding itself varies considerably based on several factors. Higher-quality siding, often featuring enhanced durability, color stability, and warranties, commands a premium price. The style of siding – such as clapboard, shake, or shingle – also influences cost. The quantity needed, determined by the size of your house and the complexity of its design (e.g., many dormers or angles), directly impacts material expenses. Finally, the color choice can also influence cost; some colors may be more expensive than others due to manufacturing processes. For example, a large Victorian-style home requiring a premium, textured vinyl siding in a custom color will naturally cost more than a smaller ranch-style home using standard white clapboard siding.
Labor Costs
Labor costs constitute a significant portion of the overall project expense. The complexity of the installation—including the number of corners, windows, doors, and other architectural features—affects the time and, consequently, the labor cost. The experience and reputation of the contractor also play a role; experienced and reputable contractors often charge more but may offer superior workmanship and project management. Geographic location also affects labor costs; areas with higher labor costs will naturally reflect higher installation fees. For instance, a project in a densely populated urban area with high demand for skilled labor will typically be more expensive than a similar project in a rural area.
Permit Costs
Building permits are typically required for exterior renovations, including vinyl siding installation. The cost of permits varies widely depending on your location and the project’s scope. Some municipalities charge a flat fee, while others base their fees on the project’s value or square footage. It’s essential to check with your local building department to determine the exact permit costs and any associated inspections fees. Failing to obtain the necessary permits can lead to significant fines and potential legal issues. For example, a large commercial building renovation might require multiple permits and inspections, resulting in substantially higher permit costs compared to a small residential project.
Sample Budget Worksheet
This worksheet provides a framework for budgeting your vinyl siding project. Remember to adjust these figures based on your specific circumstances.
| Expense Category | Estimated Cost |
|---|---|
| Materials (Siding, Trim, Fasteners) | $5,000 – $15,000 |
| Labor | $3,000 – $8,000 |
| Permits | $200 – $1,000 |
| Underlayment & Flashing | $500 – $1,500 |
| Waste Removal | $100 – $300 |
| Contingency (10-15%) | $500 – $2,250 |
| Total Estimated Cost | $9,300 – $38,050 |
Remember, this is just an estimate. Always get multiple bids from reputable contractors to ensure you’re getting a fair price.
Mastering vinyl siding installation is more than just slapping up panels; it’s about meticulous planning, precise execution, and attention to detail. By following the steps Artikeld in this guide, you’ll not only achieve a stunning exterior but also gain a valuable skill that can save you money and enhance your home’s value. Remember, proper preparation is paramount. Take your time, prioritize safety, and enjoy the satisfaction of a job well done – a beautiful, durable, and long-lasting vinyl siding installation that speaks volumes about your home’s quality.
User Queries
Can I install vinyl siding myself, or should I hire a professional?
While DIY is possible, professional installation often ensures a higher-quality, longer-lasting result. Consider your skill level and the complexity of the project before deciding.
How long does vinyl siding typically last?
With proper installation and maintenance, vinyl siding can last 20-30 years or even longer.
What’s the best time of year to install vinyl siding?
Spring and fall are generally ideal, avoiding extreme heat or cold that can affect the installation process and the siding’s performance.
How do I clean vinyl siding?
Regular cleaning with a garden hose and mild detergent is usually sufficient. Avoid harsh chemicals or abrasive cleaners.
What are the warranty options for vinyl siding?
Warranty periods vary by manufacturer. Check the manufacturer’s specifications for details on coverage and limitations.
