Transforming your home’s exterior is a significant undertaking, and choosing the right siding can dramatically impact curb appeal and property value. Vertical siding, with its clean lines and modern aesthetic, offers a versatile option for homeowners seeking a stylish and durable upgrade. But navigating the world of materials, installation, and cost can feel overwhelming. This guide cuts through the complexity, providing a practical, actionable roadmap to help you make informed decisions and achieve the perfect vertical siding project.
From understanding the nuances of different materials like vinyl, fiber cement, and wood, to mastering installation techniques and budgeting effectively, we’ll cover every crucial aspect. We’ll explore design considerations, delve into maintenance strategies, and even examine the environmental impact of your choices. By the end, you’ll be equipped to confidently embark on your vertical siding project, transforming your home’s exterior with confidence and style.
Types of Vertical Siding
Choosing the right vertical siding for your home is a crucial decision impacting both aesthetics and longevity. The material you select will significantly influence your home’s curb appeal, energy efficiency, and overall maintenance needs. Understanding the various options available is key to making an informed choice that aligns with your budget and long-term goals.
Vertical Siding Materials
Selecting the appropriate siding material involves careful consideration of factors such as cost, durability, maintenance requirements, and aesthetic preferences. The following table summarizes the pros and cons of popular vertical siding materials, providing a clearer picture of each option.
| Material | Pros | Cons | Typical Cost Range (per square foot) |
|---|---|---|---|
| Wood | Natural beauty, wide variety of styles and finishes, good insulation | High maintenance (painting, staining, sealing), susceptible to rot, insect damage, and moisture | $3-$15 |
| Vinyl | Low maintenance, affordable, variety of colors and styles, easy installation | Can fade or become brittle in extreme temperatures, less durable than other options, may not be as aesthetically pleasing as natural materials | $1-$4 |
| Fiber Cement | Durable, fire-resistant, low maintenance, resists rot and insects | More expensive than vinyl, requires professional installation, can be brittle | $4-$10 |
| Metal | Extremely durable, long lifespan, fire-resistant, low maintenance | Expensive, can dent, may be susceptible to hail damage, can be noisy in rain or hail | $6-$15 |
| Engineered Wood | More resistant to rot and insects than traditional wood, relatively affordable | Can still require some maintenance, not as durable as fiber cement or metal | $2-$8 |
Vertical Siding Manufacturing Processes
The manufacturing process significantly influences the final product’s properties and performance. Let’s examine the production of three common types: vinyl, fiber cement, and metal siding.
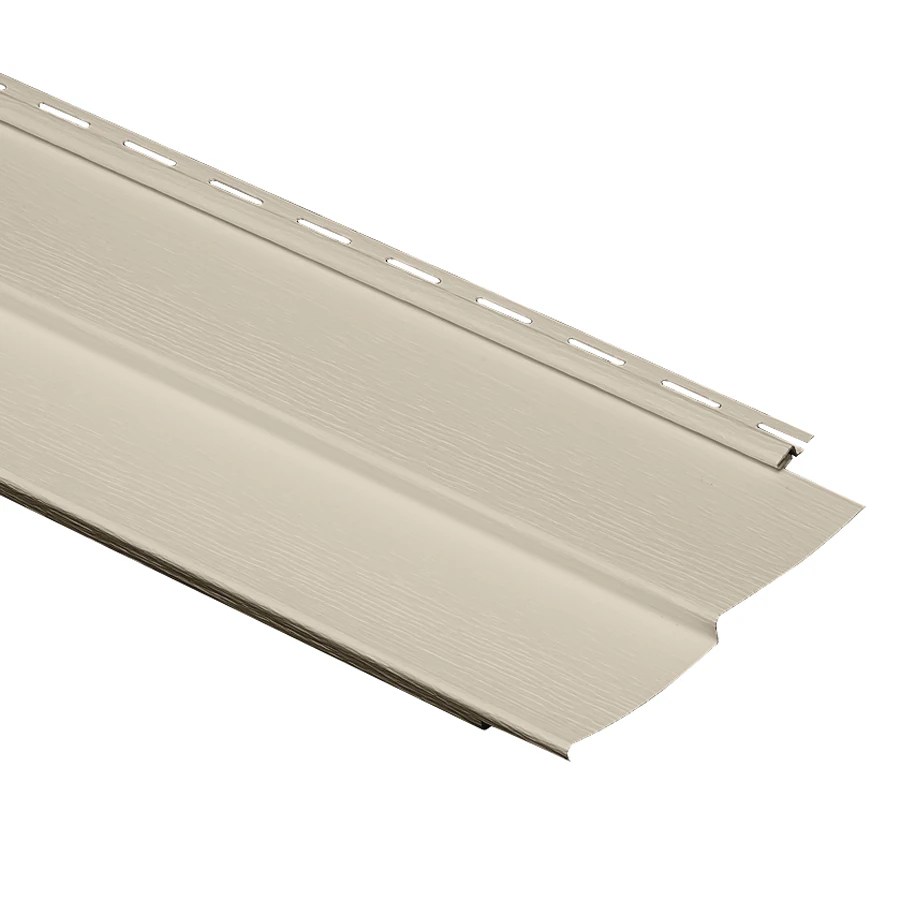
Vinyl Siding Manufacturing: Vinyl siding begins with the creation of a PVC compound, a mixture of polyvinyl chloride resin, stabilizers, and pigments. This compound is then extruded into long continuous profiles, shaped to mimic wood grain or other patterns. These profiles are then cut to the desired lengths and undergo quality control checks before packaging and distribution. The process is highly automated and efficient, resulting in a cost-effective product.
Fiber Cement Siding Manufacturing: Fiber cement siding involves mixing Portland cement, cellulose fibers, and other additives. This mixture is then formed into sheets or panels using a high-pressure molding process. After molding, the panels are cured in a high-temperature kiln to ensure strength and durability. The cured panels are then cut to size and may receive a factory-applied finish or primer. This process results in a robust and long-lasting product, but it’s more labor-intensive than vinyl siding production.
Metal Siding Manufacturing: Metal siding, often made from aluminum or steel, starts with the raw metal coil. This coil is fed into a roll-forming machine, which shapes the metal into the desired profiles using a series of rollers. The formed metal siding then undergoes a coating process, typically powder coating or paint, for corrosion protection and aesthetic appeal. Finally, the coated siding is cut to length and packaged. The manufacturing process is highly efficient and allows for a wide variety of colors and finishes.
Vinyl vs. Fiber Cement Siding: Durability and Maintenance
Vinyl and fiber cement siding represent contrasting approaches to exterior cladding. Vinyl offers affordability and low maintenance, while fiber cement prioritizes durability and longevity.
Vinyl siding requires minimal maintenance, typically just occasional cleaning with soap and water. However, its susceptibility to fading and damage from impact or extreme temperatures necessitates replacement more frequently than fiber cement. A well-maintained vinyl siding system might last 20-30 years, while poorly maintained siding could fail much sooner. For example, a home in a desert climate might experience faster fading than one in a temperate zone.
Fiber cement siding, while more expensive upfront, offers significantly greater durability and resistance to damage. It requires less frequent repainting or replacement, potentially lasting 50 years or more with proper installation and care. Regular cleaning and occasional spot painting are usually sufficient for maintenance. Consider a home near the coast; fiber cement’s resistance to moisture and rot makes it a superior choice compared to vinyl, which is prone to degradation in such environments.
Installation Methods
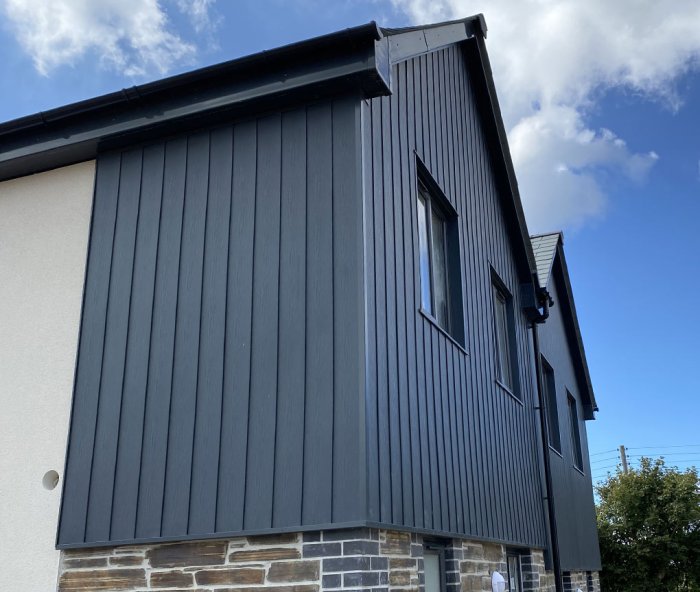
Installing vinyl vertical siding is a straightforward process that can significantly enhance your home’s curb appeal and protect it from the elements. Proper installation, however, requires attention to detail and adherence to best practices. This guide provides a step-by-step approach, ensuring a professional-looking and long-lasting result.
Successful vinyl siding installation hinges on meticulous preparation and precise execution. Failing to properly prepare the wall surface can lead to future problems, such as buckling, warping, and premature failure of the siding. Similarly, improper cutting and fitting around windows and doors can compromise the overall aesthetic and structural integrity of the installation.
Step-by-Step Vinyl Siding Installation
This section details the process of installing vinyl vertical siding on a standard residential structure. Remember to always consult the manufacturer’s instructions for your specific siding product, as variations may exist.
- Preparation: Begin by carefully inspecting the existing wall surface. Repair any damaged areas, ensuring the wall is clean, dry, and free of loose paint or debris. Address any significant unevenness using appropriate fillers or shims. For moisture issues, consider installing a moisture barrier before proceeding.
- Starter Strip Installation: Install the starter strip along the bottom of the wall, ensuring it is level and plumb. This provides a solid base for the remaining siding panels.
- Siding Panel Installation: Starting from one corner, slide the first siding panel onto the starter strip, engaging the bottom edge. Overlap the panels according to the manufacturer’s specifications. Use nails or screws to secure the siding panels to the wall framing, avoiding over-driving the fasteners. This will prevent damage to the siding.
- J-Channel Installation: Install J-channel around windows and doors to provide a clean, finished edge and a place for the siding to terminate. This will create a neat and professional look around openings.
- Window and Door Trim: Cut and fit the siding around windows and doors, ensuring a snug fit and maintaining consistent overlaps. Use a sharp utility knife or siding shears for precise cuts. Use trim pieces to cover the edges of the cut siding, creating a finished look.
- Finishing: Once all panels are installed, inspect the work for any gaps or inconsistencies. Address any issues promptly. Install any necessary accessories, such as corner pieces or trim.
Wall Surface Preparation
Proper preparation of the wall surface is crucial for a successful siding installation. This ensures the siding adheres correctly and lasts for years to come. Neglecting this step can lead to problems down the road.
- Moisture Control: Address any existing moisture problems before starting the installation. This might involve repairing leaks, improving ventilation, or installing a moisture barrier. Excessive moisture can cause the siding to warp or buckle.
- Surface Leveling: Uneven walls can lead to an uneven siding installation. Use shims or fillers to level the wall surface before installing the siding. This will ensure a consistent and professional finish.
- Cleaning: Remove any loose paint, debris, or other obstructions from the wall surface. A clean surface ensures proper adhesion of the siding.
Cutting and Fitting Around Openings
Precise cutting and fitting are essential for a clean and professional look around windows and doors. Proper techniques will prevent gaps and ensure a weathertight seal.
- Measuring and Marking: Carefully measure and mark the siding panels before cutting. Accurate measurements are crucial for a precise fit.
- Cutting Techniques: Use a sharp utility knife or siding shears for clean, straight cuts. Avoid using dull tools, as they can cause chipping or tearing of the siding material.
- Fitting and Securing: Carefully fit the cut siding panels around the openings, ensuring a snug fit. Secure the panels using appropriate fasteners, avoiding over-driving.
Design Considerations
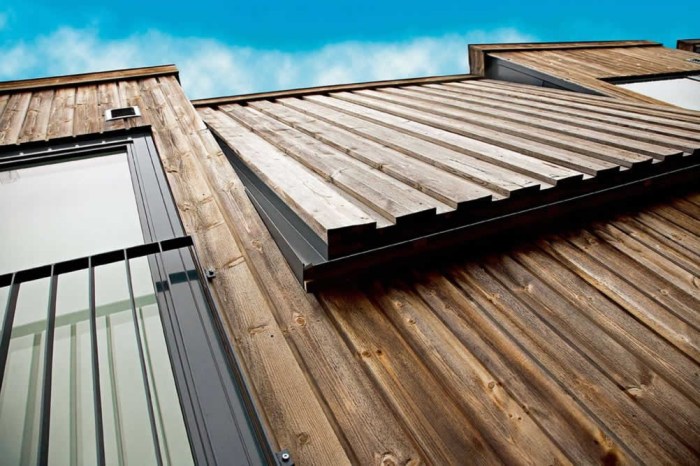
Vertical siding offers a remarkable opportunity to elevate your home’s curb appeal and overall aesthetic. The careful consideration of design elements, from pattern selection to color coordination, can transform a house into a stunning architectural statement. Let’s explore how strategic design choices can maximize the impact of your vertical siding.
Choosing the right vertical siding style and color is crucial for creating a cohesive and visually appealing exterior. The style you choose should complement your home’s architectural style and personal preferences, while the color should enhance the overall design aesthetic and harmonize with the surrounding landscape. This section will delve into the key design aspects to consider when selecting and installing vertical siding.
Vertical Siding Patterns and Arrangements
The visual impact of vertical siding is significantly influenced by the chosen pattern and arrangement. Different patterns create unique textures and visual rhythms, affecting the overall perception of your home’s size and style. Consider these popular options:
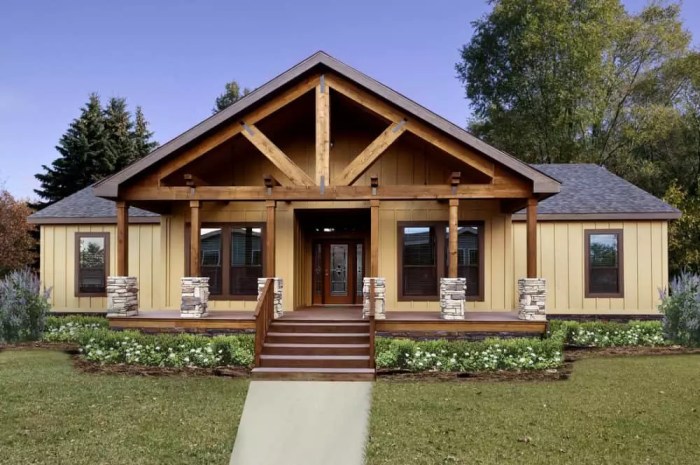
- Board and Batten: This classic style features wide vertical boards with narrower strips (battens) covering the seams. The result is a clean, traditional look with a strong vertical emphasis, often associated with farmhouse or rustic styles. The battens add a subtle texture and visual interest, breaking up the monotony of large, uninterrupted boards.
- Shiplap: Characterized by overlapping horizontal boards, shiplap offers a rustic charm and a sense of warmth. When installed vertically, shiplap creates a unique, contemporary feel, providing a less formal alternative to traditional board and batten. The overlapping creates a subtle shadow line, adding depth and dimension to the wall.
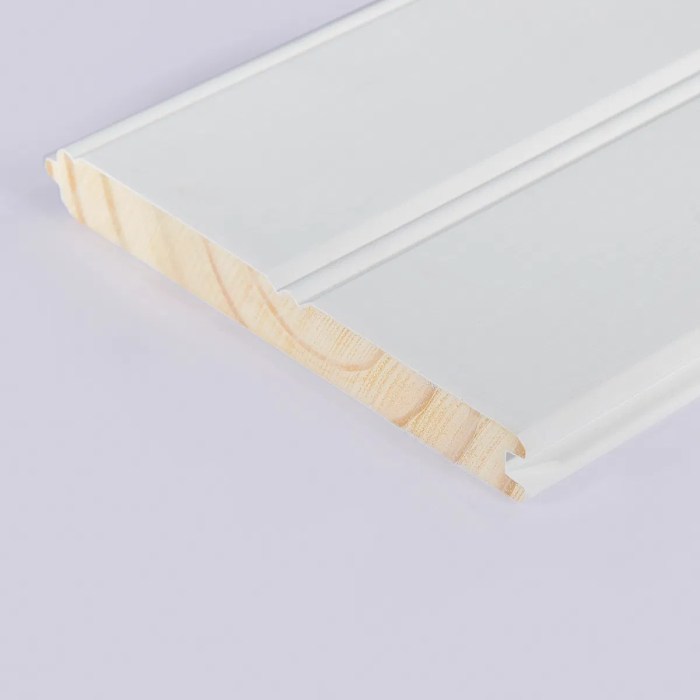
- Overlapping Styles (e.g., Beaded or V-Groove): These styles involve vertically installed boards with slightly overlapping edges, creating a textured surface. Beaded siding features a rounded edge on each board, while V-groove siding has a V-shaped groove along the edges. Both options add depth and visual interest, suitable for various architectural styles from modern to traditional.
Vertical Siding and Architectural Styles
The right siding choice can significantly enhance a home’s architectural style. Different patterns and materials work best with certain architectural aesthetics.
- Ranch Style Homes: Clean lines and horizontal emphasis are characteristic of Ranch style homes. Vertical siding can add a modern twist to a traditional Ranch, balancing the horizontal lines of the roofline and foundation. A simple, board-and-batten style in a neutral color palette would complement this style beautifully. Consider using cedar or a similar natural wood for a rustic feel.
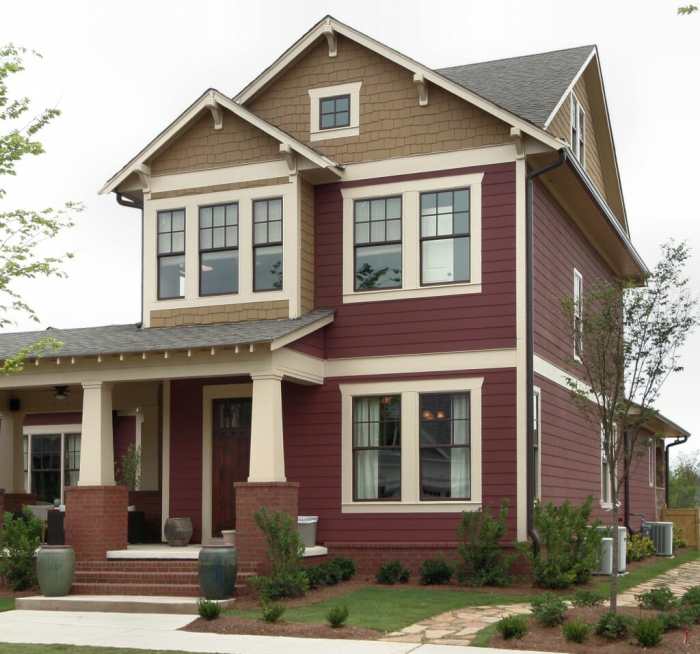
- Victorian Style Homes: Victorian homes are known for their ornate detailing and complex designs. Vertical siding can accentuate the vertical lines of the home’s structure, but should be chosen carefully to avoid clashing with the existing intricate detailing. A more refined, possibly beaded or V-groove siding, in a darker, more saturated color, could create a sophisticated and harmonious look.
- Farmhouse Style Homes: Farmhouse style homes often embrace a rustic and charming aesthetic. Board and batten siding is a natural fit for this style, often paired with natural wood tones or muted, earthy colors. The texture and simplicity of board and batten siding perfectly complements the relaxed and inviting feel of a farmhouse.
Siding Color and Texture Selection
The color and texture of your siding significantly impact the overall aesthetic of your home. Consider these factors when making your selection:
- Home’s Architectural Style: The color should complement the existing architectural details and overall style. For example, a Victorian home might benefit from a darker, more saturated color, while a Ranch style home might look best with lighter, more neutral tones.
- Surrounding Landscape: The siding color should harmonize with the natural environment. Consider the colors of the trees, shrubs, and other elements in your landscape. A color that clashes with the surrounding environment can look jarring and out of place.
- Personal Preference: Ultimately, the color you choose should reflect your personal style and preferences. However, it’s important to consider how the color will affect the overall look and feel of your home.
- Texture: The texture of the siding can add depth and visual interest. Smooth siding creates a clean, modern look, while textured siding can add a rustic or more traditional feel. The choice should complement the overall architectural style and personal preference.
Cost and Budgeting
Planning a vertical siding project requires a realistic budget that accounts for all potential expenses. Underestimating costs can lead to project delays, financial strain, and ultimately, a less-than-satisfying outcome. This section breaks down the typical costs involved and provides strategies for creating a comprehensive budget.
Vertical siding installation costs are highly variable, influenced by factors ranging from material selection to labor rates and project complexity. A thorough understanding of these cost drivers is crucial for accurate budgeting and successful project management. Ignoring these variables can lead to significant financial overruns, jeopardizing the entire project.
Cost Breakdown of Vertical Siding Installation
The total cost of a vertical siding project is typically broken down into three main components: materials, labor, and permits. Each component has its own range of costs, influenced by numerous factors detailed below.
| Cost Item | Estimated Cost per Square Foot | Factors Affecting Cost | Tips for Cost Savings |
|---|---|---|---|
| Materials (Siding, Trim, Fasteners) | $2 – $15 | Type of siding (vinyl, wood, fiber cement, metal), quality, and quantity needed. Discounts may be available for bulk purchases. | Explore less expensive, yet durable, siding options. Consider purchasing materials during off-season sales. |
| Labor | $3 – $10 | Labor rates vary by region and contractor experience. Complex projects, such as those requiring significant demolition or repairs, will command higher labor costs. | Obtain multiple quotes from different contractors. Consider DIY installation if you have the skills and time, but factor in potential cost of mistakes. |
| Permits | $50 – $500+ | Permit costs vary widely by location and the scope of the project. Larger projects or those in areas with stricter regulations will have higher permit fees. | Check with your local building department for permit requirements and potential cost-saving options. |
| Contingency/Unforeseen Expenses | 10-20% of total estimated cost | Unexpected issues like rotted wood, damaged sheathing, or changes in design can significantly impact costs. | Build a contingency fund to absorb unexpected costs and avoid project delays. |
Factors Influencing Overall Project Cost
Several factors can significantly impact the overall cost of a vertical siding project. Accurate cost estimation requires careful consideration of these variables.
For instance, choosing high-end fiber cement siding will be considerably more expensive than opting for vinyl siding. Similarly, labor costs in densely populated urban areas are typically higher than in rural regions. A complex project involving extensive repairs or custom detailing will naturally be more costly than a straightforward installation.
Creating a Realistic Budget
To create a realistic budget, start by accurately estimating the square footage of the area to be sided. Obtain detailed quotes from at least three reputable contractors, ensuring that the quotes include all aspects of the project, including materials, labor, permits, and a contingency fund. Compare these quotes carefully, paying attention to the level of detail and the reputation of the contractors.
For example, if you estimate your project will cost $10,000, allocate at least $1,000 – $2,000 for unforeseen expenses. This contingency fund will provide a buffer against unexpected problems that inevitably arise during construction. Always prioritize quality over price; choosing cheaper materials might lead to future repair costs, negating any initial savings.
Maintenance and Repair
Vertical siding, while durable, requires consistent care to maintain its aesthetic appeal and structural integrity. Neglecting maintenance can lead to costly repairs down the line, significantly impacting your home’s value and curb appeal. Understanding common issues and implementing preventative measures is key to maximizing the lifespan of your siding.
Common Problems Associated with Vertical Siding
Vertical siding, regardless of material, faces various challenges. Weather, pests, and accidental impacts are common culprits. For instance, extreme temperature fluctuations can cause expansion and contraction, potentially leading to cracks or warping, particularly in wood or vinyl siding. Heavy rains can cause water damage if not properly sealed or installed. Insects like termites or carpenter ants can burrow into wood siding, compromising its structural integrity. Finally, accidental impacts from lawnmowers, sports equipment, or even hail can cause dents, scratches, and broken panels. The severity of the damage varies depending on the material and the impact’s force. For example, a small dent in aluminum siding might be easily repaired, whereas a similar impact on wood siding could necessitate a complete panel replacement.
Preventative Maintenance Techniques
Regular inspections and cleaning are crucial for preventative maintenance. A thorough inspection, ideally twice a year (spring and fall), allows for early detection of minor issues before they escalate into major problems. Look for cracks, warping, loose panels, signs of insect infestation, or water damage. Cleaning should also be a regular part of your maintenance routine. A gentle power wash can remove dirt, grime, and mildew, improving the siding’s appearance and preventing the buildup of debris that can trap moisture and promote decay. Remember to use a low-pressure setting to avoid damaging the siding. For wood siding, consider applying a protective sealant every few years to further enhance its resistance to moisture and pests. This preventative approach significantly extends the life of your siding and saves you money on costly repairs in the long run. For instance, a homeowner who regularly inspects their siding might catch a small crack early on, allowing for a simple repair with caulk, instead of needing to replace an entire panel later.
Repairing Minor Damage
Addressing minor damage promptly is essential to prevent further deterioration. Replacing damaged panels is often the most effective solution for significant damage, such as large cracks or holes. This involves carefully removing the damaged panel, ensuring proper measurements for the replacement, and securely attaching the new panel using appropriate fasteners. Minor cracks can often be repaired using high-quality caulk designed for exterior use. The caulk should be applied neatly and allowed to cure completely before painting or sealing. For dents or scratches on metal or vinyl siding, careful use of a putty knife or specialized repair kit can often restore the siding to its original appearance. Remember to always choose repair materials that match the existing siding to maintain a consistent look. For example, replacing a damaged cedar shingle with a vinyl replacement would be visually jarring, emphasizing the importance of matching materials.
Environmental Impact
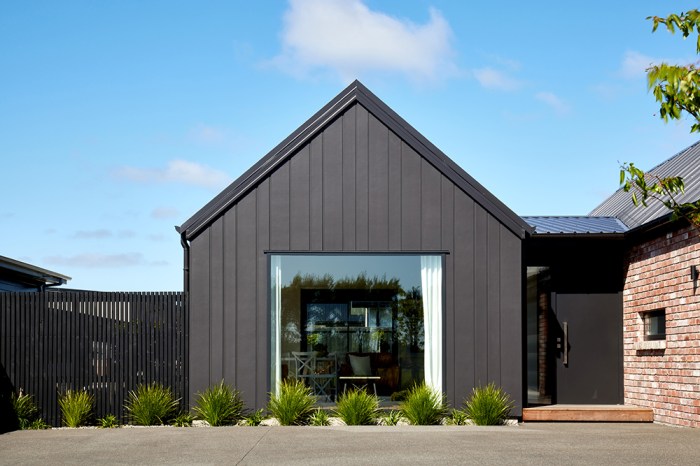
Choosing vertical siding isn’t just about aesthetics; it’s a decision with significant environmental implications. The manufacturing process, material lifespan, and eventual disposal all contribute to a product’s overall carbon footprint. Understanding these factors is crucial for making informed, eco-conscious choices for your home.
The environmental impact of vertical siding varies dramatically depending on the material used. Factors like embodied carbon (the total greenhouse gas emissions from a product’s entire lifecycle), recyclability, and energy efficiency during the manufacturing process and in the building’s performance must all be considered. Let’s delve into the specifics of different materials.
Embodied Carbon in Various Siding Materials
The embodied carbon of vertical siding materials differs significantly. For instance, vinyl siding, while often touted for its affordability, generally has a higher embodied carbon footprint due to its petroleum-based production. This is because the manufacturing process is energy-intensive and relies on fossil fuels. Conversely, materials like fiber cement, while requiring more energy in manufacturing, often have a lower overall carbon footprint due to their longer lifespan and durability, reducing the need for frequent replacements. Wood siding, sourced from sustainably managed forests, can boast a relatively low embodied carbon footprint, particularly when compared to vinyl, provided proper forest management practices are followed. However, the transportation of wood and the potential for deforestation must also be considered.
Energy Efficiency and Thermal Performance
The energy efficiency of your siding directly impacts your home’s heating and cooling costs, and subsequently, its environmental impact. Materials with high R-values (a measure of thermal resistance) provide better insulation, reducing the energy needed to maintain a comfortable indoor temperature. Fiber cement siding, for example, often offers superior insulation compared to vinyl, potentially leading to lower energy consumption and a smaller carbon footprint over the building’s lifespan. Similarly, properly installed wood siding, especially when coupled with effective insulation behind it, can also contribute to better energy efficiency. Conversely, vinyl siding, while sometimes offering improved insulation compared to older materials, generally has a lower R-value than fiber cement or well-insulated wood.
Sustainable and Eco-Friendly Siding Options
Several sustainable and eco-friendly options exist for vertical siding. Recycled materials are becoming increasingly popular, with some manufacturers offering siding made from recycled plastic or other reclaimed materials. These options reduce landfill waste and minimize the demand for virgin resources. Furthermore, siding made from rapidly renewable resources, such as bamboo, offers a low-impact alternative. Choosing siding from companies committed to sustainable forestry practices and responsible manufacturing processes is also crucial. Look for certifications and labels that verify the sustainability claims made by manufacturers. Consider the total lifecycle impact, including transportation distances and end-of-life management options. For example, a local source of wood siding from a sustainably managed forest might have a smaller overall environmental impact than a material shipped from overseas, even if the latter material has a lower embodied carbon footprint at the manufacturing stage.
Ultimately, selecting and installing vertical siding is a multifaceted process that requires careful planning and execution. By weighing the pros and cons of various materials, understanding the installation process, and developing a realistic budget, you can achieve a stunning and long-lasting result. Remember to prioritize quality materials, meticulous installation, and regular maintenance to maximize the lifespan and aesthetic appeal of your vertical siding. Don’t just cover your house; enhance it with a well-informed decision that reflects your unique style and adds significant value to your property.
FAQ Corner
Can I install vertical siding myself?
While possible for some types, especially vinyl, professional installation is often recommended for complex projects or less DIY-experienced individuals to ensure proper results and avoid costly mistakes.
How long does vertical siding last?
Lifespan varies greatly depending on the material. Vinyl can last 20-40 years, fiber cement 50+ years, and wood significantly less without proper maintenance.
What’s the best time of year to install vertical siding?
Generally, spring or fall are ideal. Avoid extreme temperatures (both hot and cold) for optimal installation and material performance.
Does vertical siding require permits?
Permits are often required, especially for significant exterior renovations. Check with your local building department for specific regulations.
How do I clean vertical siding?
Regular cleaning with a pressure washer (low pressure for softer materials) and mild detergent is recommended. Always follow manufacturer instructions.
