Transforming your home’s exterior is more than just a cosmetic upgrade; it’s an investment that impacts curb appeal, energy efficiency, and even property value. Siding replacement is a significant undertaking, demanding careful planning and execution. This comprehensive guide navigates you through every step, from choosing the right material to selecting a reliable contractor, ensuring a smooth and successful project that enhances your home for years to come.
We’ll delve into the diverse world of siding materials – vinyl, wood, fiber cement, metal – analyzing their pros and cons, lifespans, costs, and environmental impact. Understanding these factors is crucial for making informed decisions aligned with your budget and aesthetic preferences. Beyond materials, we’ll cover the entire process: project planning, contractor selection, cost estimation, and long-term maintenance, empowering you to take control and achieve your dream exterior.
Types of Siding
Choosing the right siding for your home is a crucial decision impacting both aesthetics and longevity. The material you select significantly influences your home’s curb appeal, energy efficiency, and overall maintenance needs. Understanding the various options available allows for an informed choice tailored to your budget and lifestyle. Let’s delve into the specifics of popular siding materials.
Vinyl Siding
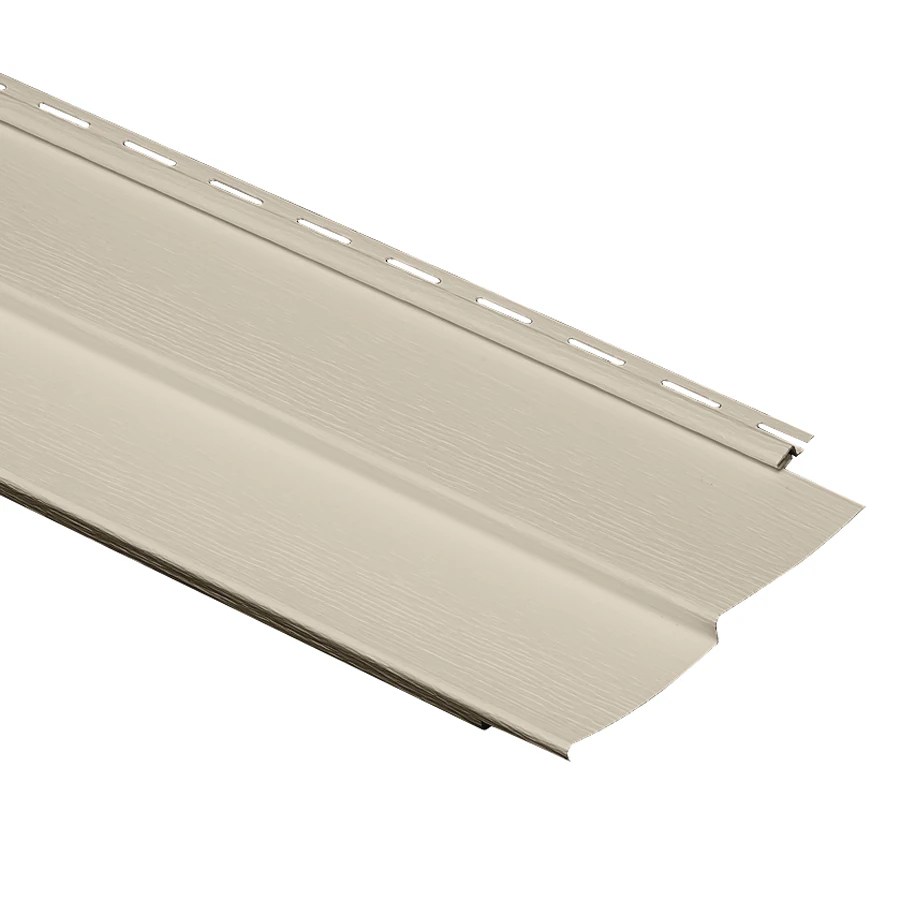
Vinyl siding, a popular choice for its affordability and low maintenance, is made from polyvinyl chloride (PVC). Its ease of installation and wide range of colors and styles make it attractive to many homeowners. However, it’s susceptible to damage from impact and extreme temperatures, potentially leading to warping or cracking. Its relatively short lifespan compared to other materials should also be considered. Furthermore, vinyl siding doesn’t offer the same level of insulation as other options, potentially increasing energy bills in extreme climates.
Wood Siding
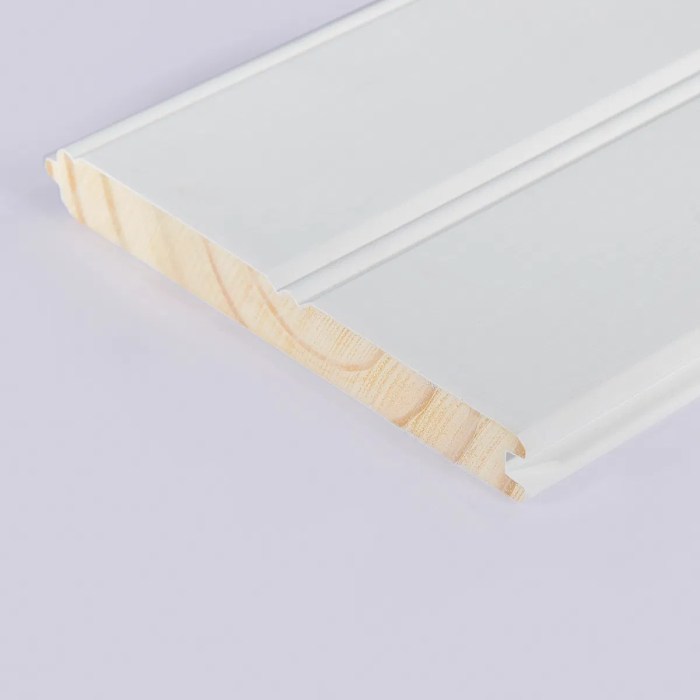
Wood siding, a classic choice offering natural beauty and warmth, comes in various types, including clapboard, shingles, and shiplap. It provides excellent insulation and can significantly enhance a home’s aesthetic appeal. However, wood requires significant maintenance, including regular painting or staining to prevent rot and insect infestation. It’s also more susceptible to damage from moisture, fire, and pests compared to other materials. The higher initial cost and ongoing maintenance make it a more expensive option in the long run for many homeowners.
Fiber Cement Siding
Fiber cement siding, a composite material made from cement, cellulose fibers, and sand, combines the durability of cement with the workability of wood. It’s highly resistant to fire, rot, and insects, making it a low-maintenance option with a long lifespan. Fiber cement offers excellent insulation properties and a wide range of styles and finishes to match various architectural designs. However, it’s heavier than vinyl and can be more challenging to install, requiring professional expertise. The initial cost is also higher than vinyl siding.
Metal Siding
Metal siding, typically made from aluminum or steel, offers exceptional durability and longevity. It’s highly resistant to fire, pests, and moisture damage, requiring minimal maintenance. Metal siding is available in a variety of colors and finishes, providing versatile design options. However, it can be prone to dents and scratches, and its metallic appearance might not appeal to all homeowners. The cost of metal siding is generally higher than vinyl, but its long lifespan can offset the initial investment over time. Furthermore, metal siding can be noisy during rain or hail.
Siding Material Comparison
| Siding Type | Lifespan (Years) | Cost (Relative) | Maintenance | Aesthetic Appeal |
|---|---|---|---|---|
| Vinyl | 20-30 | Low | Low | Moderate |
| Wood | 30-50+ (with maintenance) | Medium-High | High | High |
| Fiber Cement | 50+ | Medium-High | Low | High |
| Metal | 50+ | High | Low | Moderate |
Environmental Impact of Siding Materials
The environmental impact of siding extends from manufacturing to disposal. Vinyl siding, for instance, is derived from petroleum, a non-renewable resource, and its manufacturing process contributes to greenhouse gas emissions. Disposal can also be challenging, as vinyl isn’t readily biodegradable. Wood siding, while a renewable resource, requires significant energy for processing and transportation. Deforestation concerns must also be considered when sourcing wood. Fiber cement siding has a lower carbon footprint compared to vinyl but requires energy-intensive manufacturing processes. Metal siding, depending on the source of the metal, can have varying environmental impacts. Recycling options exist for some metal sidings, reducing landfill waste. Choosing siding with recycled content and considering the overall lifecycle impact can contribute to more sustainable building practices. For example, choosing responsibly sourced wood or recycled metal siding can significantly reduce the environmental footprint.
Siding Replacement Process
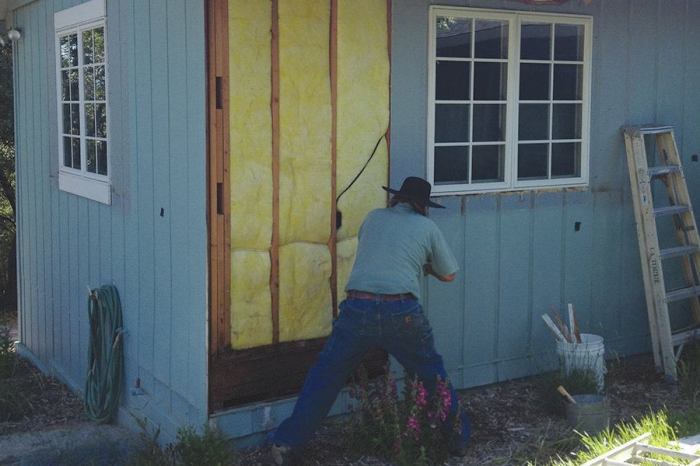
Replacing your siding is a significant home improvement project, impacting both aesthetics and property value. Understanding the process ensures a smooth, efficient, and ultimately successful outcome. This section details the typical steps involved, from initial assessment to final cleanup, enabling you to manage expectations and collaborate effectively with contractors.
A typical siding replacement project involves a methodical sequence of steps. Each stage is crucial for a quality installation and long-lasting results. Ignoring even minor details can lead to costly repairs or aesthetic imperfections down the line. Proper planning and execution are paramount for a successful project.
Project Assessment and Planning
This initial phase involves a thorough evaluation of your existing siding, identifying the type, condition, and extent of damage. Measurements are taken to determine the quantity of materials needed. The contractor will also discuss your desired siding type, color, and style, creating a detailed project plan including timelines and cost estimates. This detailed plan serves as a roadmap for the entire project, minimizing unexpected delays or cost overruns. For example, a contractor might discover significant underlying damage requiring additional work beyond the initial scope, which would be clearly Artikeld in a revised plan.
Siding Removal and Preparation
Once the plan is finalized, the old siding is carefully removed. This involves removing nails, staples, and any damaged sheathing. Any underlying issues, such as rotted wood or insect infestation, are addressed at this stage. The existing house wrap is inspected for damage and replaced if necessary. Proper preparation is critical to ensure the new siding has a stable and secure base. Imagine removing old, brittle asbestos siding – a specialized process requiring safety precautions and adherence to local regulations.
New Siding Installation
With the surface prepared, the new siding is installed according to manufacturer’s specifications. This is a meticulous process requiring precision and attention to detail. Flashing and other moisture barriers are installed to protect the house from water damage. The installation process itself varies depending on the siding type; vinyl siding installation, for instance, differs significantly from the installation of fiber cement or wood siding. Quality control checks are performed throughout this stage to ensure a flawless finish. Consider the precision required when installing cedar shakes – each piece must be carefully aligned and secured for a consistent, aesthetically pleasing outcome.
Final Inspection and Cleanup
After the siding installation is complete, a final inspection is conducted to ensure everything meets the agreed-upon specifications. Any minor imperfections are addressed, and final touch-ups are performed. The entire work area is then thoroughly cleaned, removing debris and leftover materials. This leaves your property clean and ready for enjoyment of your newly renovated exterior. A detailed walk-through with the homeowner at this stage allows for final approval and addresses any remaining concerns.
Flowchart of Siding Replacement Project Stages
The following illustrates the typical flow of a siding replacement project:
[Imagine a flowchart here. The flowchart would start with “Initial Consultation,” branch to “Assessment & Planning,” then “Siding Removal & Preparation,” followed by “New Siding Installation,” and finally “Final Inspection & Cleanup.” Each stage would be a box in the flowchart, with arrows indicating the sequence.]
Essential Tools and Materials Checklist
Having the right tools and materials readily available streamlines the siding replacement process and prevents costly delays. This checklist covers the essentials; specific needs may vary depending on the siding type and project complexity.
- Measuring tape
- Safety glasses and gloves
- Hammer and nail puller
- Circular saw or reciprocating saw
- Utility knife
- Level
- Caulk gun
- Ladder
- New siding materials (including flashing, trim, and fasteners)
- House wrap (if needed)
Cost Estimation
Replacing your siding is a significant investment, and understanding the cost factors is crucial for budgeting and making informed decisions. The total expense isn’t a simple figure; it’s a complex equation influenced by a variety of variables. Let’s break down the key elements that determine the final price tag.
Several factors significantly impact the overall cost of a siding replacement project. Ignoring these nuances can lead to unpleasant budget surprises. A thorough understanding of these cost drivers empowers you to make strategic choices that balance quality with affordability.
Factors Influencing Siding Replacement Costs
The cost of your siding replacement project will depend on several interconnected factors. Accurate estimation requires considering each element carefully.
- Material Selection: The type of siding you choose drastically affects the price. Vinyl siding is generally the most affordable option, while fiber cement, wood, and metal siding command higher prices due to their durability and aesthetic appeal. For instance, high-end cedar siding can cost several times more than basic vinyl.
- Labor Costs: Labor costs vary based on geographic location, the complexity of the project (e.g., removing old siding, intricate trim work), and the contractor’s experience and reputation. Labor-intensive projects, such as those involving significant repairs to underlying sheathing, will naturally increase the overall expense.
- Project Size: The size of your house directly correlates with the amount of material and labor required. A larger house will inherently necessitate more siding, more time for installation, and consequently, a higher overall cost. A small cottage will cost significantly less than a large Victorian-style home.
- Location: Regional variations in labor rates and material costs significantly influence the final price. Urban areas with a higher cost of living typically have higher labor rates than rural areas. Similarly, transportation costs for materials can impact the final bill.
- Permits and Inspections: Obtaining necessary building permits and scheduling inspections adds to the overall cost. These fees vary depending on local regulations and the scope of the project. Always factor these expenses into your budget.
- Unexpected Repairs: During the siding removal process, unforeseen issues like rotted wood or damaged sheathing may be discovered. Addressing these repairs adds to the project’s cost and extends the timeline. A thorough pre-project inspection can help mitigate some of these surprises.
Sample Cost Breakdown
Let’s consider a hypothetical 1,500 square foot house in a mid-sized city undergoing vinyl siding replacement. This example illustrates a typical cost breakdown, but actual costs may vary significantly.
- Materials: $6,000 (This includes siding, trim, flashing, and fasteners. Higher-end vinyl or different siding materials would increase this cost significantly.)
- Labor: $8,000 (This estimate accounts for the labor needed for removal of old siding, installation of new siding, and cleanup. Complex projects or specialized labor can inflate this cost.)
- Permits: $500 (Permit fees vary greatly depending on location and project specifics. This is a conservative estimate.)
- Contingency (for unexpected repairs): $1,000 (It’s wise to allocate a contingency fund to cover unexpected issues that may arise during the project.)
- Total Estimated Cost: $15,500
Strategies for Cost-Effective Siding
Finding cost-effective siding options doesn’t necessitate compromising quality. Strategic planning and smart choices can significantly reduce expenses without sacrificing durability or aesthetics.
- Choose Budget-Friendly Materials: Vinyl siding remains a cost-effective choice, offering a good balance between price and performance. Consider exploring different grades of vinyl to find one that meets your needs and budget.
- Shop Around for Contractors: Obtain multiple quotes from reputable siding contractors to compare pricing and services. Be sure to compare apples to apples – ensure quotes include the same scope of work.
- Consider DIY (with caution): If you’re handy and have the time, DIY installation can save on labor costs. However, be realistic about your skills and the potential for mistakes that could lead to increased costs in the long run. For complex projects, professional installation is highly recommended.
- Prioritize Efficiency: Efficient project management can reduce labor costs. Choose a contractor with a strong reputation for completing projects on time and within budget.
- Time Your Project: Contractor availability and material pricing can fluctuate seasonally. Planning your project during the off-season might yield better deals.
Choosing a Contractor
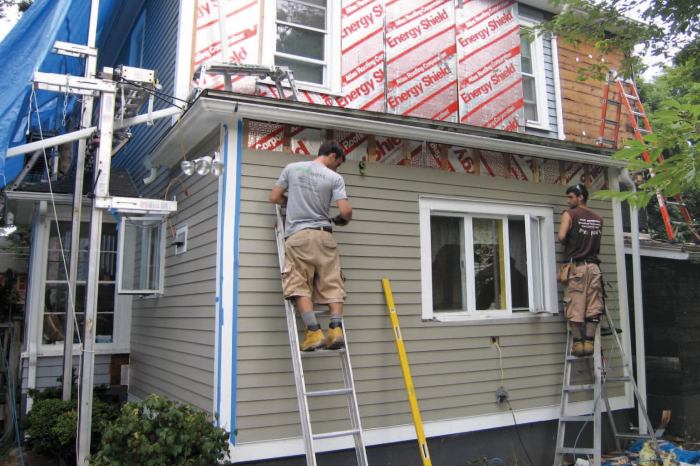
Selecting the right siding contractor is crucial for a successful and stress-free renovation. A poorly chosen contractor can lead to shoddy workmanship, cost overruns, and protracted timelines, ultimately impacting the value and aesthetics of your home. This section Artikels key factors to consider when making this important decision.
Choosing the right siding contractor requires a methodical approach. You need to ensure they possess the necessary skills, experience, and licensing to handle the job effectively and legally. Equally important is verifying their reputation through reviews and testimonials, and securing a comprehensive, legally binding contract that protects your interests.
Contractor Qualifications and Vetting
Finding a qualified siding contractor involves more than just checking online directories. You need to delve deeper to ensure they possess the necessary skills, experience, and legal standing. Start by verifying their licensing and insurance. A valid license demonstrates that they meet your state’s requirements for competency and adherence to building codes. Comprehensive insurance protects you from liability in case of accidents or damages during the project. Furthermore, inquire about their experience with similar projects, requesting examples of their previous work and client references. Thoroughly examining these aspects will significantly reduce the risk of encountering unqualified or unreliable contractors.
Obtaining Multiple Quotes and Comparing Proposals
Never settle for a single quote. Contact at least three to five reputable contractors to obtain detailed proposals for your siding replacement project. Ensure these quotes include a comprehensive breakdown of the costs involved, specifying materials, labor, and any additional expenses. Compare not only the price but also the proposed timelines, payment schedules, and warranties offered. Pay close attention to the specifics of each proposal, noting any discrepancies or ambiguities that require clarification. This comparative analysis empowers you to make an informed decision based on a thorough understanding of the value each contractor provides. For example, a contractor might offer a lower initial price but use inferior materials, resulting in higher long-term costs and reduced durability.
The Importance of a Detailed Written Contract
A comprehensive written contract serves as a legally binding agreement, protecting both you and the contractor. It should explicitly Artikel the scope of work, including materials specifications, detailed descriptions of the tasks to be performed, and the expected completion timeline. The payment schedule should be clearly defined, specifying the amounts and payment milestones tied to project progress. Crucially, the contract must include a detailed warranty covering the materials and workmanship, outlining the duration and conditions of the warranty. Without a well-defined written contract, disputes and misunderstandings are more likely to arise, potentially leading to costly legal battles. Consider having a legal professional review the contract before signing to ensure your interests are fully protected. For instance, a poorly worded contract might leave you responsible for unforeseen costs or limit your recourse in case of substandard work.
Maintenance and Repair
Investing in new siding is a significant home improvement, and protecting that investment requires diligent maintenance. Regular care not only extends the lifespan of your siding but also maintains your home’s curb appeal and prevents costly repairs down the line. Proactive maintenance is far more economical than reactive repairs.
Proper maintenance practices vary depending on the type of siding installed. Understanding your siding material and its specific needs is crucial for effective upkeep. This section will Artikel common maintenance tasks, address potential problems, and provide a sample maintenance schedule.
Routine Maintenance Tasks
Regular cleaning is the cornerstone of siding maintenance. Dirt, grime, and mildew can accumulate, leading to discoloration and potential damage. For most siding types, a simple power washing once or twice a year is sufficient. Use a low-pressure setting to avoid damaging the siding. Always inspect the siding thoroughly after cleaning, checking for any loose or damaged pieces. Pay particular attention to areas prone to moisture accumulation, such as corners and around windows and doors. Minor repairs, such as replacing loose or damaged pieces, should be addressed promptly to prevent further damage. For instance, a small crack in vinyl siding can easily expand in harsh weather, leading to more significant problems.
Common Siding Problems and Solutions
Ignoring minor issues can lead to costly repairs. Addressing problems promptly can save time and money.
- Cracks and Holes: Small cracks in vinyl or aluminum siding can often be repaired with caulk designed for the specific material. Larger holes may require replacing the damaged section. For wood siding, patching compounds can be used, followed by painting to match the existing finish.
- Loose or Damaged Pieces: Loose siding can be a sign of underlying structural issues or improper installation. If you notice loose pieces, carefully investigate the cause. Loose nails or screws can often be re-secured. However, if the problem is more extensive, professional help may be necessary.
- Mildew and Mold: Mildew and mold thrive in damp environments. Regular cleaning with a solution of bleach and water can help prevent their growth. For persistent issues, consider using a mildew-resistant cleaner specifically designed for siding. Proper ventilation can also significantly reduce mildew and mold growth.
- Insect Infestation: Wood siding is susceptible to insect damage. Regular inspections can help detect early signs of infestation. Treatment options range from localized pesticide application to professional pest control services, depending on the severity of the problem.
- Water Damage: Water damage can manifest in various ways, from discoloration to rot. Proper caulking around windows and doors is crucial to prevent water intrusion. If water damage is already present, it may require professional repair, including potential replacement of damaged sections.
Sample Maintenance Schedule
A regular maintenance schedule is essential for preserving the integrity of your siding. The frequency of maintenance will vary depending on the siding material and your climate.
| Siding Material | Frequency | Tasks |
|---|---|---|
| Vinyl | Twice yearly (spring/fall) | Power wash, inspect for cracks/damage, caulk as needed |
| Aluminum | Annually | Inspect for dents/scratches, clean with mild soap and water |
| Wood | Twice yearly (spring/fall) | Inspect for insect damage/rot, clean with appropriate cleaner, repaint/seal as needed |
| Fiber Cement | Annually | Inspect for cracks/damage, clean with mild soap and water, repair/replace damaged sections as needed |
Visual Examples
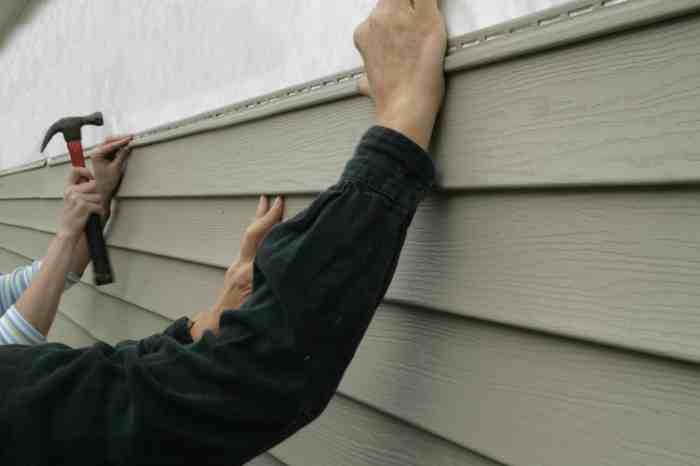
Choosing the right siding isn’t just about protection; it’s a crucial aesthetic decision that dramatically impacts your home’s curb appeal and overall value. Let’s explore how different siding types, installation patterns, and accessories can transform your house’s exterior. Understanding these visual elements allows you to make informed choices that align with your personal style and increase your property’s attractiveness.
House Exterior Examples with Different Siding Types
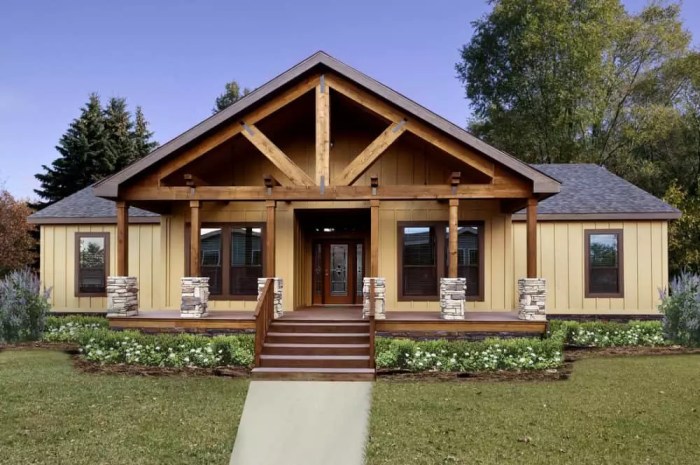
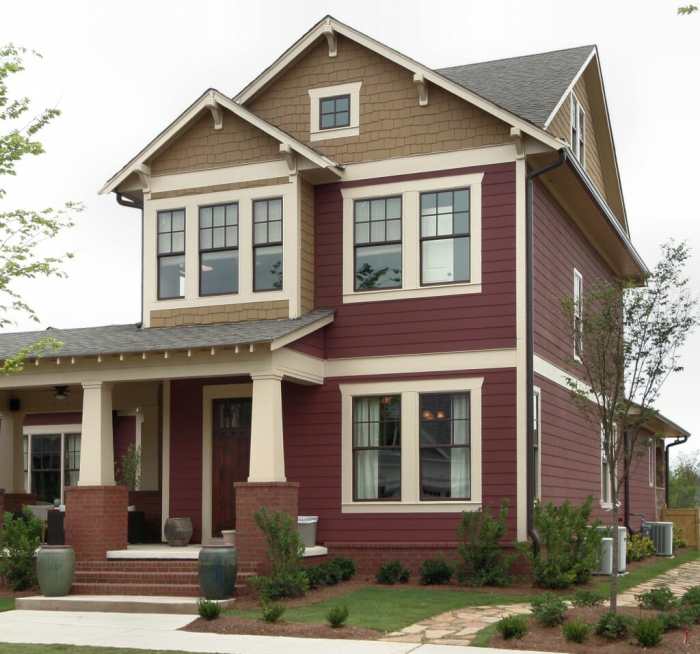
Three distinct homes showcase the versatility of siding. Imagine a charming Cape Cod style home clad in classic clapboard siding, painted a soft, Nantucket gray. The horizontal lines of the clapboard create a sense of traditional elegance, complemented by crisp white trim around the windows and doors. The texture is subtly varied, with the slightly overlapping boards adding depth. This palette evokes a feeling of coastal serenity and timeless charm. In contrast, picture a modern farmhouse with sleek, vertical fiber cement siding in a deep charcoal gray. The vertical lines lend a contemporary feel, emphasizing height and creating a sophisticated, minimalist aesthetic. The smooth, even surface of the fiber cement provides a clean, contemporary look. Finally, envision a rustic mountain cabin featuring rough-hewn cedar shingles in a warm, earthy brown. The natural texture and color of the wood create a welcoming, inviting ambiance, perfectly suited to its surroundings. The irregular shapes of the shingles add a unique, handcrafted feel, reflecting the natural beauty of the landscape.
Siding Installation Patterns
The way siding is installed significantly influences the visual outcome. Horizontal installation, the most common method, creates a classic and traditional look. The horizontal lines emphasize the width of the house, making it appear wider. Vertical installation, conversely, creates a more modern and contemporary feel, emphasizing height and drawing the eye upward. This style can make a home appear taller and more slender. Overlapping patterns, like those seen with clapboard or shingle siding, add texture and depth, creating visual interest through the interplay of light and shadow. The overlapping pattern also contributes to the structural integrity of the siding, creating a more weather-resistant barrier.
Visual Impact of Siding Accessories
Siding accessories are the unsung heroes of exterior design. Trim, for instance, defines architectural details and adds visual interest. Crisp white trim against a darker siding creates a striking contrast, highlighting windows, doors, and other architectural features. Flashing, though often unseen, plays a crucial role in protecting your home from water damage, while also adding a subtle but important element to the overall visual design. Properly installed flashing is often nearly invisible but is essential for a long-lasting siding installation. Finally, soffits and fascia boards, the underside of the eaves and the vertical boards along the roofline, respectively, are often overlooked but contribute significantly to the overall aesthetic. They can be painted to match the siding or trim, creating a cohesive look, or used to introduce a contrasting color accent, adding a subtle pop of visual interest.
Replacing your siding is a substantial investment, but with careful planning and execution, it can dramatically enhance your home’s beauty and value. This guide equipped you with the knowledge to navigate the complexities of material selection, contractor hiring, and project management. Remember, prioritizing quality materials and experienced professionals is key to achieving a long-lasting, aesthetically pleasing result. Don’t just renovate your home’s exterior; transform it into a reflection of your unique style and a testament to smart home improvement.
Questions Often Asked
What’s the average lifespan of different siding types?
Lifespans vary greatly. Vinyl siding can last 20-30 years, wood 20-50 (depending on maintenance), fiber cement 50+ years, and metal 40-50 years.
Can I replace siding myself?
While possible for smaller projects with simple designs, professional installation is generally recommended for a quality, long-lasting result and warranty coverage. DIY can void warranties.
How do I prepare my home for siding replacement?
Clear the area around your house, remove any landscaping obstructions, and protect windows and doors. Consult with your contractor on specific preparations needed.
What are some hidden costs I should consider?
Permitting fees, disposal of old siding, potential repairs to underlying sheathing, and unexpected issues discovered during the process can all add to the total cost.
How often should I clean my new siding?
Regular cleaning, typically once or twice a year, depending on the climate and siding type, helps prevent dirt and grime buildup and prolongs its lifespan.
