Transforming your home’s exterior? Siding installation is a significant investment impacting curb appeal and property value. This comprehensive guide navigates the intricacies of choosing the right siding, executing a flawless installation, and ensuring long-term durability. From understanding different materials like vinyl, wood, and fiber cement to mastering the installation process and budgeting effectively, we’ll cover every crucial aspect. Get ready to unlock the secrets to a stunning and long-lasting exterior.
We’ll delve into the practical steps involved, from meticulous surface preparation to tackling common installation challenges. We’ll also explore essential safety precautions and maintenance tips to maximize your siding’s lifespan. This isn’t just a how-to guide; it’s your roadmap to a successful siding project that enhances your home’s beauty and value for years to come.
Types of Siding
Choosing the right siding for your home is a crucial decision impacting both aesthetics and longevity. The material you select will significantly influence your home’s curb appeal, energy efficiency, and long-term maintenance costs. Let’s delve into the specifics of various siding options to help you make an informed choice.
Vinyl Siding
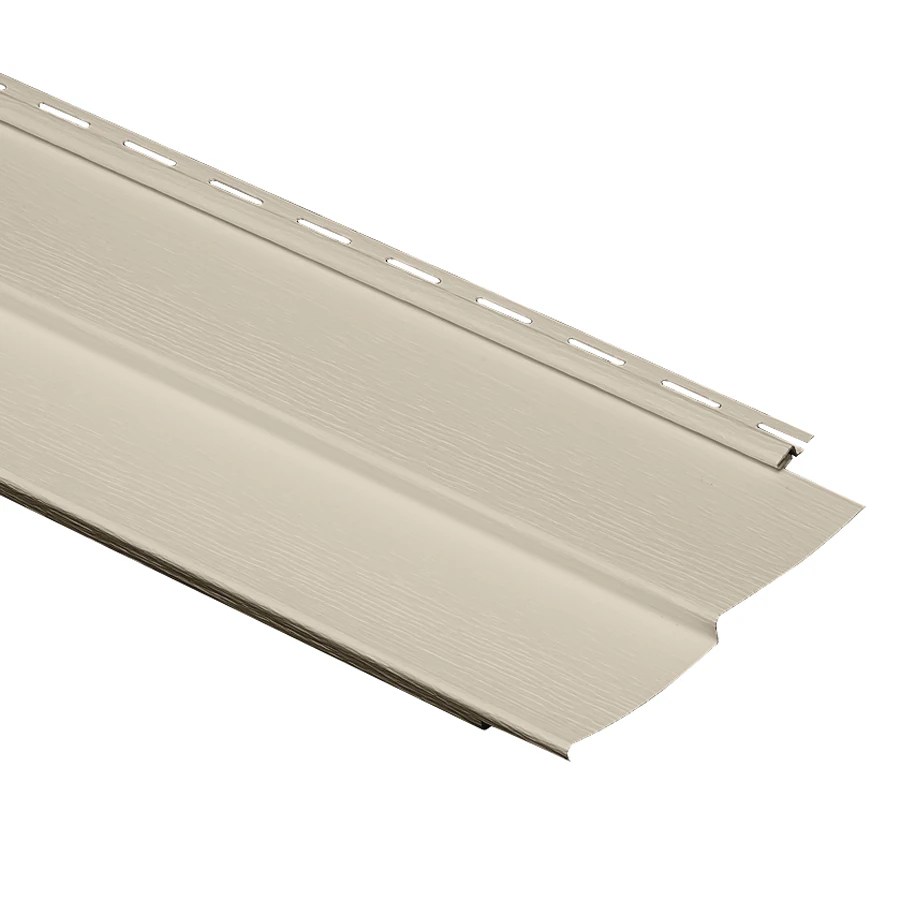
Vinyl siding remains a popular choice due to its affordability and low maintenance. It’s manufactured from polyvinyl chloride (PVC), a durable plastic resistant to rot, insect infestation, and moisture damage. However, vinyl siding can be susceptible to dents and scratches, and its color can fade over time with prolonged sun exposure. Its relatively lightweight nature simplifies installation, but this also means it can be easily damaged by strong winds. While it offers a wide range of colors and styles to mimic other materials like wood, its artificial appearance might not appeal to everyone.
Wood Siding
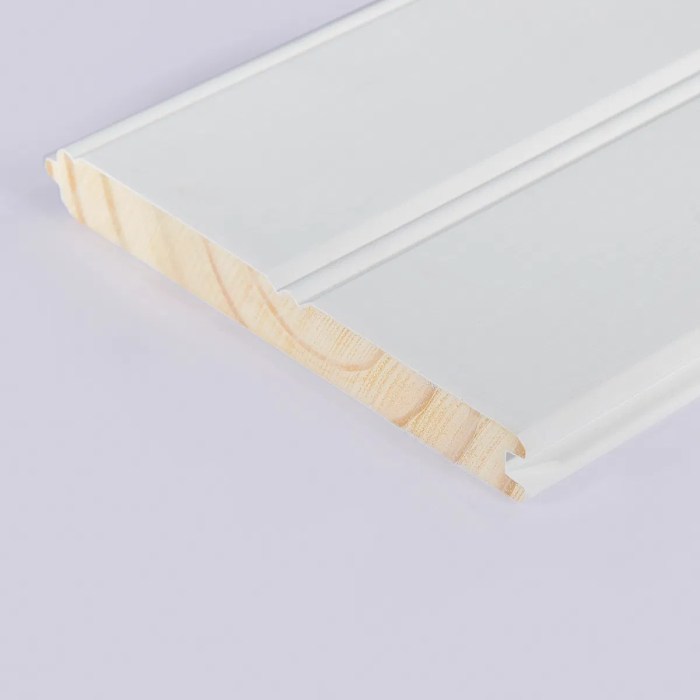
Wood siding, a classic choice, offers unparalleled natural beauty and warmth. Materials like cedar, redwood, and pine provide a rich aesthetic, but require significantly more maintenance than vinyl. Wood is susceptible to rot, insect damage, and requires regular painting or staining to protect it from the elements. While durable when properly maintained, it’s more expensive upfront and necessitates ongoing care to prevent deterioration. The inherent variability in wood grain and color creates a unique look, but this can also mean inconsistencies across the siding.
Fiber Cement Siding
Fiber cement siding combines the durability of cement with the workability of wood fibers. This results in a product that is exceptionally resistant to fire, rot, insects, and moisture. It’s significantly more durable than vinyl and requires minimal maintenance. However, fiber cement siding is heavier than vinyl, requiring more robust installation, and can be more costly upfront. It’s also prone to cracking if not installed properly, and the material can be brittle. Aesthetically, it offers a variety of textures and colors to mimic wood or stone.
Metal Siding
Metal siding, typically made of aluminum or steel, offers exceptional durability and longevity. It’s highly resistant to fire, insects, and rot, and requires minimal maintenance. Metal siding is also energy-efficient, reflecting sunlight and helping to regulate indoor temperatures. However, it can be more expensive than vinyl or wood, and its metallic appearance might not suit all architectural styles. Furthermore, metal siding can dent or be damaged by hail, and expansion and contraction due to temperature changes can cause issues if not properly installed.
Cost Comparison of Siding Materials
The cost of siding varies significantly depending on the material, labor costs, and regional factors. The following table provides a general comparison, keeping in mind that actual costs can fluctuate.
| Siding Type | Material Cost (per sq ft) | Installation Cost (per sq ft) | Total Estimated Cost (per sq ft) |
|---|---|---|---|
| Vinyl | $1-$4 | $3-$6 | $4-$10 |
| Wood | $4-$15 | $5-$10 | $9-$25 |
| Fiber Cement | $6-$12 | $7-$12 | $13-$24 |
| Metal | $8-$15 | $8-$15 | $16-$30 |
*Note: These are estimated costs and can vary based on location, installer, and specific product choices.*
Siding Installation Process
Siding installation, while seemingly straightforward, demands precision and attention to detail for a long-lasting, aesthetically pleasing, and weather-resistant exterior. A poorly executed job can lead to costly repairs down the line, impacting both the home’s value and its protection. This section Artikels the crucial steps involved in a professional siding installation, ensuring your project achieves optimal results.
Successful siding installation hinges on meticulous preparation and a systematic approach. From initial measurements and material selection to the final finishing touches, each stage contributes to the overall quality and longevity of the siding. Understanding this process empowers homeowners to make informed decisions and oversee contractors effectively.
Preparation and Planning
Thorough preparation is paramount. This involves accurate measurements of the house’s exterior, ordering sufficient siding materials, and ensuring all necessary tools and equipment are readily available. Detailed planning minimizes on-site delays and ensures a smooth workflow. This stage includes assessing the existing wall condition, identifying any areas needing repair (like rotted wood or damaged sheathing), and selecting appropriate underlayment for optimal insulation and moisture protection. Accurate calculations of the required materials, factoring in waste and potential cuts, prevents mid-project disruptions.
Tools and Equipment for Siding Installation
Professional siding installation requires specialized tools for efficient and accurate work. A comprehensive toolkit includes a measuring tape, level, chalk line, circular saw, miter saw (for precise angled cuts), hammer, nail gun (often pneumatic), safety glasses, work gloves, utility knife, and scaffolding or ladders for safe access to higher areas. Additional tools may be necessary depending on the siding type, such as a jig saw for intricate cuts or a heat gun for working with certain vinyl siding types. Investing in high-quality tools ensures precision and reduces the risk of damage to the siding materials.
Step-by-Step Visual Guide
Imagine a series of images illustrating the siding installation process.
Image 1: Preparation and Measurement. This image shows a contractor meticulously measuring the house’s exterior walls, using a measuring tape and chalk line to mark out the siding panels’ placement. Key aspects highlighted are the precise measurements and the use of a level to ensure vertical and horizontal alignment. The image also shows the existing wall being inspected for any damage or necessary repairs.
Image 2: Installing the Starter Strip. This image displays the installation of the first row of siding, the starter strip, which provides a level base for the rest of the siding. The image emphasizes the importance of proper alignment and securing the strip with nails at the correct spacing to prevent warping or buckling. The image also shows the use of a level to ensure a perfectly horizontal starting point.
Image 3: Installing Subsequent Siding Panels. This image showcases the installation of subsequent siding panels, highlighting the overlapping method and the use of a nail gun for efficient and secure fastening. The image clearly shows the correct spacing between nails to avoid splitting the siding and the consistent overlap to ensure watertight protection. The image also displays the use of a level to ensure each row is perfectly aligned.
Image 4: Cutting and Fitting Around Obstacles. This image illustrates the process of precisely cutting siding panels to fit around windows, doors, and corners. The image showcases the use of a miter saw for accurate angled cuts and the importance of careful measurement to ensure a seamless and aesthetically pleasing finish. The image also highlights the use of appropriate caulking to seal any gaps around these areas.
Image 5: Finishing Touches and Caulking. This image shows the final stages of installation, including the installation of J-channels, corner trim, and fascia. The image emphasizes the use of caulking to seal all joints and gaps, creating a weathertight barrier. The image showcases a neatly finished exterior, highlighting the importance of attention to detail in achieving a professional look.
Preparing the Surface for Siding
Proper surface preparation is the cornerstone of a successful siding installation. Neglecting this crucial step can lead to premature siding failure, costly repairs, and a significantly diminished lifespan for your entire exterior. Think of it as building a house – you wouldn’t start constructing walls on a shaky foundation, would you? The same principle applies to siding. A well-prepared surface ensures a strong, lasting bond between the siding and your home’s exterior, protecting it from the elements for years to come.
Preparing the surface involves a thorough inspection for any damage, followed by cleaning and priming. This meticulous process guarantees that your new siding will look great and perform optimally, maximizing your return on investment. Ignoring this phase is a recipe for disaster, potentially leading to issues ranging from unsightly gaps to structural damage.
Damaged Sheathing, Rot, and Insect Infestation Identification and Repair
Identifying and addressing problems like damaged sheathing, rot, and insect infestation is paramount. Damaged sheathing, often caused by moisture intrusion or impact, compromises the structural integrity of your home’s exterior. Rot, typically caused by prolonged exposure to moisture, weakens the wood, creating instability. Insect infestations, particularly termites, can cause significant structural damage that’s often hidden beneath the surface. A thorough inspection, potentially involving a professional assessment for severe cases, is essential. Repairing damaged sheathing involves replacing affected sections with new, appropriately treated lumber. Rotted areas must be completely removed and replaced, ensuring the surrounding wood is also sound. Insect infestations require targeted treatment, possibly including professional pest control services, to eliminate the problem and prevent future damage. Failure to address these issues before installing new siding is like putting a band-aid on a broken leg; it might look okay initially, but the underlying problem will only worsen.
Cleaning and Priming Exterior Walls
Thorough cleaning is vital to remove dirt, grime, mildew, and other contaminants that can interfere with the adhesion of the siding and primer. Power washing is often the most effective method, using a low-pressure nozzle to avoid damaging the underlying surface. Pay close attention to corners and crevices where dirt tends to accumulate. After cleaning, allow the walls to dry completely before applying a quality primer. Primer serves as a bonding agent, improving the adhesion of the siding and providing a uniform surface for a consistent finish. Choosing a primer specifically designed for exterior use and compatible with your chosen siding material is crucial. A properly primed surface not only enhances the longevity of your siding but also significantly improves the overall aesthetic appeal of your home’s exterior. Think of it as prepping a canvas before painting a masterpiece – a smooth, clean surface is essential for achieving the best possible results. Cutting corners here can lead to uneven paint application, peeling siding, and a less-than-professional finish.
Siding Installation Techniques
Choosing the right siding installation technique is crucial for a long-lasting, aesthetically pleasing, and weather-resistant exterior. The method you select will depend on several factors, including the type of siding material, the complexity of your home’s design, and your budget. Proper installation is key to maximizing the lifespan and performance of your siding investment.
Different siding installation methods offer unique advantages and disadvantages. Understanding these nuances will help you make an informed decision and ensure a successful project. The primary methods involve variations in the orientation and overlapping of the siding panels.
Horizontal Siding Installation
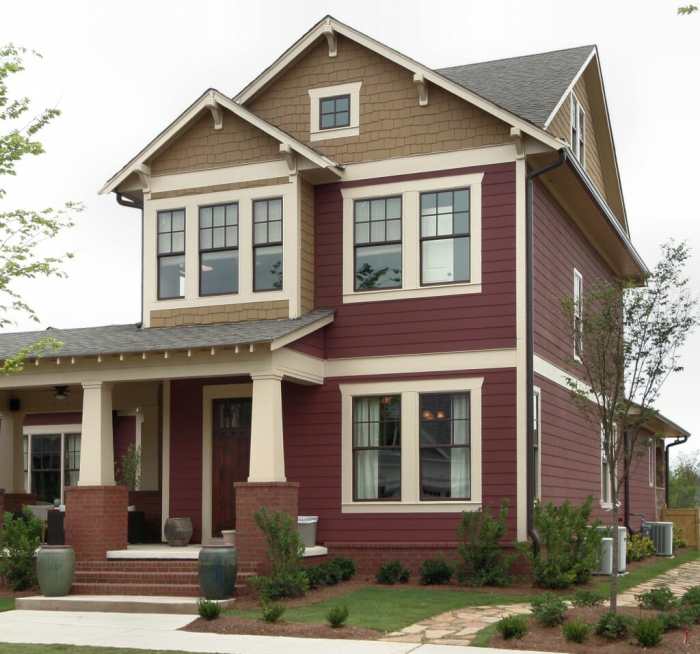
Horizontal siding installation, the most common method, involves installing siding panels horizontally across the exterior walls. This approach is straightforward and generally requires less specialized tools and expertise compared to other methods. The panels are typically overlapped, creating a protective barrier against the elements.
- Advantages: Simple installation, visually appealing on many house styles, readily available materials and tools.
- Disadvantages: Can be more susceptible to water damage if not properly installed, may require more frequent maintenance in high-wind areas.
- Suitable Materials: Vinyl, wood, fiber cement, aluminum.
Vertical Siding Installation
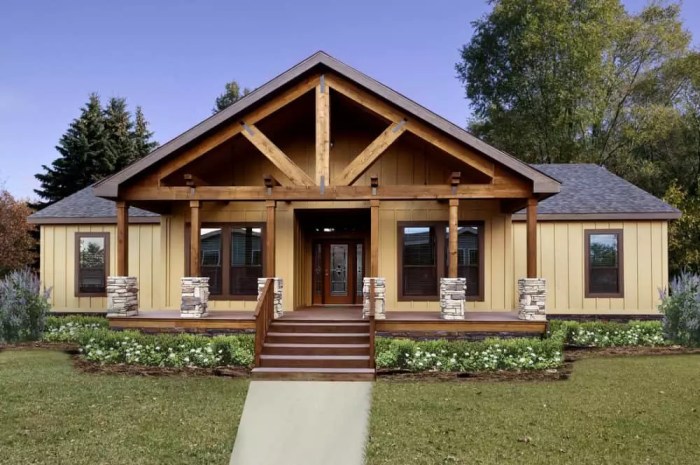
Vertical siding installation, while less common than horizontal, offers a distinct aesthetic appeal. The panels are installed vertically, creating a modern and sleek look, often used to accentuate the height of a building. This method requires careful planning and precise cuts to ensure a uniform appearance.
- Advantages: Modern aesthetic, can help accentuate height, less prone to water damage from horizontal rain.
- Disadvantages: More challenging installation, potentially higher labor costs, may require specialized tools.
- Suitable Materials: Vinyl, wood, fiber cement, metal.
Overlapping Siding Installation
Overlapping is a fundamental technique used in both horizontal and vertical siding installation. The panels are installed so that each successive panel overlaps the previous one, creating a watertight seal. The amount of overlap varies depending on the siding material and manufacturer’s specifications. Proper overlapping is crucial for preventing water penetration and ensuring the longevity of the siding.
- Advantages: Creates a weather-resistant barrier, relatively simple technique, suitable for most siding types.
- Disadvantages: Requires precise measurements and cuts to ensure consistent overlap, improper overlap can lead to water damage.
- Suitable Materials: All siding types – vinyl, wood, fiber cement, metal, etc.
Board and Batten Siding Installation
Board and batten siding is a classic technique featuring wide vertical boards and narrow strips (battens) covering the seams. This method offers a rustic and traditional appearance. The battens are nailed over the joints of the wider boards, creating a strong and visually appealing finish.
- Advantages: Durable, visually appealing, excellent for rustic or traditional styles.
- Disadvantages: More labor-intensive than other methods, requires precise cuts and measurements.
- Suitable Materials: Wood, fiber cement (though less common).
Common Siding Installation Problems and Solutions
Siding installation, while seemingly straightforward, presents several potential pitfalls that can lead to costly repairs and aesthetic flaws. Understanding these common problems and implementing preventative measures is crucial for a successful and long-lasting installation. Ignoring these issues can result in water damage, structural problems, and a significantly reduced lifespan for your siding. This section details common problems and their effective solutions.
Improper Flashing Installation
Improperly installed flashing is a leading cause of water damage behind siding. Flashing, typically made of metal, acts as a barrier to prevent water penetration at vulnerable points like windows, doors, and corners. Failure to properly seal and overlap flashing allows water to seep behind the siding, leading to rot, mold, and structural damage. Solutions involve ensuring proper overlap (at least 4 inches), using sealant around all seams, and verifying that flashing extends beyond the siding to direct water away from the building. For example, a common mistake is insufficient overlap of flashing around a window, allowing rain to run directly behind the siding. Correcting this requires removing the affected siding, installing new, correctly overlapping flashing, and resealing with high-quality waterproof sealant before replacing the siding. Preventative measures include carefully measuring and cutting flashing to the correct size and employing a quality sealant specifically designed for exterior use.
Gaps and Openings in Siding
Gaps between siding panels, around windows and doors, or at corners are major entry points for water and insects. These gaps can occur due to improper measurement, cutting, or installation techniques. Solutions involve carefully measuring and cutting siding panels to ensure a snug fit, using appropriate caulking or sealant to fill gaps, and ensuring proper alignment of panels. For instance, if gaps are visible between horizontal siding panels, they may indicate incorrect spacing during installation. Remedying this requires carefully removing the affected sections, applying appropriate sealant to the underlying surface, and reinstalling the panels with precise spacing. Preventative measures include using a level to ensure straight lines and consistent spacing throughout the installation process.
Water Damage Behind Siding
Water damage, often a consequence of improper flashing or gaps, can lead to significant structural problems. Signs include discoloration, swelling, or rot in the underlying sheathing or framing. Solutions depend on the severity of the damage. Minor damage may only require cleaning, drying, and applying sealant. More extensive damage might necessitate replacing sections of the sheathing, framing, and siding. For example, dark staining or mold growth on interior walls beneath siding indicates water penetration. Addressing this requires careful investigation to identify the source of the leak (faulty flashing, gaps, etc.), repairing the source, removing the damaged siding and sheathing, allowing the area to dry completely, and reinstalling new siding. Preventative measures include regular inspection of the siding for any signs of water damage and prompt attention to any issues.
Improper Nail Placement
Incorrect nail placement can lead to siding buckling, warping, and premature failure. Nails should be driven straight and at the correct depth to avoid damaging the siding material. Solutions involve removing improperly placed nails and reinstalling them correctly. For example, nails driven too deeply can cause dents and damage to the siding. Correcting this involves carefully removing the damaged siding, repairing any underlying damage, and reinstalling the siding with properly placed nails. Preventative measures include using a nail gun with adjustable depth settings and using a nail set to ensure the nails are driven to the correct depth without damaging the siding.
Safety Precautions During Siding Installation
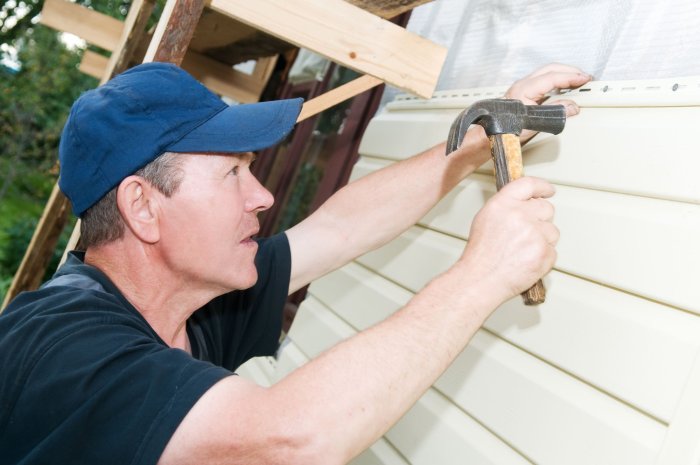
Siding installation, while seemingly straightforward, involves inherent risks, particularly when working at heights and with power tools. Neglecting safety precautions can lead to serious injuries or even fatalities. Prioritizing safety not only protects the workers but also ensures a smoother, more efficient project. This section details crucial safety measures to mitigate these risks.
Safe practices are paramount throughout the entire siding installation process. From initial preparation to final cleanup, consistent adherence to safety protocols is non-negotiable. This includes understanding and utilizing appropriate safety equipment, implementing fall protection strategies, and following safe operating procedures for power tools.
Working at Heights Safety
Working at heights presents significant fall risks. Falls from ladders or scaffolding are a leading cause of injuries in construction. To mitigate this, always use properly erected and stable scaffolding or ladders, ensuring they are rated for the weight capacity and the height required. Securely fasten ladders to prevent slipping. Employ fall arrest systems, such as harnesses and safety lines, whenever possible, especially when working above a certain height. Regularly inspect equipment for any signs of damage or wear before each use. Never overload scaffolding or ladders, and always maintain three points of contact when climbing. For example, a worker should always maintain contact with two hands and one foot or two feet and one hand while climbing.
Power Tool Safety
Power tools, essential for siding installation, pose significant dangers if mishandled. Always use tools in accordance with the manufacturer’s instructions. Ensure that tools are properly maintained and in good working order, with sharp blades and functioning safety mechanisms. Wear appropriate personal protective equipment (PPE) such as safety glasses, hearing protection, and work gloves. Never operate power tools while fatigued or under the influence of drugs or alcohol. Before starting any power tool, make sure the area is clear of any obstructions and that you have a secure footing. Regularly inspect cords for damage and avoid using tools with frayed or damaged cords. A common example of a safety hazard is using a nail gun without proper safety glasses, potentially leading to eye injury from flying debris.
Personal Protective Equipment (PPE)
Proper PPE is crucial for protecting workers from various hazards during siding installation. This includes:
- Safety glasses or goggles to protect eyes from flying debris.
- Hearing protection (earplugs or muffs) to reduce noise exposure from power tools.
- Work gloves to protect hands from cuts and abrasions.
- A hard hat to protect the head from falling objects.
- Steel-toed boots to protect feet from dropped objects or heavy materials.
- Fall protection harness and lanyard when working at heights.
- Respiratory protection (dust mask or respirator) when working with materials that produce dust or fumes.
The use of appropriate PPE is not merely recommended; it’s a mandatory safety precaution that significantly reduces the risk of injuries.
Siding Installation Safety Checklist
Before commencing any siding installation, review and follow this checklist:
- Inspect all tools and equipment for proper functionality and safety.
- Ensure adequate lighting in the work area.
- Secure the work area to prevent unauthorized access.
- Wear appropriate PPE for all tasks.
- Inspect scaffolding and ladders for stability and structural integrity.
- Utilize fall protection systems when working at heights.
- Follow manufacturer’s instructions for all power tools.
- Maintain a clean and organized work area to prevent trips and falls.
- Be aware of overhead power lines and take necessary precautions.
- Report any unsafe conditions or equipment immediately to the supervisor.
Regularly checking this checklist ensures a consistent approach to safety throughout the project. Failing to adhere to these simple yet critical steps can have severe consequences.
Cost Estimation and Budgeting for Siding Installation
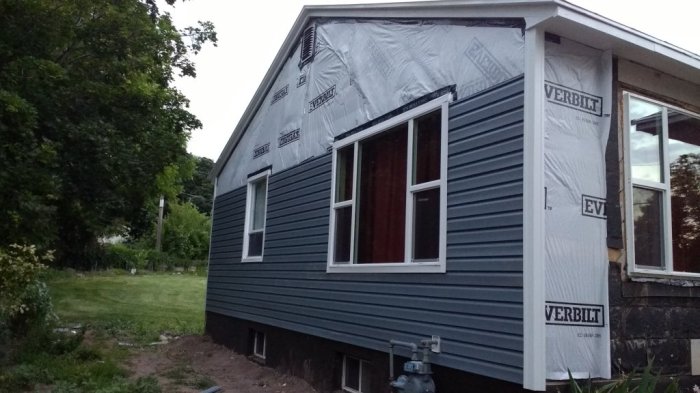
Siding installation costs can vary significantly depending on several factors. Understanding these factors and creating a realistic budget is crucial for a smooth and financially responsible project. Failing to adequately budget can lead to unexpected expenses and project delays. This section will provide a detailed breakdown of cost components and strategies for effective budgeting.
Factors Influencing Siding Installation Costs
Several key elements contribute to the overall expense of a siding installation project. These include the cost of materials, labor, and necessary permits. Accurately estimating each component is essential for creating a comprehensive budget.
- Material Costs: The type of siding chosen dramatically impacts the price. Vinyl siding is generally the most affordable, while fiber cement and wood siding are significantly more expensive. The quantity needed, determined by the size of the house and the complexity of the design, further influences the material cost. For example, a large two-story home will naturally require more siding than a small bungalow. The cost also includes additional materials like flashing, trim, and fasteners.
- Labor Costs: Labor costs are a substantial portion of the total project expense. The complexity of the job, the size of the house, and the contractor’s hourly rate all affect labor costs. A house with intricate architectural details or difficult-to-access areas will necessitate more labor hours, driving up the cost. Experienced and reputable contractors often charge higher hourly rates than less experienced ones.
- Permit Costs: Building permits are legally required in most jurisdictions before starting any exterior home improvement project. Permit fees vary depending on location and the scope of the work. It’s crucial to factor these costs into the budget from the outset to avoid unexpected delays or legal complications. Failing to obtain the necessary permits can lead to fines and potential project shutdowns.
Creating a Realistic Budget for Siding Installation
Developing a realistic budget requires careful planning and detailed cost estimations. Begin by obtaining multiple quotes from reputable contractors to compare pricing and services. Don’t solely focus on the lowest bid; consider the contractor’s experience, reputation, and warranty offerings.
- Gather Detailed Estimates: Request detailed, itemized estimates from at least three different contractors. These estimates should break down material costs, labor costs, and permit fees separately. This allows for a clear comparison of pricing and service offerings.
- Factor in Contingencies: Always include a contingency buffer (typically 10-20%) in your budget to account for unexpected expenses. Unforeseen issues, such as rotted wood or damaged sheathing, can significantly increase costs. Having a contingency fund prevents project delays and financial strain.
- Prioritize and Phase: If budget constraints are a concern, consider prioritizing the most crucial areas and phasing the project over time. For example, you might address the most visible side of the house first and tackle other areas later.
Finding Reputable Contractors and Negotiating Fair Prices
Selecting a trustworthy contractor is paramount to a successful project. Thorough research and due diligence are essential.
- Check References and Reviews: Contact previous clients to inquire about their experiences with the contractor. Online reviews on platforms like Yelp or Angie’s List can also provide valuable insights into a contractor’s reliability and quality of work.
- Verify Licensing and Insurance: Ensure the contractor holds the necessary licenses and insurance coverage. This protects you from liability in case of accidents or damages during the project. Request proof of insurance and licensing before signing any contracts.
- Negotiate Prices Respectfully: Once you’ve received multiple estimates, don’t hesitate to negotiate prices respectfully. Explain your budget constraints and inquire about potential cost savings without compromising quality. A reputable contractor will be willing to work with you to find a mutually agreeable price.
Maintenance and Repair of Siding
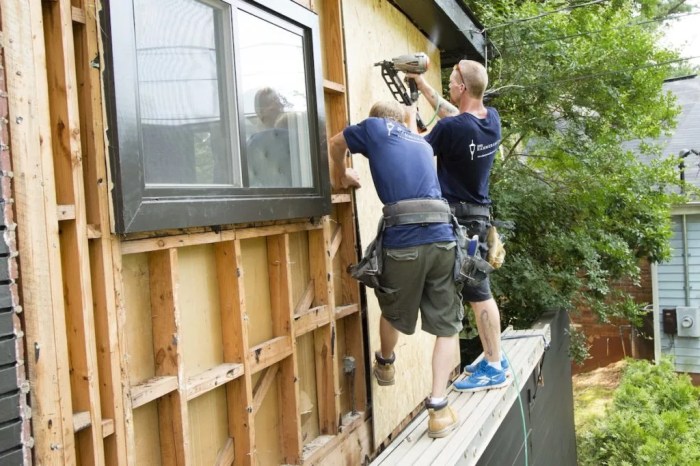
Proper siding maintenance is crucial for preserving your home’s curb appeal and protecting it from the elements. Neglecting routine care can lead to costly repairs down the line, significantly impacting your home’s value and energy efficiency. Regular inspections and timely repairs will extend the lifespan of your siding and minimize the need for extensive, expensive renovations.
Regular maintenance significantly extends the life of your siding, saving you money on replacements and repairs in the long run. A proactive approach prevents minor issues from escalating into major problems, ensuring your home remains aesthetically pleasing and structurally sound. This proactive strategy also helps maintain your home’s energy efficiency by preventing drafts and water damage.
Routine Siding Maintenance
Regular inspections are vital for early detection of problems. Ideally, inspect your siding twice a year – once in the spring after winter’s harsh weather and again in the fall before winter sets in. Look for cracks, dents, loose panels, discoloration, and signs of insect infestation. Pay close attention to areas prone to damage, such as corners, edges, and areas around windows and doors. Cleaning your siding regularly is also essential to remove dirt, mildew, and other debris that can accumulate over time. The frequency of cleaning will depend on your climate and the type of siding you have.
Identifying and Repairing Common Siding Problems
Cracks in vinyl siding can often be repaired with a vinyl patching kit, carefully following the manufacturer’s instructions. For larger cracks or damage, replacing the affected panel might be necessary. Dents in aluminum or vinyl siding can sometimes be gently pushed back into place, but severe dents may require panel replacement. Loose panels typically indicate a problem with the fasteners. You can usually tighten or replace these fasteners, but if the underlying structure is damaged, more extensive repairs might be needed. For wood siding, addressing rot or insect damage promptly is crucial. This often requires replacing affected boards and treating the surrounding area with a wood preservative.
Cleaning Different Siding Materials
Cleaning methods vary depending on the siding material. Vinyl siding is relatively easy to clean, typically requiring only a mixture of water and mild detergent applied with a soft-bristled brush or pressure washer (using low pressure to avoid damage). Aluminum siding can be cleaned similarly, but avoid abrasive cleaners that can scratch the surface. Wood siding requires more care; a gentle cleaning with a soft brush and a solution of water and mild detergent is usually sufficient. For more stubborn stains, a pressure washer may be necessary, but again, use low pressure to avoid damaging the wood. For fiber cement siding, use a soft brush and a solution of water and a mild detergent. Avoid abrasive cleaners or high-pressure washing, as these can damage the surface. Always rinse thoroughly after cleaning any siding material.
Successfully completing a siding installation project requires careful planning, meticulous execution, and a keen eye for detail. By understanding the nuances of material selection, mastering installation techniques, and prioritizing safety, you can achieve a stunning and durable exterior that elevates your home’s aesthetic appeal and protects it from the elements. Remember, proper maintenance is key to prolonging the life of your siding, ensuring your investment pays off in lasting beauty and increased property value. Now go forth and transform your home’s exterior!
General Inquiries
How long does siding installation typically take?
The timeframe varies greatly depending on the size of the house, siding material, and complexity of the project. Expect anywhere from a few days to several weeks.
Can I install siding myself?
While DIY is possible for smaller projects with simpler designs, professional installation is often recommended for larger homes or complex designs to ensure quality and avoid costly mistakes.
What’s the warranty on most siding materials?
Warranty periods vary by manufacturer and material type. Check with your supplier for specifics, but expect warranties ranging from 10 to 50 years.
How often should I clean my siding?
Regular cleaning, at least once or twice a year, is recommended to remove dirt, debris, and algae. The frequency might need to increase depending on your climate and siding material.
What are the signs I need siding repair?
Look for cracks, dents, loose panels, water damage, or signs of rot or insect infestation. Addressing these issues promptly prevents larger, more costly problems down the line.
