Shake siding—the rustic charm of natural wood or the modern sleekness of composite materials—offers a unique aesthetic for your home’s exterior. But choosing the right shake siding isn’t just about looks; it’s about understanding the nuances of material, installation, maintenance, and long-term cost. This guide dives deep into every aspect, equipping you with the knowledge to make an informed decision that enhances your home’s value and curb appeal for years to come. We’ll explore the diverse types of shake siding available, from classic cedar to innovative composites, detailing their pros, cons, and ideal applications. From installation techniques and maintenance best practices to cost analysis and environmental considerations, we’ll leave no stone unturned.
This in-depth exploration will cover everything from selecting the perfect material and understanding the intricacies of installation to mastering maintenance and repair techniques. We’ll also analyze the financial implications, comparing shake siding costs with other exterior cladding options, and explore the environmental impact of your choice. By the end, you’ll be confident in your ability to choose, install, and maintain stunning shake siding that perfectly complements your home’s style and your budget.
Types of Shake Siding
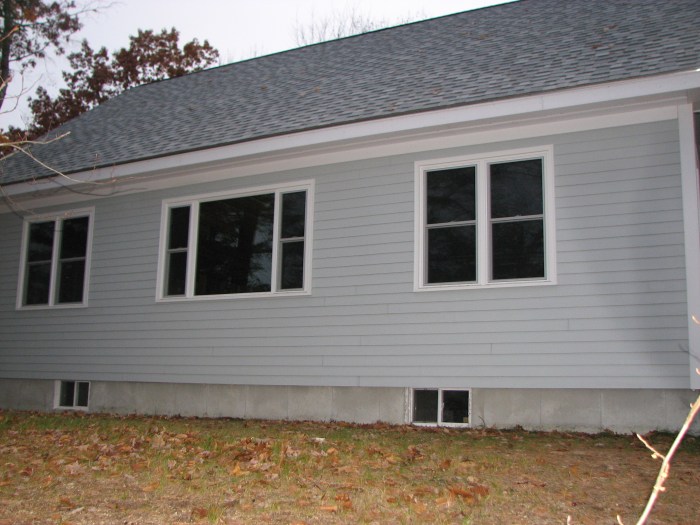
Shake siding offers a rustic charm and natural beauty that can significantly enhance the curb appeal of any home. However, understanding the different types available, their manufacturing processes, and their respective lifespans is crucial for making an informed decision that aligns with your budget and long-term goals. Choosing the right shake siding can mean the difference between a beautiful, lasting investment and costly repairs down the line.
Shake Siding Materials
Several materials are commonly used in the manufacture of shake siding, each possessing unique characteristics impacting cost, durability, and maintenance requirements. These variations allow homeowners to select a product that perfectly suits their needs and aesthetic preferences.
Cedar Shake Siding
Cedar shake siding is a popular choice due to its natural beauty, resistance to rot and decay (when properly treated), and pleasant aroma. The manufacturing process involves harvesting cedar trees, milling them into specific dimensions, and then often treating the shakes with preservatives to enhance their longevity. The shakes are then sorted by grade based on their appearance and quality. High-grade cedar shakes are more expensive but offer superior aesthetics and durability. Cedar’s natural oils provide inherent pest resistance, further contributing to its lifespan.
Redwood Shake Siding
Redwood, known for its rich color and exceptional durability, is another highly sought-after material for shake siding. Similar to cedar, redwood is harvested, milled, and graded before being used. The manufacturing process often involves kiln drying to reduce moisture content and minimize shrinkage. Redwood’s natural resistance to insects and decay contributes to a longer lifespan compared to some other wood types, although proper maintenance is still recommended.
Composite Shake Siding
Composite shake siding offers a more affordable and often lower-maintenance alternative to natural wood shakes. These shakes are manufactured from a blend of materials, typically wood fibers and polymers, providing durability and resistance to moisture damage. The manufacturing process involves mixing the components, molding them into shake shapes, and then often adding a protective coating to enhance their aesthetic appeal and weather resistance. While composite shakes mimic the look of natural wood, their lifespan and durability may not match that of high-quality cedar or redwood.
Shake Siding Material Comparison
The following table summarizes the key differences between cedar, redwood, and composite shake siding:
| Material | Cost | Lifespan (Years) | Maintenance |
|---|---|---|---|
| Cedar | Medium to High | 30-50+ (with proper treatment) | Regular cleaning, occasional staining/sealing |
| Redwood | High | 40-60+ (naturally durable) | Periodic cleaning, less frequent staining/sealing |
| Composite | Low to Medium | 20-30 | Minimal cleaning, typically requires less maintenance |
Installation Methods for Shake Siding
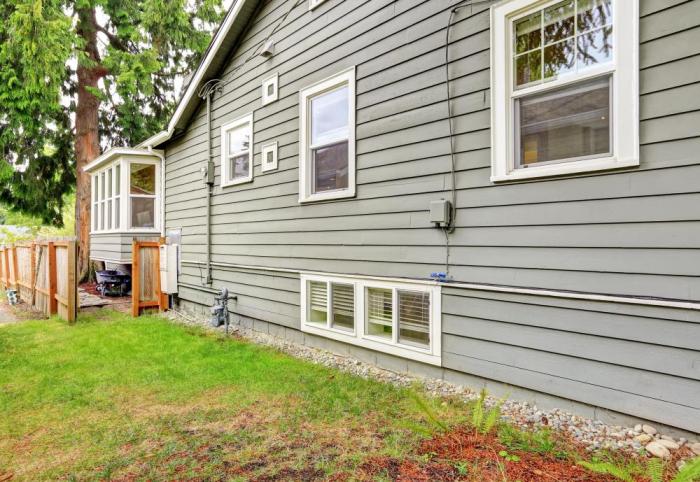
Installing shake siding can significantly enhance your home’s curb appeal and value. However, it’s a project that requires precision and attention to detail. A successful installation hinges on proper planning, the right tools, and a methodical approach. This guide will walk you through the process, ensuring you achieve a professional finish.
Shake siding installation involves several key steps, regardless of whether you opt for horizontal or vertical application. Understanding these steps and adhering to best practices is crucial for a long-lasting and aesthetically pleasing result. Remember, safety should always be your top priority throughout the installation process.
Necessary Tools and Safety Precautions
Before beginning any installation, gather the necessary tools and prioritize safety. This includes a measuring tape, circular saw, hammer, nail gun (optional but highly recommended for efficiency), safety glasses, work gloves, a level, and a chalk line. Always wear appropriate safety gear, including eye protection and gloves, to prevent injuries from flying debris or sharp tools. Ensure the work area is clear of obstructions and that you have a stable working platform. If working at heights, utilize proper scaffolding and safety harnesses. Remember, a safe work environment is a productive work environment.
Step-by-Step Installation Guide
The following steps provide a general overview. Specifics may vary depending on the type of shake siding and your home’s structure. Always refer to the manufacturer’s instructions for your specific product.
- Preparation: Begin by preparing the wall surface. This involves cleaning the area, repairing any damaged sections, and ensuring the sheathing is sound and properly fastened. A smooth, clean surface is essential for a professional finish.
- Flashing Installation: Install flashing around windows and doors to prevent water penetration. This is a critical step to protect your home from water damage. Proper flashing ensures the longevity of your siding.
- Starter Course: Install the starter course, which provides a level base for the rest of the siding. This course should be perfectly aligned and level to ensure the rest of the installation is straight.
- Shake Application: Begin applying the shake siding, ensuring proper overlap and alignment. Use a nail gun or hammer to secure the shakes, following the manufacturer’s recommended nail placement guidelines. Maintain consistent spacing and alignment throughout the installation.
- Caulking and Finishing: After installation, caulk all seams and joints to prevent water intrusion. This step is crucial for preventing leaks and maintaining the integrity of your siding.
Horizontal vs. Vertical Application
The choice between horizontal and vertical application depends on personal preference and architectural style. Horizontal installation is more common and often perceived as more traditional, while vertical installation can create a modern, contemporary look. Both methods follow the same basic principles Artikeld above, but the orientation of the shakes changes the visual impact.
Achieving a Professional Finish
Several key factors contribute to a professional-looking finish. Consistent spacing between shakes is paramount. Using a level frequently ensures straight lines and avoids any sagging or unevenness. Precise cuts are essential, especially around windows and corners. Finally, meticulous caulking and finishing touches create a clean, polished look. Take your time, and don’t rush the process.
Maintenance and Repair of Shake Siding
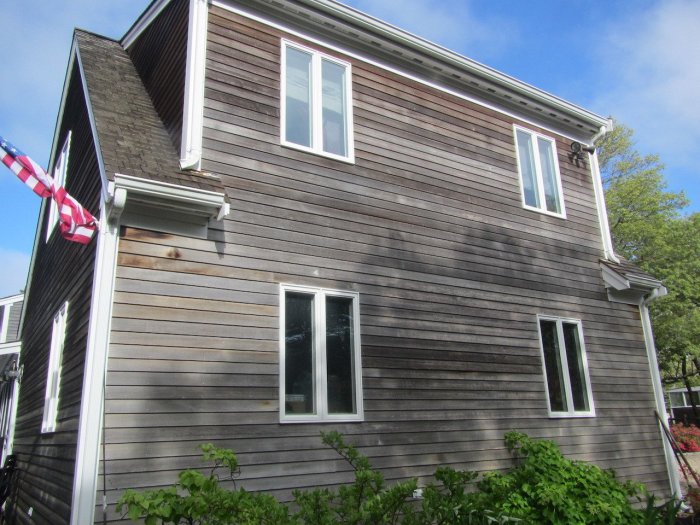
Shake siding, while offering a rustic charm and natural beauty, requires diligent maintenance to preserve its longevity and aesthetic appeal. Neglecting upkeep can lead to costly repairs and significantly shorten the lifespan of your siding. Understanding common problems and implementing a proactive maintenance plan is crucial for protecting your investment and ensuring your home remains visually stunning for years to come.
Common Issues and Problems
Shake siding, being a natural material, is susceptible to several issues. Rot is a significant concern, particularly in areas with high humidity or poor drainage. Moisture trapped between shakes can create the perfect environment for fungal growth, leading to decay and structural weakening. Insect infestation, especially from termites and carpenter ants, is another common problem. These insects bore into the wood, compromising its integrity and creating pathways for further damage. Finally, weathering, caused by sun exposure, rain, and wind, leads to discoloration, cracking, and the gradual deterioration of the shakes. Regular inspections and preventative measures are key to mitigating these risks.
Cleaning and Maintaining Shake Siding
Regular cleaning is essential to remove dirt, debris, and algae buildup that can accelerate deterioration. A gentle pressure washing, using a low-pressure nozzle to avoid damaging the shakes, is often effective. Be sure to maintain a safe distance to prevent damage. For stubborn stains, a solution of mild detergent and water can be applied, followed by thorough rinsing. It’s crucial to allow the siding to dry completely after cleaning to prevent moisture retention. Consider applying a wood preservative every few years to protect against rot and insect infestation. Choose a product specifically designed for exterior wood and follow the manufacturer’s instructions carefully.
Repairing Damaged Shake Siding
Repairing damaged shake siding often involves replacing individual shakes. For minor cracks or splits, wood filler can be used to seal the damage and prevent further deterioration. However, for severely damaged or rotten shakes, complete replacement is necessary. This involves carefully removing the damaged shake using a pry bar or similar tool, taking care not to damage surrounding shakes. A replacement shake should be carefully fitted into the space, ensuring a tight seal. Use appropriate nails or fasteners designed for exterior use and matching the existing siding. Finally, seal any gaps or cracks with exterior-grade caulk to prevent moisture intrusion.
Shake Siding Maintenance Checklist
Regular inspections are crucial for early detection of problems. The following checklist Artikels a proactive approach to maintaining your shake siding:
- Annual Inspection: Conduct a thorough visual inspection of all siding, looking for signs of rot, insect damage, cracks, or loose shakes.
- Spring Cleaning: Clean the siding using a low-pressure washer and mild detergent, ensuring complete drying afterwards.
- Wood Preservative Application: Apply a wood preservative every 2-3 years, following manufacturer instructions.
- Repair Damaged Shakes: Replace any damaged or rotten shakes promptly, ensuring proper installation and sealing.
- Gutter and Downspout Maintenance: Ensure gutters and downspouts are clear to prevent water damage.
Following this checklist will significantly extend the life of your shake siding and maintain its attractive appearance. Remember, proactive maintenance is far more cost-effective than extensive repairs later on.
Shake Siding Styles and Aesthetics
Shake siding offers a unique blend of rustic charm and modern appeal, significantly impacting a building’s overall aesthetic. The careful selection of style, color, and texture can elevate a home’s curb appeal and contribute to its lasting value. Understanding the various options available is crucial for achieving the desired look and feel.
The visual impact of shake siding hinges on several key factors: the type of shake (hand-split, machine-made, or tapered), the pattern of installation, and the chosen color and texture. These elements work together to create a specific mood and architectural style. Let’s explore how these choices affect the final product.
Shake Siding Profiles and Patterns
Shake siding comes in a variety of profiles, each contributing a distinct aesthetic. Hand-split shakes, for example, boast an irregular, natural texture that exudes rustic charm. Their uneven lengths and surfaces create a visually interesting and dynamic façade. Machine-made shakes, on the other hand, offer a more uniform and consistent appearance, often preferred for a cleaner, more contemporary look. Tapered shakes, with their gradually thinning profile, provide a classic and elegant feel, especially when installed in a staggered pattern. The installation pattern itself—whether running horizontally, vertically, or in a more complex arrangement—further influences the overall impression.
Architectural Styles and Shake Siding
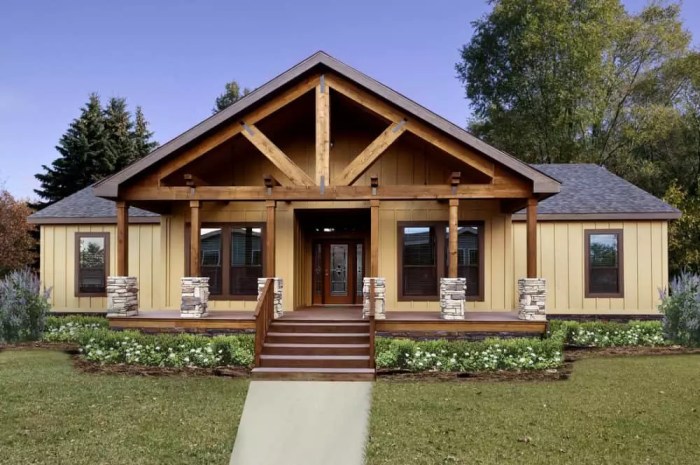
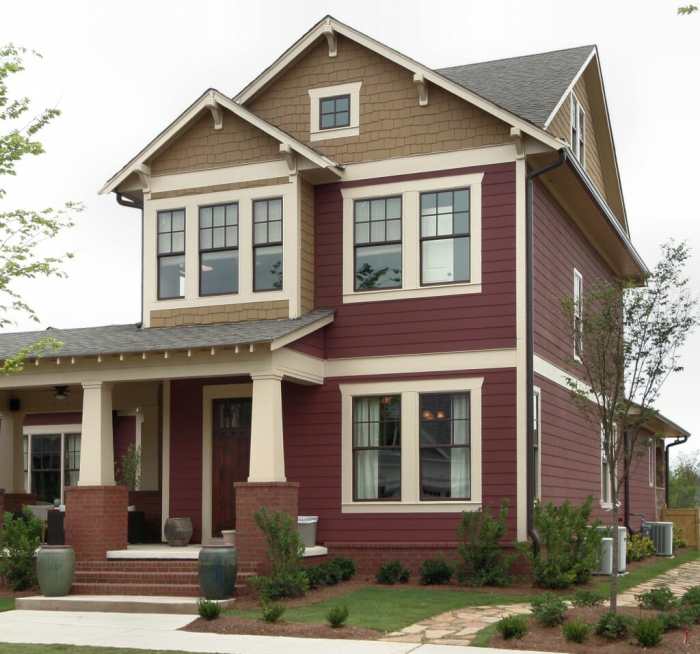
Shake siding’s versatility allows it to complement a wide range of architectural styles. Its rustic nature makes it a natural fit for homes with Craftsman, Cape Cod, or mountain-lodge aesthetics. The natural textures and colors can blend seamlessly with the surrounding landscape, creating a cohesive and harmonious design. However, with careful selection of profile and color, shake siding can also enhance contemporary or even transitional styles, adding a touch of warmth and character without compromising modern design principles. For instance, a sleek, machine-made shake in a neutral color can beautifully complement a minimalist design.
Color and Texture Impact on Appearance
The color and texture of shake siding play a pivotal role in shaping the overall look of a building. Darker shades, such as deep browns or grays, tend to create a more dramatic and sophisticated appearance, emphasizing the texture and depth of the shakes. Lighter colors, such as creams or light grays, offer a softer, more airy feel, often making the building appear larger and brighter. The texture, whether rough and rustic or smooth and refined, also significantly contributes to the overall aesthetic. A smooth, machine-made shake might be chosen for a clean, modern look, while a rough-hewn, hand-split shake would create a more traditional and rustic feel. Consider the surrounding environment and the desired mood when making these selections.
Examples of Shake Siding Styles and Applications
The following table showcases a variety of shake siding styles and their applications, illustrating the diverse aesthetic possibilities.
| Image Description | Shake Type | Architectural Style |
|---|---|---|
| A rustic, hand-split cedar shake siding with a deep brown hue, showcasing irregular lengths and textures. The irregular texture and varied lengths create visual interest and depth. | Hand-split Cedar | Rustic, Craftsman |
| A contemporary home featuring smooth, machine-made shakes in a light gray color. The clean lines and uniform appearance contribute to a modern aesthetic. | Machine-made Fiber Cement | Contemporary, Modern |
| A charming Cape Cod style home with tapered cedar shakes in a warm, medium brown tone. The staggered pattern creates visual rhythm and a classic appeal. | Tapered Cedar | Cape Cod, Traditional |
Cost Considerations of Shake Siding
Choosing shake siding for your home is a significant investment, impacting both the aesthetic appeal and the overall value of your property. Understanding the cost factors involved is crucial for budgeting and making informed decisions. This section will break down the various expenses associated with shake siding, allowing you to accurately estimate the total cost for your project.
Several key factors significantly influence the final cost of shake siding. These factors interact in complex ways, meaning a precise estimate requires careful consideration of each element. Ignoring any of these could lead to significant budget overruns.
Material Costs
The cost of shake siding itself varies widely depending on the type of wood used, its grade, and its thickness. Premium woods like cedar or redwood, known for their durability and aesthetic appeal, command higher prices than less expensive options such as pine or fir. The grade of the wood, indicating its quality and freedom from defects, also directly impacts cost. Higher grades, with fewer knots and imperfections, are more expensive. Finally, thicker shakes generally cost more, offering increased durability and longevity but also adding to the overall material expense. For example, a high-grade cedar shake might cost $8-$12 per square foot, while a lower-grade pine shake could be closer to $4-$6 per square foot. These are estimates, and regional variations will apply.
Installation Costs
Labor costs represent a substantial portion of the overall project expense. The complexity of the installation, including factors such as the house’s shape, the presence of difficult-to-reach areas, and the need for specialized tools and techniques, all influence the hourly or per-square-foot rate charged by installers. Experienced and reputable installers will generally charge more than less experienced contractors. Expect to pay anywhere from $3 to $8 or more per square foot for professional installation, depending on location and complexity. DIY installation can reduce this cost, but it requires significant skill and time.
Regional Variations
The cost of shake siding can vary significantly depending on your geographical location. The availability of local wood sources, the prevailing labor rates, and the regional demand for shake siding all contribute to price fluctuations. Areas with a high demand for premium wood shakes or a shortage of skilled installers will generally have higher costs compared to regions where these resources are more readily available. For instance, coastal regions with high demand for cedar shake siding might have significantly higher prices than inland areas.
Comparison with Other Cladding Options
Shake siding’s cost should be compared to alternative exterior cladding options such as vinyl, fiber cement, brick, or stucco. While shake siding offers a unique aesthetic appeal and potential long-term value, it’s generally more expensive than vinyl siding but less expensive than brick or stone veneer. Fiber cement siding falls somewhere in the middle, offering a good balance of cost and durability. A comprehensive cost analysis should include not just the initial material and installation costs but also the expected lifespan and long-term maintenance requirements of each option.
Estimating Total Project Cost
To estimate the total cost of a shake siding project, you need to consider the following:
First, measure the total square footage of the area to be sided. Then, determine the cost per square foot of the chosen shake material, adding in any additional materials such as flashing, underlayment, and fasteners. Next, estimate the labor cost per square foot, based on local rates and the project’s complexity. Finally, add a contingency of 10-15% to account for unexpected expenses or cost overruns.
Total Cost = (Material Cost per sq ft + Labor Cost per sq ft) * Total Square Footage + Contingency (10-15%)
For example, if you have 1000 square feet of wall space, choose a shake material costing $10 per square foot, and the labor cost is $5 per square foot, the calculation would be:
Total Cost = ($10 + $5) * 1000 sq ft + ($1500 * 0.15) = $16,500
This is a simplified example; actual costs can vary considerably based on the factors discussed earlier. It’s crucial to obtain multiple quotes from reputable contractors to get a more accurate and comprehensive estimate.
Potential Expenses Associated with Shake Siding Installation and Maintenance
Beyond the initial material and installation costs, you should factor in potential expenses associated with ongoing maintenance and repair. This includes periodic cleaning, staining or sealing to protect the wood from the elements, and potential repairs due to damage from weather or insects. The frequency and cost of these maintenance activities depend on factors such as the climate, the type of wood used, and the quality of the initial installation. Budgeting for these long-term expenses is crucial for responsible financial planning.
Environmental Impact of Shake Siding
Choosing shake siding involves more than just aesthetics and cost; it carries significant environmental implications. Understanding the lifecycle impact – from material sourcing to disposal – is crucial for making informed decisions that align with sustainability goals. This section analyzes the environmental footprint of various shake siding materials and compares them to alternatives.
Sustainable Harvesting and Material Sourcing
The environmental impact of wood shake siding hinges heavily on the sourcing practices. Sustainably harvested wood, certified by organizations like the Forest Stewardship Council (FSC), minimizes deforestation and promotes responsible forest management. This ensures that trees are harvested at a rate that allows for regeneration, preserving biodiversity and ecosystem health. Conversely, shake siding sourced from unsustainable logging practices contributes to deforestation, habitat loss, and carbon emissions. Recycled or reclaimed wood offers a more sustainable alternative, diverting waste from landfills and reducing the demand for newly harvested timber. The origin and certification of the wood are critical factors to consider when assessing the environmental impact.
Manufacturing and Transportation Impacts
The manufacturing process for shake siding, regardless of the material, consumes energy and generates waste. Energy use varies depending on the type of wood, the manufacturing techniques employed, and the scale of production. For example, the production of composite shake siding often involves the use of plastics and resins, which have their own environmental impacts associated with their extraction, processing, and potential for microplastic pollution. Transportation adds to the carbon footprint, with longer distances resulting in higher emissions. The closer the manufacturing facility is to the construction site, the lower the transportation-related environmental impact.
Carbon Footprint Comparison with Alternatives
Shake siding’s carbon footprint compares differently to various alternatives. Compared to materials like vinyl siding, which is derived from petroleum, wood shake siding can offer a lower carbon footprint, especially if sourced sustainably. However, the carbon sequestration capacity of wood siding can be offset by the energy used in manufacturing and transportation. Metal siding, while durable and recyclable, requires significant energy for its production. A comprehensive life-cycle assessment (LCA) is needed to accurately compare the carbon footprints of different siding materials, taking into account factors such as material sourcing, manufacturing, transportation, installation, maintenance, and end-of-life disposal.
Environmental Aspects of Shake Siding Options
| Shake Siding Type | Material Sourcing | Manufacturing Impact | Transportation Impact |
|---|---|---|---|
| Sustainably Harvested Wood | Low environmental impact, promotes forest regeneration | Moderate energy consumption, minimal waste | Varies depending on distance; lower impact with local sourcing |
| Unsustainably Harvested Wood | High environmental impact, contributes to deforestation | Moderate energy consumption, minimal waste | Varies depending on distance |
| Recycled Wood Shake | Low environmental impact, diverts waste from landfills | Moderate energy consumption, minimal waste | Varies depending on distance |
| Composite Shake Siding | Variable depending on materials used; potential for high impact if using non-recycled plastics | Moderate to high energy consumption, potential for waste generation | Varies depending on distance |
Ultimately, the decision to use shake siding hinges on a careful consideration of aesthetics, budget, and long-term maintenance. This guide has provided a comprehensive overview of the factors involved, from material selection and installation to ongoing care and cost implications. By weighing the advantages and disadvantages of various options and understanding the potential challenges, you can make an informed decision that results in a beautiful and durable exterior for your home. Remember, the right shake siding can dramatically enhance your property’s value and curb appeal, providing a return on investment that extends far beyond the initial cost. So, take your time, do your research, and choose wisely.
Expert Answers
What is the average lifespan of shake siding?
The lifespan varies greatly depending on the material (cedar can last 30+ years, composite much longer), climate, and maintenance. Proper maintenance significantly extends its life.
Can I install shake siding myself?
While possible for DIY enthusiasts with experience, professional installation is generally recommended for a superior, long-lasting result and to avoid costly mistakes.
How often should I clean my shake siding?
At least once a year, preferably in spring or fall, using a gentle cleaner and soft brush. Pressure washing can damage the siding.
What are the common signs of shake siding damage?
Look for rot, insect infestation (especially termites), warping, cracks, and discoloration. Address issues promptly to prevent further damage.
Is shake siding fire resistant?
Natural wood shake siding is not inherently fire-resistant. Treat it with fire-retardant chemicals to improve safety, especially in fire-prone areas. Composite options often offer better fire resistance.
