Transforming your home’s exterior with a fresh coat of paint on your vinyl siding can dramatically boost curb appeal and property value. But painting vinyl isn’t as simple as slapping on some paint; it requires understanding the nuances of vinyl siding, paint compatibility, and proper application techniques. This comprehensive guide will walk you through each step, from preparing the surface and selecting the right paint to mastering painting techniques and ensuring long-lasting results. We’ll delve into the specifics of different vinyl types, paint options, and maintenance strategies, empowering you to achieve a professional-looking finish.
We’ll cover everything from choosing the perfect color to address potential issues and troubleshoot common problems. Get ready to learn how to expertly paint your vinyl siding, saving money and adding significant value to your home. This isn’t just about aesthetics; it’s about maximizing your investment and creating a stunning exterior that stands the test of time.
Understanding Vinyl Siding and Paint Compatibility

Painting vinyl siding might seem like a simple home improvement project, but achieving a durable, long-lasting finish requires understanding the nuances of vinyl and paint compatibility. Choosing the wrong paint can lead to peeling, cracking, and an overall unsatisfactory result, wasting both time and money. This section delves into the crucial aspects of vinyl siding and paint compatibility to ensure your project’s success.
Vinyl Siding Types and Paint Receptivity
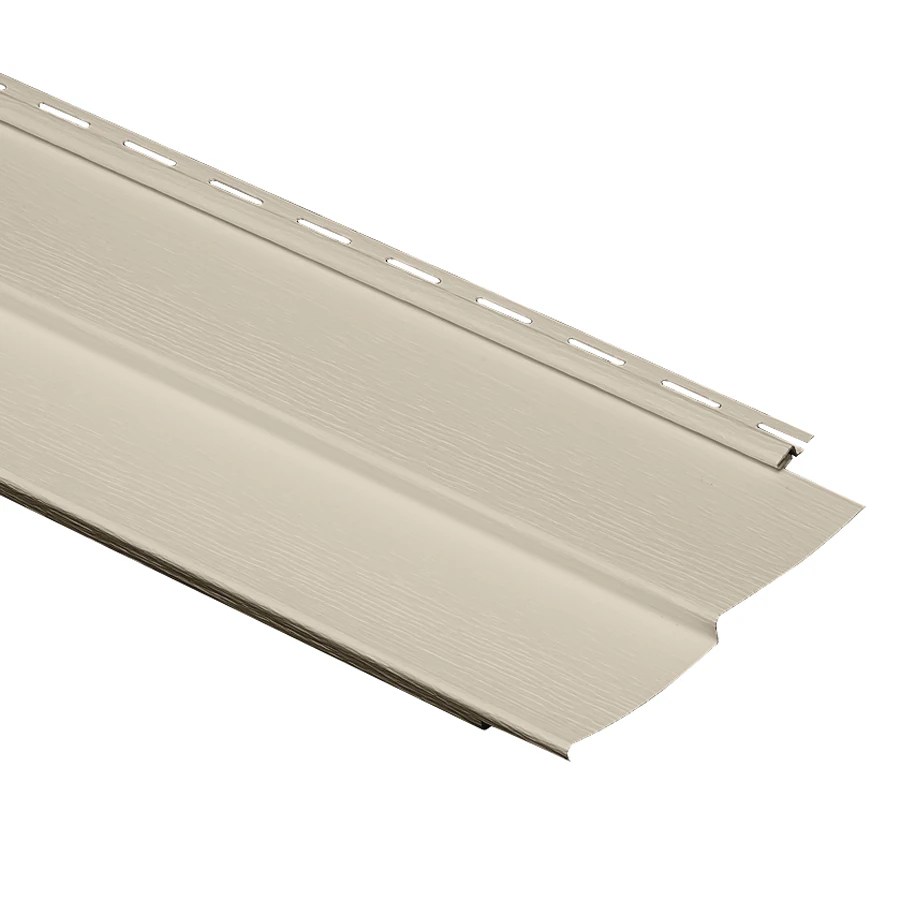
Vinyl siding isn’t a monolithic material. Different types exhibit varying degrees of paint adhesion. The manufacturing process, the specific formulation of the vinyl, and even the age of the siding can all impact how well paint will bond. Generally, smoother siding tends to provide a better surface for paint, while heavily textured siding might require more surface preparation and a specialized paint. Older siding, especially if it’s weathered or chalky, presents a greater challenge. Always inspect your siding carefully before beginning any painting project.
Vinyl Siding Chemical Composition and Paint Adhesion
Vinyl siding’s primary component is polyvinyl chloride (PVC), a thermoplastic polymer. PVC’s chemical structure affects its interaction with paint. The non-porous nature of PVC means paint doesn’t readily penetrate the surface, relying instead on mechanical adhesion. This is why surface preparation, including cleaning and possibly priming, is critical for successful paint application. The presence of plasticizers in the vinyl also plays a role; these additives can migrate to the surface over time, potentially interfering with paint adhesion. This is why selecting a paint specifically designed for vinyl is crucial.
Paint Types Suitable for Vinyl Siding
Several paint types are marketed for vinyl siding, each with its advantages and disadvantages. Acrylic latex paints are popular due to their flexibility and relatively low cost. However, 100% acrylic paints generally offer superior durability, UV resistance, and flexibility, making them a more reliable choice for long-term protection. Alkyd paints (oil-based) were once common, but their long drying times and potential for cracking on vinyl have made them less preferred. Choosing a high-quality paint designed for exterior use and specifically labeled for vinyl siding is paramount. Consider paints with excellent adhesion properties and UV protection to ensure the longevity of your paint job.
Comparison of Paint Types for Vinyl Siding
| Paint Type | Pros | Cons | Cost |
|---|---|---|---|
| Acrylic Latex | Affordable, relatively easy to apply, good flexibility | May not be as durable as 100% acrylic, less UV resistance | $ |
| 100% Acrylic | Excellent durability, superior UV resistance, flexible, resists mildew | More expensive than acrylic latex | $$ |
| Alkyd (Oil-Based) | Excellent durability (when properly applied to suitable substrates) | Long drying time, potential for cracking on vinyl, strong odor | $$ |
(Note: Cost is relative and can vary significantly based on brand and quality. $ represents low cost, $$ represents medium to high cost.)
Surface Preparation for Painting Vinyl Siding

Painting vinyl siding can dramatically improve your home’s curb appeal, but a successful paint job hinges on meticulous surface preparation. Skipping this crucial step can lead to peeling paint, uneven coverage, and a less-than-professional finish, ultimately wasting your time and money. Proper preparation ensures the paint adheres correctly, providing a long-lasting, beautiful result. Think of it as laying a strong foundation for a skyscraper – without it, the whole project is at risk.
Proper cleaning is paramount for optimal paint adhesion. Dirt, mildew, and other contaminants create a barrier between the paint and the siding, hindering the paint’s ability to bond effectively. This can lead to premature paint failure, requiring costly repainting sooner than expected. Furthermore, a clean surface allows for a more even application of paint, resulting in a smoother, more professional-looking finish.
Cleaning Vinyl Siding
Thorough cleaning is the first step in preparing your vinyl siding for painting. Begin by rinsing the siding with a garden hose to remove loose dirt and debris. For heavily soiled siding, a solution of mild detergent and water is effective. Apply this solution using a soft-bristled brush or a long-handled scrub brush to reach all areas. Rinse thoroughly again with the garden hose, ensuring all traces of detergent are removed. Allow the siding to dry completely before proceeding to the next step. For stubborn stains, consider using a pressure washer, but maintain a safe distance to avoid damaging the siding. Always test any cleaning solution on an inconspicuous area first to ensure it doesn’t damage the vinyl.
Mildew Removal
Mildew is a common problem on vinyl siding, especially in humid climates. Not only is mildew unsightly, but it also compromises the paint’s adhesion. To remove mildew, use a solution of one part bleach to three parts water. Apply this solution using a soft-bristled brush, ensuring thorough coverage of affected areas. Allow the solution to sit for 15-20 minutes before rinsing thoroughly with a garden hose. Always wear protective gloves and eyewear when working with bleach. For particularly stubborn mildew, consider using a mildew-removing product specifically designed for vinyl siding. After treatment, allow the siding to dry completely before painting.
Repairing Damaged Vinyl Siding
Before painting, inspect the siding for any damage such as cracks, holes, or loose panels. Repairing these imperfections before painting is crucial for a professional-looking finish and to prevent future problems. Minor cracks can often be filled with a high-quality vinyl caulk, matching the color of your siding as closely as possible. For larger holes or damaged panels, replacement may be necessary. This involves carefully removing the damaged section and installing a new panel, ensuring a snug fit. Use appropriate tools and follow manufacturer instructions for proper installation. Once repairs are complete, allow the caulk to fully cure before painting.
Step-by-Step Guide for Vinyl Siding Preparation
A systematic approach ensures a flawless paint job. Here’s a step-by-step guide:
- Clean the siding: Rinse with a garden hose, then wash with a mild detergent solution, and rinse again thoroughly. Allow to dry completely.
- Remove mildew: Apply a bleach solution (1:3 bleach to water), let it sit, and rinse. Dry completely.
- Repair damage: Fill minor cracks with vinyl caulk, replace damaged panels as needed. Allow caulk to cure.
- Prime (if necessary): If painting a dark color over a light color, or if the siding is particularly porous, a primer is recommended for better adhesion and coverage.
- Final inspection: Before painting, conduct a final inspection to ensure the surface is clean, dry, and free of any imperfections.
Following these steps will create a surface perfectly primed for painting, ensuring a long-lasting and beautiful finish. Remember, proper preparation is key to a successful paint job, saving you time, money, and potential headaches down the line.
Painting Techniques and Methods
Painting vinyl siding successfully hinges on choosing and executing the right painting technique. The method you select will significantly impact the final look, longevity, and overall efficiency of the project. Consider factors like the size of the area, the complexity of the siding design, and your own comfort level with different tools before making your decision.
The three primary methods for painting vinyl siding are brush painting, roller painting, and spray painting. Each has its own advantages and disadvantages, and the optimal choice depends on your specific circumstances.
Brush Painting
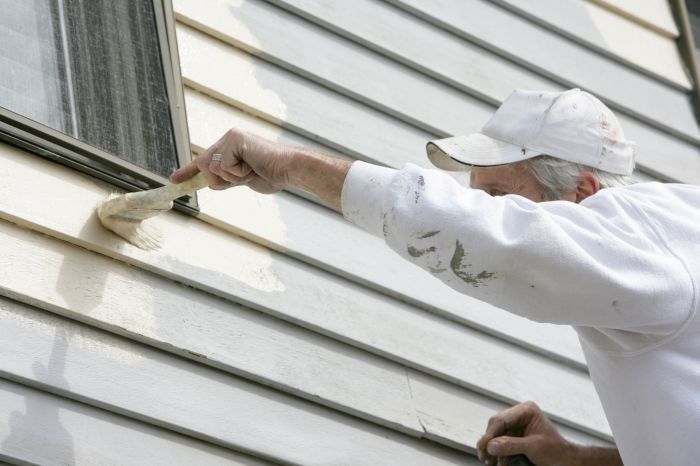
Brush painting offers excellent control and precision, making it ideal for intricate details and hard-to-reach areas. A high-quality brush, with synthetic bristles designed for exterior paints, ensures even coverage and minimizes the risk of brush strokes. However, brush painting is labor-intensive and time-consuming, especially for large surfaces. It requires meticulous attention to detail to avoid lap marks and ensure a uniform finish. The best results are achieved using a combination of short, even strokes and working in manageable sections.
Roller Painting
Roller painting provides a faster and more efficient method for covering large, flat surfaces. A high-density roller cover with a nap length appropriate for the siding texture will promote even paint distribution. This technique reduces the risk of lap marks compared to brushing, but still requires careful overlapping of roller strokes to avoid streaks. Roller painting may not be as effective for intricate detailing or hard-to-reach areas. Using an extension pole will greatly improve efficiency when painting higher sections of siding.
Spray Painting
Spray painting offers the fastest coverage, especially beneficial for expansive areas. An airless sprayer delivers a consistent, even coat, minimizing brushstrokes and lap marks. However, spray painting requires careful preparation to prevent overspray onto unwanted surfaces. It also necessitates appropriate safety precautions, including wearing a respirator mask to avoid inhaling paint fumes. Spray painting can be more expensive than brushing or rolling due to equipment rental or purchase costs. Overspray can also lead to wasted paint and potential environmental concerns.
Proper Painting Tools and Equipment
Selecting the right tools and equipment is crucial for a professional-looking finish and a smooth painting process. The quality of your tools directly impacts the quality of your work. Investing in durable, high-quality tools will save time and frustration in the long run. Furthermore, proper equipment ensures safety and efficiency throughout the project.
A well-equipped painter will have a range of essential tools at their disposal.
- High-quality brushes (various sizes, synthetic bristles)
- High-density roller covers and frames (various nap lengths)
- Paint trays and liners
- Extension poles for rollers and brushes
- Drop cloths or painter’s plastic to protect surrounding areas
- Painter’s tape for masking delicate areas
- Putty knife for scraping loose paint or debris
- Wire brush for cleaning siding
- Ladder (if necessary)
- Safety glasses and respirator mask (especially for spray painting)
In addition to tools, selecting the right paint is critical. Use a high-quality exterior acrylic latex paint specifically formulated for vinyl siding. This type of paint offers superior durability, weather resistance, and flexibility, essential for long-lasting results.
Color Selection and Aesthetics

Choosing the right paint color for your vinyl siding is a crucial step in enhancing your home’s curb appeal and overall value. The color you select will significantly impact the perceived size, style, and even the mood of your house. Careful consideration of architectural style, surrounding landscape, and the interplay of light and shadow is paramount for achieving a visually stunning and harmonious result.
Color selection isn’t simply about personal preference; it’s about understanding the principles of color theory and how they interact with your home’s unique characteristics. A well-chosen color scheme can dramatically elevate your property’s aesthetic, while a poor choice can detract from its beauty. This section will guide you through the process of making informed color decisions that will transform your home’s exterior.
Architectural Style and Color Harmony
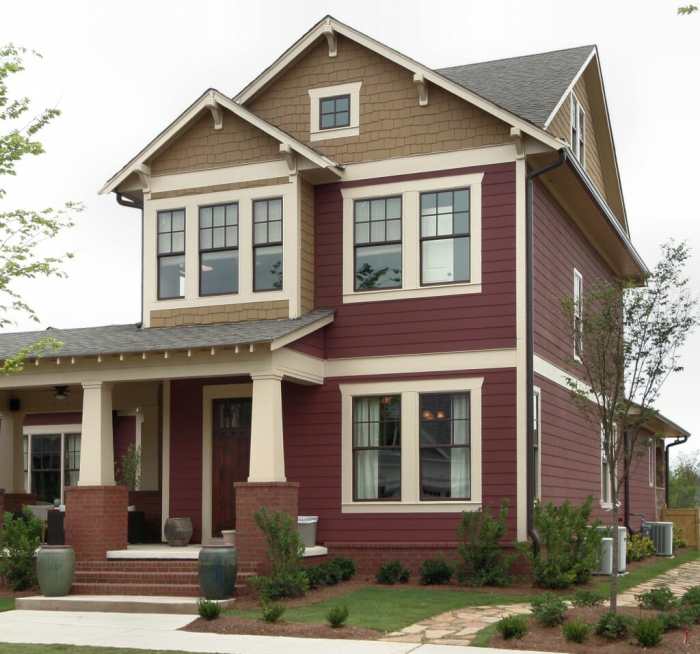
The architectural style of your home significantly influences the appropriate color palette. A Victorian home, for example, might lend itself to rich, deep colors like burgundy or forest green, reflecting the ornate details and historical context. In contrast, a contemporary home might benefit from a clean, minimalist palette featuring neutral tones or bold, monochromatic schemes. Consider the dominant features of your home’s architecture – its lines, proportions, and decorative elements – when selecting colors that will complement rather than clash. For instance, a home with many intricate details might benefit from a darker, more saturated color to highlight those features, while a simpler home might look better with lighter, brighter shades.
Light and Shadow’s Influence on Color Perception
The way light interacts with your home’s exterior dramatically affects how paint colors appear. South-facing walls receive significantly more sunlight than north-facing walls, causing colors to appear lighter and brighter on the south side. Conversely, north-facing walls might appear darker and cooler. Shadows cast by trees, overhangs, or other structures further complicate this interaction. A color that looks vibrant in direct sunlight might appear dull in shade. Therefore, it’s crucial to consider the orientation of your home and the natural light conditions throughout the day when selecting your paint colors. Test paint samples in different areas and at various times of day to see how the color shifts with changing light conditions. Consider using lighter colors on areas that receive more direct sunlight and darker colors on areas that remain in shadow to create balance and visual harmony.
Successful Vinyl Siding Color Combinations
Numerous successful color combinations exist for vinyl siding. Classic combinations, such as white or cream siding with black or dark brown trim, offer timeless elegance. For a more modern look, consider pairing gray siding with charcoal or navy blue trim. Earthy tones, like beige or taupe, paired with warm browns or greens, create a natural and inviting aesthetic. For a bolder statement, you could choose a deep blue or green siding with white or off-white trim. Remember that the surrounding landscape and the style of your home will ultimately influence the best color combination for your property. Exploring online resources or consulting with a design professional can offer valuable inspiration and guidance.
Paint Sheen and Visual Effect
Imagine three identical vinyl siding samples, each painted the same color, but with a different sheen. The first sample, painted with a flat sheen, presents a matte finish, minimizing light reflection and creating a subtle, understated appearance. It’s excellent for hiding imperfections but may require more frequent cleaning. The second sample, painted with a satin sheen, offers a slightly more luminous finish, reflecting light moderately while still maintaining a relatively low-gloss look. It offers a balance between durability and visual subtlety. The third sample, painted with a semi-gloss sheen, displays a noticeable shine, reflecting more light and creating a more pronounced, polished look. This sheen is more durable and easier to clean but can highlight surface imperfections. The choice of sheen impacts not only the visual appeal but also the practical aspects of maintenance and durability.
Maintaining Painted Vinyl Siding
Protecting your investment in painted vinyl siding requires a proactive maintenance strategy. Neglecting this crucial step can lead to premature deterioration, impacting both the aesthetic appeal and the longevity of your home’s exterior. Regular cleaning and careful attention to detail are key to preserving the vibrant color and structural integrity of your painted siding.
Long-Term Maintenance Requirements
Maintaining painted vinyl siding involves a combination of preventative measures and timely interventions. This isn’t a one-time task; rather, it’s an ongoing process that will ensure your siding remains attractive and protected for years to come. Consistent upkeep minimizes the need for extensive and costly repairs down the line. Think of it as preventative maintenance for your home’s exterior, similar to regularly servicing your car to prevent major mechanical issues.
Preventing Chipping, Peeling, and Fading
The key to preventing paint damage lies in preparation and protection. Choosing high-quality, exterior-grade paint specifically formulated for vinyl siding is paramount. Proper surface preparation before painting—including cleaning and priming—is equally crucial. Furthermore, avoiding power washing with excessive pressure can prevent chipping. Regularly inspecting the siding for any signs of damage, such as loose or damaged caulking around windows and doors, allows for prompt repairs, preventing further deterioration. Finally, selecting a paint with UV inhibitors will help mitigate fading caused by prolonged sun exposure.
Cleaning and Protecting Painted Vinyl Siding
Cleaning painted vinyl siding should be done at least twice a year, ideally in spring and fall. A gentle solution of mild detergent and water, applied with a soft-bristled brush or sponge, is sufficient for most cleaning tasks. Avoid abrasive cleaners or high-pressure washing, which can damage the paint and the siding itself. After cleaning, rinse thoroughly with clean water to remove all traces of soap. For stubborn stains, consider using a specialized vinyl siding cleaner, following the manufacturer’s instructions carefully. Regular cleaning prevents the build-up of dirt and grime, which can accelerate paint degradation.
Maintenance Schedule for Painted Vinyl Siding
A well-defined maintenance schedule is essential for preserving the beauty and longevity of your painted vinyl siding. The following schedule provides a framework; adjustments may be necessary depending on your specific climate and environmental conditions.
| Task | Frequency | Notes |
|---|---|---|
| Regular Cleaning (mild detergent & water) | Twice yearly (Spring & Fall) | Focus on removing dirt, pollen, and cobwebs. |
| Inspection for damage (chips, cracks, peeling) | Annually | Address minor repairs promptly to prevent larger issues. |
| Repainting | Every 5-10 years (depending on paint quality and climate) | Consider repainting sooner if significant fading or damage is observed. |
Proper maintenance extends the life of your painted vinyl siding significantly, saving you money on costly repairs and replacements in the long run.
Potential Issues and Troubleshooting
Painting vinyl siding, while offering a cost-effective way to refresh your home’s exterior, presents unique challenges. Understanding potential problems and their solutions is crucial for a successful and long-lasting paint job. Ignoring these issues can lead to premature paint failure, requiring costly repairs down the line. This section will address common problems and provide practical solutions to ensure your project’s success.
Paint Peeling, Bubbling, or Cracking
Paint failure, manifested as peeling, bubbling, or cracking, often stems from inadequate surface preparation. Insufficient cleaning, leaving behind dirt, mildew, or old paint, prevents proper adhesion. Similarly, applying paint to a surface that’s too hot or cold can also lead to adhesion problems. Temperature extremes affect the paint’s drying process and its ability to bond with the vinyl. Another common culprit is using an inappropriate paint type. Oil-based paints, for instance, are less flexible than acrylic latex paints, making them more prone to cracking on vinyl siding due to the siding’s expansion and contraction with temperature changes.
Causes of Uneven Paint Application
Uneven paint application is a common aesthetic issue resulting from several factors. Inadequate stirring of the paint can lead to inconsistent pigment distribution, resulting in variations in color and sheen. Using an inappropriate application method, such as applying too thick a coat or employing the wrong type of sprayer, can also lead to runs, drips, and an uneven finish. Insufficient surface preparation, such as failing to fill minor gaps or cracks, creates unevenness. Lastly, environmental conditions like high humidity or wind can negatively affect the evenness of the paint application.
Correcting Mistakes During Painting
Minor mistakes during the painting process can often be corrected. For instance, fresh paint drips or runs can be carefully removed with a damp cloth or sponge before they dry. For larger areas of uneven paint, light sanding followed by re-application of paint may be necessary. However, it’s crucial to allow sufficient drying time between sanding and repainting to ensure proper adhesion. Remember, meticulous surface preparation is key to minimizing mistakes in the first place. A thorough cleaning and careful application of primer can significantly reduce the likelihood of issues requiring correction. For more extensive issues, such as large areas of peeling or bubbling, it may be necessary to remove the affected paint completely and start again with proper surface preparation. Always test any correction method in an inconspicuous area before applying it to a larger surface to avoid causing further damage.
Painting vinyl siding is a worthwhile investment that can dramatically improve your home’s appearance and value. By following the steps Artikeld in this guide – from meticulous surface preparation and careful paint selection to employing the right techniques and implementing a solid maintenance plan – you can achieve a professional, long-lasting finish. Remember, the key to success lies in understanding the unique properties of vinyl siding and choosing the appropriate materials and methods. Don’t hesitate to tackle this project yourself; with the right knowledge and a bit of elbow grease, you can transform your home’s exterior with confidence.
Quick FAQs
Can I paint over existing paint on vinyl siding?
Yes, but proper surface preparation is crucial. Clean the existing paint thoroughly, ensuring it’s free from mildew and loose particles. If the existing paint is peeling or damaged, you’ll need to repair those areas before repainting.
How long does vinyl siding paint last?
With proper preparation and high-quality paint, you can expect vinyl siding paint to last 5-10 years, sometimes longer depending on climate and maintenance.
What’s the best time of year to paint vinyl siding?
Spring or fall are ideal. Avoid extreme heat or cold, as these can negatively affect paint adhesion and drying time. Aim for temperatures between 50-80°F (10-27°C).
Do I need a primer for vinyl siding?
While not always strictly necessary, a high-quality primer specifically designed for vinyl siding can improve paint adhesion and coverage, especially on darker colors or previously painted surfaces.
What happens if I use the wrong type of paint?
Using incompatible paint can lead to peeling, cracking, and premature failure. Always use a paint specifically formulated for exterior use and vinyl siding.


