Transforming your home’s exterior with Hardie siding offers unparalleled durability and curb appeal. But before you dive into this project, understanding the intricacies of Hardie siding installation is crucial for a successful and long-lasting result. This comprehensive guide will walk you through every step, from material selection and preparation to the finishing touches, ensuring your project is a masterpiece, not a disaster.
We’ll cover everything from choosing the right Hardie siding type for your climate and budget to mastering the techniques of installation, flashing, and caulking. We’ll also address common pitfalls and offer solutions to ensure a professional finish that protects your home for years to come. Get ready to learn the secrets to a flawless Hardie siding installation.
Hardie Siding Materials & Types
Choosing the right Hardie siding for your home is a crucial decision impacting both aesthetics and longevity. Understanding the various types available, their properties, and cost-effectiveness is paramount for making an informed choice. This section will delve into the specifics of different Hardie siding options, comparing their performance across various climates and contrasting them with other popular siding materials.
Hardie Siding Types and Their Properties
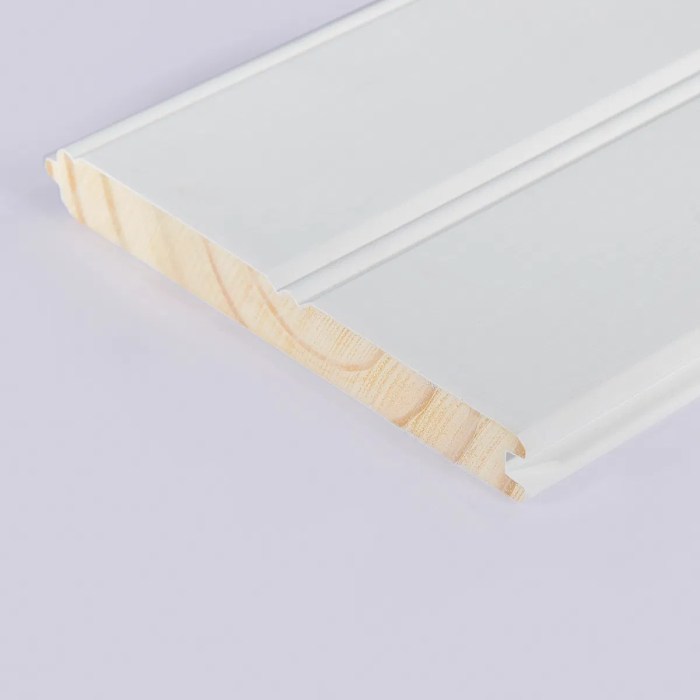
James Hardie offers a range of fiber cement siding products designed to meet diverse architectural styles and climate conditions. Key differences lie in their profiles, textures, and thicknesses, influencing their durability, maintenance requirements, and overall cost. The most common types include HardiePlank® lap siding, HardieShingle®, HardiePanel®, and HardieTrim®. HardiePlank® mimics traditional wood lap siding with a variety of widths and textures, providing a classic look. HardieShingle® offers a more rustic, shingle-style aesthetic. HardiePanel® is a larger format siding ideal for modern designs, while HardieTrim® provides complementary trim pieces for a finished look. Each type boasts fiber cement’s inherent strength and resistance to rot, insects, and fire.
Cost-Effectiveness of Hardie Siding Options
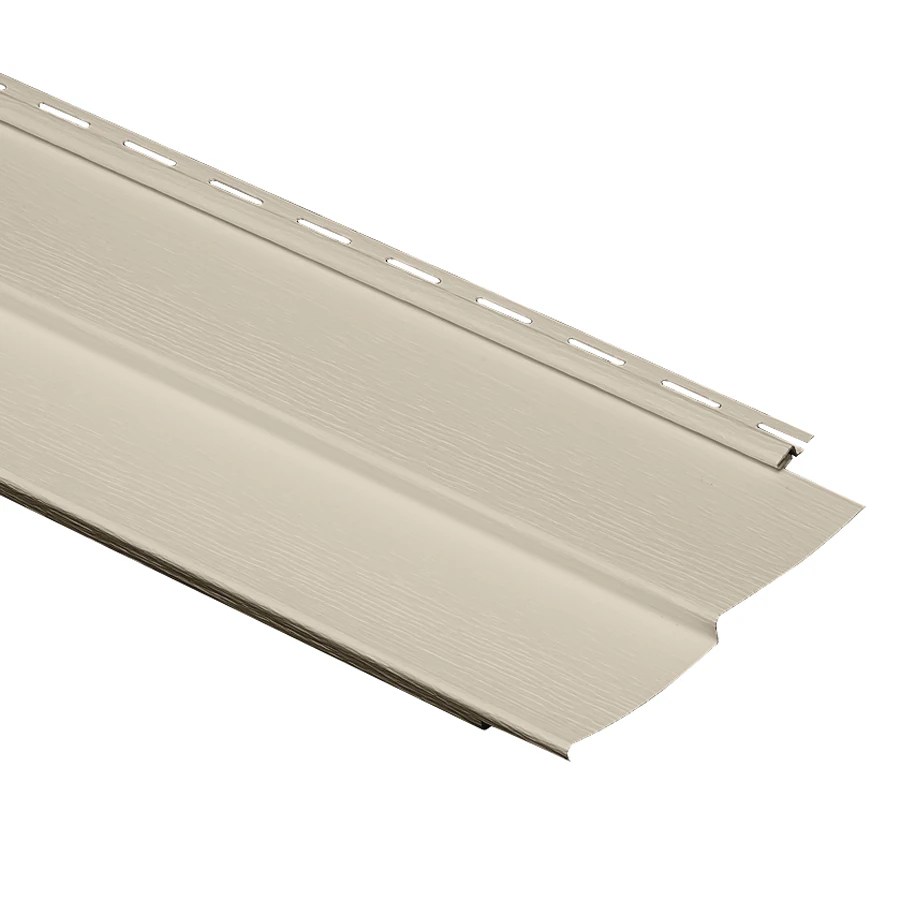
While Hardie siding represents a premium investment compared to vinyl, its longevity and low maintenance translate to long-term cost savings. The initial cost varies based on the chosen profile, texture (smooth, cedar, etc.), and the complexity of the installation. For instance, HardiePlank® lap siding generally falls within a mid-range price bracket, while the larger-format HardiePanel® might be slightly more expensive due to fewer pieces needed for installation. However, this higher upfront cost is often offset by the reduced need for frequent repairs and replacements common with less durable siding materials.
Hardie Siding and Climate Considerations
The performance of Hardie siding varies subtly depending on the climate. In regions with extreme temperature fluctuations, the inherent stability of fiber cement proves advantageous, minimizing expansion and contraction issues that can lead to cracking or warping. In coastal areas, its resistance to moisture and salt spray is crucial for preventing damage. However, even in harsh climates, proper installation and regular maintenance (such as repainting every few years) are key to maximizing the lifespan of any siding. For instance, in humid climates, ensuring proper ventilation behind the siding is vital to prevent moisture buildup.
Comparison of Siding Materials
| Feature | Fiber Cement (Hardie) | Vinyl Siding | Wood Siding |
|---|---|---|---|
| Cost (per sq ft) | Medium-High | Low | Medium-High |
| Durability | High (50+ years) | Medium (20-30 years) | Low-Medium (15-25 years, varies greatly) |
| Maintenance | Low (periodic repainting) | Very Low | High (painting, repairs) |
Hardie Siding Installation Process
Installing Hardie siding, while seemingly straightforward, requires precision and attention to detail to ensure a long-lasting, beautiful, and weather-resistant exterior. A well-executed installation translates directly to increased home value and curb appeal. This process, broken down into manageable steps, will guide you through achieving professional-level results.
Successful Hardie siding installation hinges on meticulous preparation and a thorough understanding of the materials. Failing to properly prepare the surface or neglecting crucial steps can lead to costly mistakes down the line, impacting both aesthetics and structural integrity. This detailed guide will walk you through each phase, emphasizing best practices for a flawless finish.
Preparation and Planning
Before the first piece of siding goes up, thorough preparation is paramount. This includes a detailed assessment of the existing wall structure, ensuring it’s sound and properly prepared to receive the new siding. This stage lays the foundation for a successful installation.
- Inspect the existing wall sheathing for damage, rot, or inconsistencies. Repair any issues before proceeding.
- Ensure proper ventilation behind the siding to prevent moisture buildup and potential damage.
- Install house wrap or weather barrier to further protect against moisture intrusion. This acts as a crucial secondary defense line.
- Establish a straight and level baseline using a chalk line to guide the installation of the first course of siding.
- Plan the layout of the siding, minimizing cuts and waste. This will improve efficiency and reduce material costs.
Tools and Equipment
Having the right tools readily available significantly impacts efficiency and the quality of the final product. The following list represents the essential equipment needed for a professional-looking Hardie siding installation.
- Measuring tape and chalk line
- Circular saw with a fine-tooth blade designed for cutting fiber cement
- Jigsaw for intricate cuts around windows and doors
- Drill with various drill bits and a screwdriver bit set
- Level and plumb bob
- Safety glasses and hearing protection
- Ladder and scaffolding (as needed)
- Nail gun (preferably a pneumatic nailer for faster and more consistent nailing)
- Caulk gun and appropriate caulk for sealing gaps and joints
- Putty knife for filling nail holes and minor imperfections
Installation Checklist
A methodical approach, guided by a comprehensive checklist, is key to a flawless installation. Each step, meticulously followed, ensures the long-term durability and aesthetic appeal of your Hardie siding.
- Inspect the wall sheathing and make necessary repairs.
- Install house wrap or weather barrier.
- Establish a level baseline.
- Install starter strip according to manufacturer’s instructions.
- Install siding panels, ensuring proper overlap and alignment.
- Use appropriate fasteners and spacing.
- Cut and fit siding around windows and doors precisely.
- Caulk all seams and joints.
- Fill nail holes and minor imperfections with putty.
- Inspect the completed installation for any defects or inconsistencies.
Cutting and Fitting Around Openings
Precise cuts and fitting around windows and doors are critical for a professional finish. Improper cuts can lead to gaps and compromise the weather resistance of the siding. These best practices will help ensure a clean, seamless integration.
Begin by carefully measuring the openings. Use a jigsaw for precise cuts, making sure to account for expansion and contraction. Always make test cuts on scrap pieces of siding before cutting the final pieces. Apply caulk to all seams and joints to ensure a watertight seal. Consider using trim pieces to further enhance the aesthetics and provide a finished look.
Underlayment and Preparation
Proper wall preparation is the cornerstone of a successful Hardie siding installation. Neglecting this crucial step can lead to costly repairs down the line, including compromised weather resistance, unsightly gaps, and premature siding failure. Think of it as laying a strong foundation for a skyscraper – you wouldn’t start building without ensuring the ground is stable and prepared, would you? The same principle applies to your home’s exterior. By meticulously preparing the walls, you’re investing in the longevity and aesthetic appeal of your Hardie siding.
The selection and installation of appropriate underlayment significantly impacts the overall performance and durability of your Hardie siding. Underlayment acts as a protective barrier against moisture, wind, and insects, creating a more energy-efficient and weather-resistant exterior. Choosing the right underlayment is as important as choosing the right siding itself. Failure to do so can compromise the entire project.
Underlayment Material Types and Purposes
Several types of underlayment materials offer varying levels of protection and performance. House wrap, a popular choice, is a breathable membrane that allows moisture vapor to escape from the wall cavity while preventing liquid water from penetrating. Building paper, a more traditional option, offers basic moisture protection but is less breathable than house wrap. In climates with high humidity, a breathable house wrap is generally preferred to prevent moisture buildup within the wall assembly. For superior protection in extreme weather conditions, consider using a more advanced underlayment system, perhaps incorporating an additional layer of water-resistant barrier. The specific choice depends on local climate conditions, building codes, and the overall design of the wall system.
House Wrap and Building Paper Installation
Installing house wrap or building paper requires careful attention to detail. Overlapping seams are crucial to prevent water penetration. Typically, each sheet should overlap the previous one by at least 6 inches, and all seams should be sealed with appropriate tape designed for the specific underlayment material. Start at the bottom of the wall and work your way up, ensuring each sheet is taut and free of wrinkles. Pay particular attention to corners and around windows and doors, using appropriate flashing materials to ensure a watertight seal. Remember, proper installation is paramount to preventing future problems. A poorly installed underlayment can negate the benefits of high-quality Hardie siding.
Exterior Wall Preparation Steps
Proper preparation is key to a successful installation. Skipping steps or rushing the process can result in problems down the road. Think of it as preparing a canvas for a masterpiece – a poorly prepared canvas will result in a less than perfect painting. The same is true for your home’s exterior. Here’s a step-by-step guide to ensure your walls are ready for Hardie siding:
- Remove Existing Siding: Carefully remove any existing siding, trim, and flashing, ensuring the underlying structure is sound.
- Repair Damaged Areas: Repair any damaged sheathing, framing, or other structural components. Replace rotten wood or damaged areas immediately.
- Clean the Surface: Thoroughly clean the wall surface to remove dirt, debris, loose paint, and other contaminants. This ensures proper adhesion of the underlayment.
- Install Flashing: Install flashing around windows, doors, and other openings to prevent water penetration. Proper flashing is critical for long-term protection.
- Install Underlayment: Install the chosen underlayment material, ensuring proper overlap and sealing of seams. This protects against moisture and wind.
- Inspect and Address Issues: Before proceeding, conduct a thorough inspection to address any remaining issues or imperfections. A thorough inspection will save you time and money in the long run.
Flashing and Water Management
Proper flashing is paramount to the longevity and structural integrity of your Hardie siding installation. Neglecting this crucial step can lead to costly water damage, mold growth, and premature siding failure. Understanding the various flashing types and their correct application is essential for a successful and waterproof installation. This section details critical flashing areas and provides a step-by-step guide for flawless execution.
Water intrusion is the enemy of any exterior cladding system. Hardie siding, while durable, is not impervious to water damage. Strategic flashing creates a barrier, diverting water away from vulnerable areas and protecting the underlying structure. Failing to properly flash critical areas can lead to rot, structural damage, and expensive repairs. Therefore, meticulous attention to flashing details is not optional; it’s a necessity.
Critical Flashing Areas
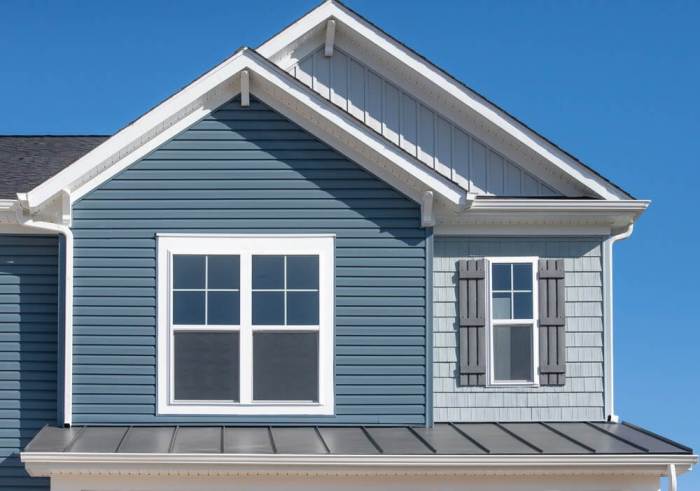
Several key areas demand careful flashing during Hardie siding installation. These include, but are not limited to, window and door openings, corners, and transitions between different siding materials or planes. Each requires a specific approach to ensure complete water protection.
- Window and Door Openings: These are high-risk areas for water penetration. Flashing must be installed to create a watertight seal between the siding and the window or door frame.
- Corners: Exterior corners are vulnerable to driving rain. Proper flashing prevents water from seeping behind the siding and into the wall cavity.
- Transitions: Where siding meets other materials, such as brick or trim, flashing is needed to prevent water from migrating between different surfaces.
Flashing Materials and Applications
Various flashing materials offer distinct advantages for different applications. The choice depends on factors such as the specific location, the type of siding, and local building codes.
- Aluminum Flashing: A common and versatile option, aluminum flashing is durable, corrosion-resistant, and easily formable. It’s suitable for most flashing applications.
- Copper Flashing: Highly durable and resistant to corrosion, copper flashing offers superior longevity but comes at a higher cost. It is often used in high-end applications or areas exposed to harsh weather conditions.
- Plastic Flashing: Less expensive than metal flashing, plastic flashing is suitable for certain applications, but its durability and longevity may be less than metal options. It’s crucial to choose a high-quality, UV-resistant plastic.
- Self-Adhesive Flashing Tape: Convenient for smaller applications and sealing seams, this tape provides a watertight seal but may not be suitable for all situations.
Step-by-Step Window Flashing Installation
Installing flashing around a window involves several key steps to ensure a watertight seal. This process, when performed correctly, prevents water from penetrating the wall system, preserving the integrity of your siding and the structure beneath.
- Prepare the Window Opening: Ensure the window is properly installed and caulked. Clean the area around the window frame thoroughly to remove any debris.
- Install the Underflashing: Place a continuous piece of flashing, extending several inches beyond the window frame on all sides. Overlap the flashing to create a watertight seal. Secure it with appropriate fasteners.
- Install the J-Channel: Position the J-channel over the underflashing, ensuring it’s aligned with the window frame. Secure it with nails or screws.
- Install the Siding: Install the Hardie siding panels, carefully tucking them under the J-channel. Ensure proper alignment and overlap.
- Caulk all Seams: Apply a high-quality exterior-grade caulk to seal all gaps and seams between the flashing, siding, and window frame. This creates a complete barrier against water penetration.
Siding Installation Techniques
Mastering Hardie siding installation hinges on understanding and employing the correct techniques. The choice between horizontal and vertical installation, proper nail placement, and attention to detail all contribute to a long-lasting, aesthetically pleasing finish. Ignoring these crucial steps can lead to costly repairs and compromised structural integrity.
Horizontal vs. Vertical Hardie Siding Installation
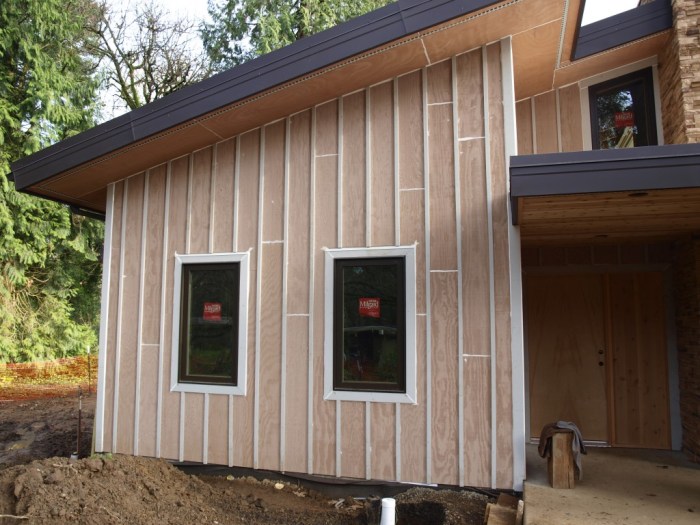
Horizontal installation, the most common method, provides a classic, clean look and often simplifies the installation process, especially on larger surfaces. Vertical installation, while less frequent, offers a modern aesthetic and can be advantageous on buildings with significant vertical lines or unique architectural features. The choice depends on the desired visual effect and the building’s design. Horizontal installation typically involves running the siding panels horizontally across the structure, while vertical installation runs the panels vertically from top to bottom. Consider the overall architectural style; horizontal siding complements traditional designs, while vertical siding lends itself well to modern or contemporary styles. Proper planning, including accurate measurements and careful consideration of the building’s orientation, is crucial regardless of the chosen method.
Nail Placement and Spacing for Hardie Siding
Proper nail placement is paramount for preventing damage and ensuring a secure installation. Nails should be driven straight into the framing members, avoiding bending or damaging the siding. The recommended spacing and penetration depth vary depending on the specific Hardie siding product and local building codes. Consistent spacing prevents warping and cracking. Using a nail gun with the correct settings ensures consistent penetration depth. Over-driving nails can split the siding, while under-driving can compromise the hold and lead to loose panels. Consult the manufacturer’s instructions for precise guidelines on nail placement and spacing for your chosen Hardie siding product.
Achieving a Clean and Professional Finish
A professional finish is characterized by consistent panel alignment, precise cuts, and careful caulking. Use a level to ensure all panels are perfectly aligned, both horizontally and vertically, and maintain consistent spacing between panels. Precise cutting is essential to achieve a neat appearance, especially around windows and doors. Use a sharp utility knife or power saw for clean cuts. Caulking is crucial for sealing gaps and preventing water intrusion. Apply a high-quality, paintable caulk to all joints and seams. Regularly check your work for any inconsistencies and correct them promptly. Paying attention to these details will dramatically enhance the overall quality and visual appeal of the finished product.
Common Mistakes to Avoid During Hardie Siding Installation
Several common mistakes can compromise the longevity and aesthetics of a Hardie siding installation. One frequent error is improper nail placement, leading to loose panels or siding damage. Another is neglecting to adequately prepare the underlayment, resulting in water damage. Failure to properly flash around windows and doors can also create vulnerabilities to moisture. Ignoring manufacturer instructions for nail spacing and penetration depth is another significant pitfall. Finally, rushing the installation process without sufficient attention to detail can lead to visible imperfections and compromises in overall quality. Careful planning, meticulous execution, and adherence to best practices are essential to avoid these common mistakes.
Finishing Touches and Caulking
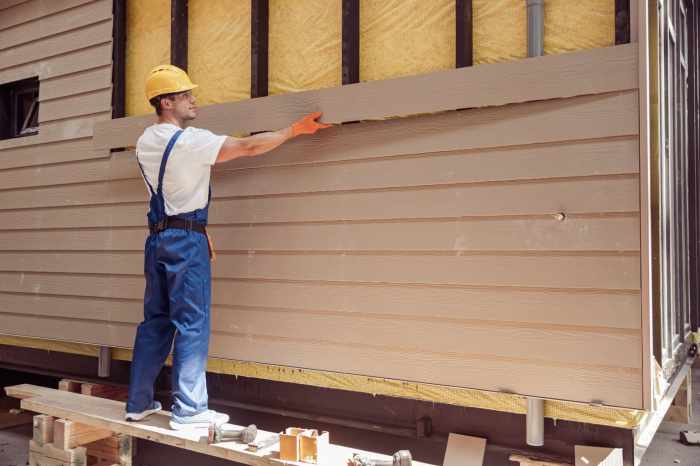
Proper caulking is the unsung hero of a successful Hardie siding installation. It’s the final, crucial step that ensures your beautiful new siding remains watertight and protects your home for years to come. Neglecting this detail can lead to costly repairs down the road, undoing all the hard work you’ve already put in. This section will detail the best practices for achieving a professional, long-lasting caulking job.
Caulking seals gaps and joints in your Hardie siding, preventing water penetration and air leaks. The right caulking material is essential for durability and weather resistance. Using the wrong type can lead to cracking, shrinking, and ultimately, water damage. Mastering the techniques for a smooth, even application ensures a beautiful, protective seal. Cleaning up excess caulking is just as important as the application itself, preserving the aesthetic appeal of your finished project.
Caulking Material Selection
Choosing the right caulking is paramount. Different caulks offer varying degrees of flexibility, adhesion, and weather resistance. For Hardie siding, a high-quality, paintable acrylic latex caulk is generally recommended. These caulks are designed to withstand temperature fluctuations and remain flexible, preventing cracking as the house settles or experiences seasonal expansion and contraction. Avoid using silicone caulks in areas that will be painted, as they can interfere with paint adhesion. Consider the specific climate and weather conditions in your area when making your selection; a caulk rated for extreme temperatures might be necessary in regions with harsh winters or scorching summers. Always check the manufacturer’s specifications to ensure the caulk is compatible with Hardie siding and the applicable environmental conditions.
Caulking Application Techniques
Before applying caulk, ensure the surfaces are clean, dry, and free from dust or debris. This ensures optimal adhesion. Use a caulking gun to apply a continuous, even bead of caulk into the gaps and joints. Avoid applying caulk too thickly; a smooth, consistent bead is preferable to a large, uneven glob. A consistent bead will not only look better, but will also create a better seal and prevent cracking. For larger gaps, consider using backer rod to fill some of the space before applying caulk. This will reduce the amount of caulk needed and improve the strength of the seal. The bead should be slightly larger than the gap it’s filling, and then gently tool it to a smooth, concave shape. This creates a strong and weatherproof seal. Using a caulking tool, such as a wet finger or a specialized smoothing tool, will create a professional finish.
Cleaning Up Excess Caulking
Excess caulk should be removed immediately before it dries. A damp cloth or sponge works well for cleaning up wet caulk. For dried caulk, a utility knife or plastic scraper can be used carefully to remove it without damaging the surrounding siding. Always clean your tools immediately after use to prevent caulk from hardening on them. A solvent specifically designed for cleaning caulk may be needed for stubborn residues. Remember that quick cleanup is crucial; the longer you wait, the harder it will be to remove excess caulk. A little attention to detail in this step goes a long way in ensuring a flawless, professional-looking finish.
Troubleshooting Common Issues
Hardie siding, while durable, is not immune to installation problems. Addressing these issues promptly is crucial for maintaining the longevity and aesthetic appeal of your siding. Ignoring even minor flaws can lead to significant damage and costly repairs down the line. This section will guide you through identifying and resolving common Hardie siding installation problems.
Damaged Siding
Damaged Hardie siding panels can occur during shipping, handling, or installation. Inspect each panel carefully before installation. Replacing damaged panels is essential; attempting repairs often leads to unsightly patching and compromised structural integrity.
Damaged panels should be replaced entirely. Repairing damaged sections compromises the panel’s structural integrity and can lead to further issues. Always use panels from the same batch to ensure color consistency.
Improper Nail Placement
Incorrect nail placement is a frequent source of problems. Nails driven too deep can cause dimpling, while nails driven too shallow can lead to loose panels and water penetration. The correct depth and spacing are crucial for a secure and weather-resistant installation.
Nails should be driven straight and flush with the surface of the siding. Using a nail gun with the correct settings is highly recommended for consistent depth. Over-driving or under-driving nails can compromise the siding’s integrity. Always refer to the manufacturer’s recommended nail spacing.
Water Leakage
Water leakage is a serious issue that can lead to rot, mold, and structural damage. Proper flashing and caulking are essential to prevent water penetration. Issues can arise from inadequate flashing around windows and doors, gaps in the siding, or improper caulking.
Water leakage is often the result of insufficient flashing or improper caulking around windows, doors, and other penetrations. Regular inspections, particularly after heavy rain, are crucial for early detection of leaks. Repairing leaks promptly is vital to prevent extensive water damage.
Gaps and Uneven Seams
Gaps between siding panels and uneven seams are visually unappealing and compromise the weather-resistance of the installation. These issues can result from improper measurement, cutting, or installation techniques.
Consistent measurements and precise cutting are paramount to minimize gaps and ensure even seams. Using the correct tools and techniques is crucial for achieving a professional finish. Overlapping panels correctly and ensuring proper alignment are key steps to avoid these issues.
Caulking Failure
Caulk is critical for sealing gaps and preventing water intrusion. Using the wrong type of caulk or applying it improperly can lead to cracking and failure, compromising the water barrier.
High-quality, exterior-grade caulk is essential. Apply caulk in a smooth, continuous bead, ensuring complete coverage of all joints and gaps. Allow sufficient drying time before exposing the caulk to moisture.
Safety Precautions
Hardie siding installation, while rewarding, presents inherent risks. Prioritizing safety is paramount to prevent accidents and ensure a successful project. This section details crucial safety measures for working at heights, using power tools, handling Hardie siding materials, and adhering to relevant regulations. Neglecting these precautions can lead to serious injury or project delays.
Working at heights and with power tools necessitates a proactive approach to risk management. Proper planning and the use of appropriate safety equipment are essential to mitigate potential hazards. Similarly, safe handling of Hardie siding materials prevents damage to the materials and potential injury to the installers. Compliance with manufacturer’s instructions and local building codes is non-negotiable for a safe and legally compliant installation.
Working at Heights
Working at heights significantly increases the risk of falls. To mitigate this risk, always use appropriate fall protection equipment, such as safety harnesses and anchored lifelines, when working above six feet. Ensure the scaffolding or ladders used are stable, properly secured, and rated for the intended load. Regularly inspect equipment for damage before each use. Never overload a ladder or scaffold. A thorough pre-job safety assessment, identifying potential fall hazards and implementing appropriate preventative measures, is crucial. Consider the use of aerial work platforms for large projects or difficult-to-reach areas, as these provide a safer working environment.
Power Tool Safety
Power tools, essential for Hardie siding installation, pose significant risks if not handled correctly. Always use appropriate personal protective equipment (PPE), such as safety glasses, hearing protection, and work gloves. Before operating any power tool, ensure you understand its operation and safety features. Regularly inspect tools for damage and ensure they are properly maintained. Never operate a tool while fatigued or under the influence of drugs or alcohol. Disconnect power tools before making adjustments or changing blades. Maintain a firm grip on the tool at all times, and be aware of your surroundings to avoid accidental contact with other objects or individuals. Follow the manufacturer’s instructions for each tool meticulously.
Personal Protective Equipment (PPE)
The use of appropriate PPE is critical for minimizing the risk of injury during Hardie siding installation. This includes, but is not limited to: safety glasses or goggles to protect against flying debris, hearing protection (earplugs or muffs) to reduce exposure to loud noises from power tools, work gloves to protect hands from cuts and abrasions, a dust mask or respirator to prevent inhalation of harmful dust particles generated during cutting and sawing, sturdy work boots with slip-resistant soles to prevent falls, and a hard hat to protect the head from falling objects. Depending on the specific tasks and conditions, additional PPE may be required, such as a full-body harness for working at heights.
Safe Handling of Hardie Siding Materials
Hardie siding, while durable, requires careful handling to prevent damage and injury. Always use appropriate lifting techniques to avoid strains or injuries. Use lifting equipment, such as a forklift or hand truck, for large quantities of siding. Store materials properly to prevent damage or deterioration. Avoid dropping or throwing siding panels. Use caution when cutting or sawing Hardie siding, as it can generate sharp edges and fine dust. Dispose of waste materials properly in accordance with local regulations. Always wear appropriate PPE when handling Hardie siding, especially during cutting and installation.
Compliance with Manufacturer’s Instructions and Local Building Codes
Adherence to manufacturer’s instructions and local building codes is paramount for a safe and successful Hardie siding installation. Manufacturer’s instructions provide detailed guidance on proper installation techniques, safety precautions, and material handling. Local building codes establish minimum safety and performance standards for construction projects. Failure to comply with these regulations can result in project delays, fines, or even legal action. Regularly consult both the manufacturer’s instructions and the applicable building codes throughout the installation process to ensure compliance. Obtain necessary permits and inspections as required by local authorities.
Mastering Hardie siding installation is more than just nailing planks to your house; it’s about understanding the nuances of material selection, proper preparation, and meticulous execution. By following the steps Artikeld in this guide, you’ll not only achieve a stunning aesthetic but also ensure the longevity and protection of your home’s exterior. Remember, a well-installed Hardie siding system is an investment in your home’s value and curb appeal that will pay dividends for years to come. So, grab your tools, and let’s get started!
Popular Questions
Can I install Hardie siding myself, or should I hire a professional?
While DIY is possible, Hardie siding installation requires specific skills and tools. If you lack experience, hiring a professional ensures a quality installation and avoids costly mistakes.
How long does Hardie siding installation typically take?
The timeframe varies depending on the house size and complexity, but expect several days to a couple of weeks for a typical home.
What’s the warranty on Hardie siding?
James Hardie offers warranties varying by product and region; check their website for specific details. Proper installation is crucial for warranty validity.
How often should I maintain my Hardie siding?
Hardie siding is low-maintenance. Regular cleaning with water and a soft brush is usually sufficient. Inspect for damage periodically.
Can I paint Hardie siding?
Yes, Hardie siding can be painted, but use paints specifically designed for fiber cement siding to ensure proper adhesion and longevity.
