Transforming your home’s exterior with Hardie Plank siding offers unparalleled durability and curb appeal. But tackling this project requires more than just a hammer and nails. This comprehensive guide dives deep into every stage of Hardie Plank siding installation, from meticulous preparation to achieving a flawless finish. We’ll cover material selection, installation techniques, and crucial maintenance tips, ensuring your project is a resounding success, saving you time, money, and headaches along the way.
Whether you’re a seasoned DIY enthusiast or a first-timer, understanding the nuances of Hardie Plank installation is crucial. From choosing the right type of siding to mastering precise cuts around complex architectural features, we’ll equip you with the knowledge to confidently navigate each step. This guide provides a clear roadmap, empowering you to achieve professional-looking results and significantly increase your home’s value.
Hardie Plank Siding Materials
Choosing the right Hardie Plank siding for your home is a crucial decision impacting both aesthetics and longevity. Understanding the different types available, their properties, and their respective advantages and disadvantages is key to making an informed choice. This section details the various options to help you select the best fit for your project and budget.
Hardie Plank Siding Types and Properties
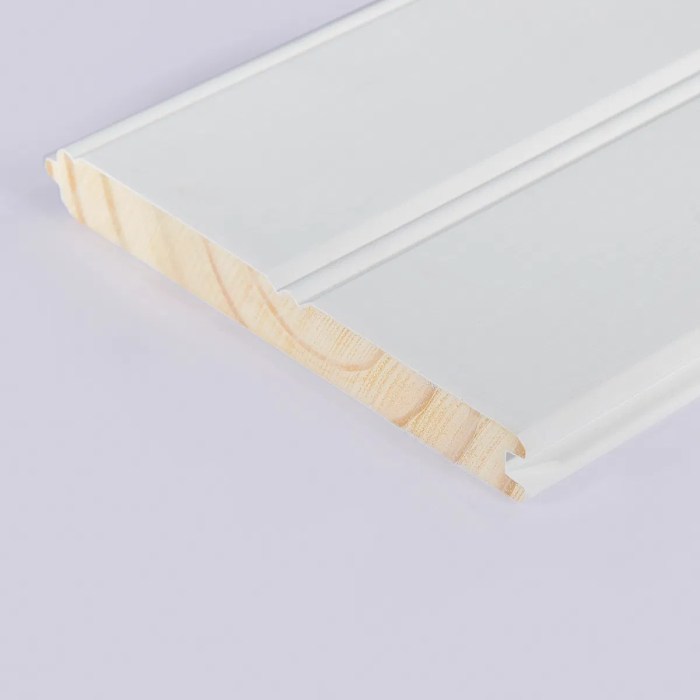
James Hardie offers a range of fiber cement siding products, each with unique characteristics. These differences stem from variations in the manufacturing process and the specific composition of the fiber cement mixture. This leads to differences in texture, appearance, and performance. The most common types are HardiePlank® Lap Siding, HardiePanel® Vertical Siding, and HardieShingle® Siding. Each offers a distinct aesthetic and performance profile.
HardiePlank Lap Siding
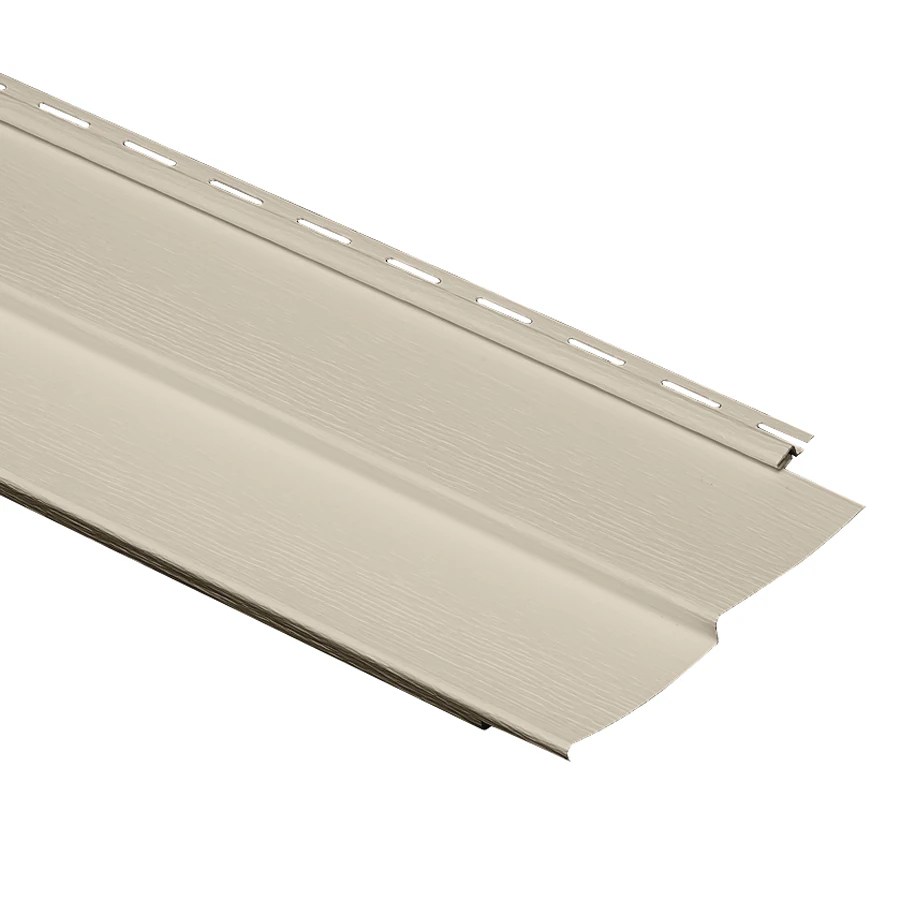
HardiePlank Lap Siding mimics the look of traditional wood lap siding, offering a classic and versatile aesthetic. Its textured surface provides a realistic wood-grain appearance, making it a popular choice for homeowners seeking a timeless look. This siding is known for its durability and resistance to damage from insects, rot, and fire. The color is integrated into the material itself, resulting in less fading over time compared to painted wood.
HardiePanel Vertical Siding
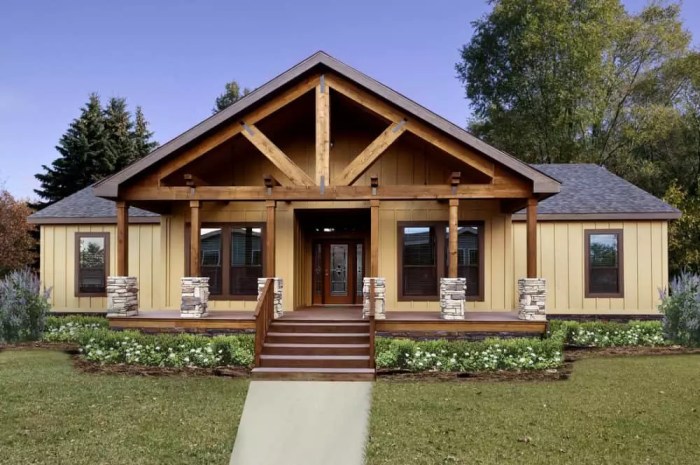
HardiePanel Vertical Siding provides a clean, modern look with its vertical orientation. This type of siding is often chosen for its contemporary aesthetic and its ability to create a sleek, visually appealing facade. Like HardiePlank Lap Siding, it is resistant to damage from pests, rot, and fire, offering similar long-term durability and low maintenance requirements. The vertical lines can also create the illusion of height, making it a good option for smaller homes.
HardieShingle Siding
HardieShingle Siding offers a more textured, rustic look, mimicking the appearance of traditional wood shingles. This siding is ideal for homeowners who want a more traditional or cottage-style aesthetic. Its layered appearance adds depth and visual interest to the exterior of a home. While offering the same durability and fire resistance as other Hardie products, its intricate design may require slightly more attention during installation to ensure proper alignment and overlap.
Comparison of Hardie Plank Siding Options
The following table summarizes the key differences between the three main types of Hardie Plank siding, facilitating a more informed comparison. Remember that pricing can vary based on region, installer, and project specifics.
| Feature | HardiePlank Lap Siding | HardiePanel Vertical Siding | HardieShingle Siding |
|---|---|---|---|
| Appearance | Traditional wood lap siding | Modern, vertical lines | Traditional wood shingles |
| Durability | Excellent, resists rot, insects, and fire | Excellent, resists rot, insects, and fire | Excellent, resists rot, insects, and fire |
| Maintenance | Low; occasional cleaning | Low; occasional cleaning | Low to moderate; occasional cleaning |
| Cost | Moderate | Moderate | Moderate to High |
Preparation for Installation
Proper preparation is paramount to a successful Hardie Plank siding installation. Cutting corners here will lead to costly mistakes down the line, impacting both the aesthetics and longevity of your project. A meticulously prepared surface ensures a smooth, efficient installation and a beautiful, long-lasting finish. This section details the essential tools, surface preparation steps, and accurate measurement techniques for optimal results.
Necessary Tools and Equipment
Gathering the right tools beforehand streamlines the installation process and prevents frustrating delays. Having everything readily accessible saves time and ensures a more efficient workflow. A well-organized workspace contributes significantly to the overall success of the project.
- Measuring Tape: A high-quality, durable measuring tape is essential for accurate measurements of the wall sections and individual siding pieces.
- Circular Saw with Fine-Toothed Blade: A circular saw with a fine-toothed blade is necessary for clean, precise cuts of the Hardie Plank siding. A blade specifically designed for fiber cement is recommended.
- Safety Glasses and Hearing Protection: Protecting your eyes and ears is crucial. Hardie Plank cutting generates dust and noise, so safety gear is non-negotiable.
- Level: A level is critical for ensuring that the siding is installed straight and plumb. Using a level throughout the installation process prevents unsightly irregularities.
- Hammer and Nail Gun (optional): While nails can be hammered in manually, a nail gun significantly speeds up the installation process. Ensure you use the appropriate nails for Hardie Plank siding.
- Caulk Gun and Exterior Grade Caulk: Caulk is used to seal gaps and joints, creating a weathertight barrier. Choose a high-quality, exterior-grade caulk suitable for fiber cement.
- Utility Knife: A sharp utility knife is helpful for trimming and making precise cuts in smaller areas.
- Jigsaw (optional): A jigsaw is useful for cutting intricate shapes or making cuts in tight spaces where a circular saw may be difficult to maneuver.
Wall Surface Preparation
Before installing Hardie Plank siding, the wall surface must be properly prepared. This crucial step ensures a secure and long-lasting installation, preventing future issues such as water damage or siding failure. Ignoring this phase can compromise the entire project.
- Sheathing Inspection: Inspect the existing sheathing for any damage, rot, or loose boards. Replace any damaged sections with new, properly sized sheathing to create a solid and even surface.
- Flashing Installation: Install flashing around windows, doors, and other openings to prevent water penetration. Flashing should overlap properly and be securely fastened to create a watertight seal.
- Water Barrier Application: Apply a water-resistant barrier, such as housewrap, over the sheathing. This barrier protects the wall from moisture intrusion and helps to maintain a dry interior environment. Ensure proper overlap and secure fastening.
- Surface Cleaning: Clean the prepared wall surface thoroughly to remove any dirt, debris, or loose materials that could interfere with the siding installation. A clean surface ensures proper adhesion and a smooth finish.
Measuring and Cutting Hardie Plank Siding
Accurate measurement and cutting are essential for a professional-looking finish. Improper cuts lead to gaps, wasted material, and an overall unsatisfactory result. Precise measurements save material and time.
To measure and cut a Hardie Plank siding piece for a specific wall section, first measure the length of the wall section you are working on. Then, add the necessary overlaps (typically specified by the manufacturer’s instructions) to this measurement. This total length represents the required length of the Hardie Plank piece. Use a sharp pencil to mark this length on the plank. Using a straight edge and a fine-toothed circular saw (or other appropriate cutting tool), carefully cut along the marked line, ensuring a clean, straight cut. Always wear appropriate safety gear during cutting. For example, if a wall section measures 8 feet, and the manufacturer recommends a 1/2 inch overlap at each end, the total length of the Hardie Plank piece should be 8 feet + 1 inch (1/2 inch + 1/2 inch). Remember to always double-check your measurements before cutting.
Installation Techniques
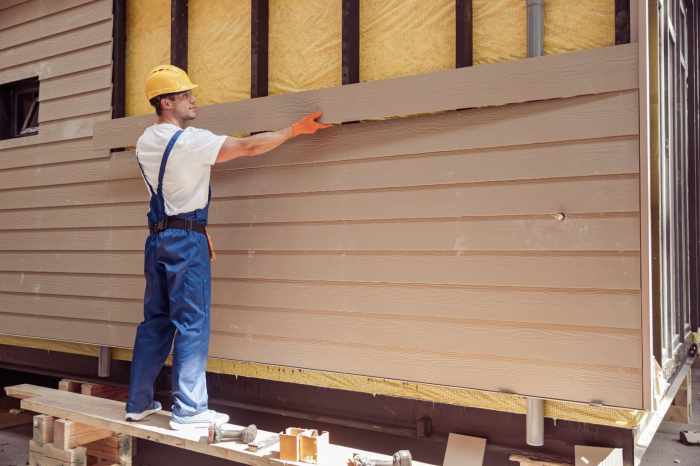
Installing Hardie Plank siding is a process that demands precision and attention to detail. Proper installation ensures a long-lasting, beautiful, and weather-resistant exterior for your home. Failing to follow best practices can lead to issues such as leaks, warping, and an overall unsatisfactory finish. This section details the crucial steps involved in achieving a professional-looking installation.
The successful installation of Hardie Plank siding hinges on meticulously following the manufacturer’s instructions and adhering to established building codes. Remember, preparation is key. Ensure your wall sheathing is properly prepared, and all necessary materials are readily available before you begin. This will streamline the process and minimize potential delays.
Installing the First Course of Hardie Plank Siding
The first course sets the foundation for the entire siding installation. Accuracy here is paramount. Begin at a corner or a pre-determined starting point, ensuring a level and plumb installation. This initial course dictates the alignment of all subsequent courses. Using a level and plumb bob at this stage will prevent cumulative errors. Secure the first course using appropriate nails, spaced according to manufacturer specifications, avoiding over-driving which can damage the plank. Properly fastening the first course prevents sagging and ensures a straight, even look.
Consider using a starter strip at the bottom to create a clean, straight line to begin with. This strip provides a consistent surface for the first course of siding and helps maintain a uniform look. It’s also crucial to maintain consistent spacing between the planks, using spacers to ensure this.
Installing Subsequent Courses of Siding
Once the first course is securely in place, subsequent courses are installed by overlapping the previous course. The manufacturer will specify the recommended overlap; typically, this is a few inches to ensure weathertightness. Maintain consistent alignment and spacing throughout the installation process. Regularly check your work with a level to ensure that the siding remains plumb and straight. Using a chalk line to mark the height of each course can significantly aid in maintaining a consistent look.
Each plank should be carefully aligned and secured using appropriate nails or screws. Avoid driving nails too close to the edges of the planks, as this can cause splitting. The consistent use of spacers will aid in keeping the spacing even throughout the installation.
Cutting and Fitting Hardie Plank Siding Around Windows, Doors, and Corners
Cutting and fitting Hardie Plank around openings and corners requires precision and careful measurement. Improper cuts can lead to gaps and compromises in weather protection. Accurate measurements and precise cuts are vital for a seamless finish.
- Accurate Measurement: Take precise measurements of the area around windows, doors, and corners before making any cuts.
- Proper Cutting Tools: Use a sharp circular saw with a fine-tooth blade for clean, accurate cuts. A miter saw is ideal for precise angle cuts needed for corners.
- Test Fitting: Before securing any cut pieces, always test fit them to ensure a perfect alignment and fit. This avoids costly mistakes and ensures a clean finish.
- Caulk Application: After fitting the pieces, apply a high-quality exterior-grade caulk to seal any gaps or seams. This helps prevent water intrusion and enhances the overall weather resistance of the siding.
- Corner Treatments: For corners, use J-channel or corner trim to create a neat and professional finish. These pre-fabricated pieces ensure proper overlap and weather protection.
Working with Different Features
Installing Hardie Plank siding around complex architectural details requires precision and attention to detail. Mastering these techniques elevates your project from good to exceptional, ensuring a professional finish that lasts. Proper installation around features like dormers, bay windows, and the integration of trim pieces significantly impacts the overall aesthetic appeal and longevity of your siding. This section provides the crucial steps to flawlessly handle these challenges.
Successfully navigating complex architectural features with Hardie Plank siding hinges on careful planning and precise execution. Understanding the unique challenges each feature presents and employing the correct techniques is paramount to achieving a seamless and durable final product. Remember, proper preparation is key to a smooth installation.
Hardie Plank Installation Around Dormers and Bay Windows
Installing Hardie Plank around dormers and bay windows demands meticulous measurement and cutting to ensure a clean, professional finish. Begin by carefully measuring the angles and curves of the feature. Pre-cut the Hardie Plank pieces to fit precisely, allowing for expansion and contraction. Use appropriate trim pieces, such as corner boards and J-channels, to create a smooth transition between the siding and the architectural detail. Secure the planks with appropriate fasteners, ensuring they are evenly spaced and hidden as much as possible. Consider using a coping saw for intricate cuts, and always double-check your measurements before making any permanent cuts. For particularly complex curves, consider using a flexible trim piece designed for this purpose.
Installing J-Channels and Other Trim Pieces
J-channels and other trim pieces are essential for creating a neat and professional finish. J-channels provide a clean transition between different siding planes or around corners. Start by installing the J-channel along the edge where the siding will meet another surface, such as a window frame or corner. Ensure the J-channel is level and plumb before securing it with appropriate fasteners. Next, install the Hardie Plank siding, fitting it neatly into the J-channel. Other trim pieces, such as corner boards and window trim, are installed in a similar fashion, ensuring proper alignment and secure fastening. Remember to leave sufficient space for expansion and contraction. Using a level and plumb bob will help ensure straight lines and prevent future problems.
Installing Soffit and Fascia with Hardie Plank Products
Soffit and fascia are crucial for protecting the underside of your roof overhang. Hardie Plank offers products specifically designed for these applications, offering both durability and aesthetic appeal. Begin by installing the fascia boards, ensuring they are level and plumb. Use appropriate fasteners, spacing them evenly for secure attachment. Next, install the soffit panels, ensuring they fit snugly against the fascia and are properly aligned. These panels should be cut to fit the space accurately, and it’s crucial to leave appropriate expansion gaps between the panels to prevent buckling. Finally, seal all seams and joints with appropriate caulk to prevent moisture intrusion. Proper installation of soffit and fascia will help protect your home from the elements and maintain its curb appeal. Consider using flashing where the soffit meets the wall to further enhance protection against water damage.
Finishing Touches and Maintenance
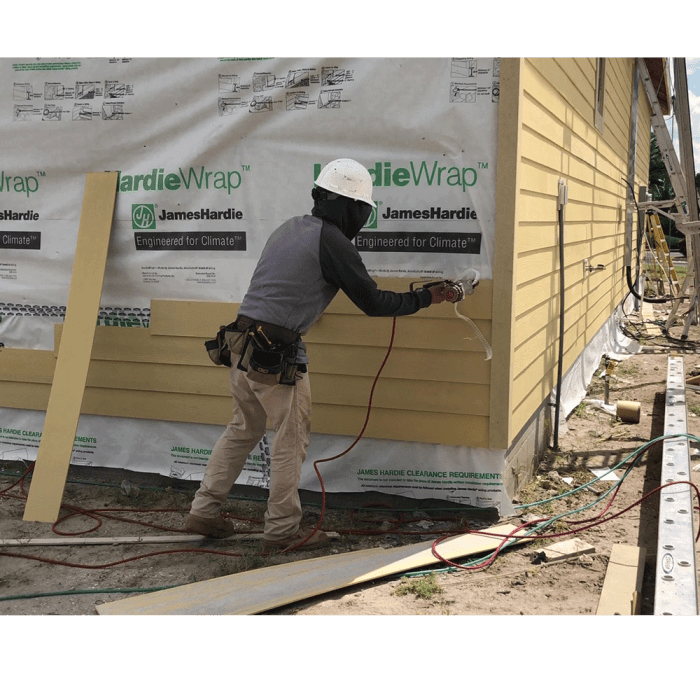
Properly finishing and maintaining your Hardie Plank siding is crucial for preserving its beauty and extending its lifespan. Neglecting these steps can lead to costly repairs down the line, negating the initial investment in this high-quality product. This section details the essential final steps and ongoing care required to ensure your siding remains a valuable asset to your property for years to come.
Caulking and Sealing Seams and Joints
Effective caulking is paramount in preventing water infiltration, a major cause of siding damage. All seams and joints, particularly around windows, doors, and corners, must be meticulously sealed with a high-quality, paintable exterior-grade caulk. Choose a caulk specifically designed for exterior use and compatible with fiber cement siding. Apply the caulk in a smooth, continuous bead, ensuring complete coverage of the joint. Tool the caulk to create a smooth, weather-resistant seal, removing any excess material. Regular inspection and recaulking, particularly in areas prone to movement or weathering, is recommended to maintain a watertight barrier. Failing to properly caulk can lead to water damage, mold growth, and significant structural problems. Consider using backer rod in wider gaps to reduce the amount of caulk needed and improve the seal’s longevity.
Cleaning and Maintaining Hardie Plank Siding
Maintaining the pristine appearance and structural integrity of your Hardie Plank siding is relatively straightforward. Regular cleaning removes dirt, debris, and mildew, preventing staining and damage. For routine cleaning, a simple solution of mild detergent and water applied with a soft-bristled brush is often sufficient. Rinse thoroughly with clean water to remove all traces of soap. For tougher stains or mildew, a pressure washer can be effective, but use caution to avoid damaging the siding. Maintain a safe distance and use a low-pressure setting. Always test any cleaning solution on an inconspicuous area first to ensure it doesn’t damage the finish. Avoid abrasive cleaners or harsh chemicals, as these can scratch or dull the surface. Regular cleaning, ideally once or twice a year, will significantly extend the life of your Hardie Plank siding.
Post-Installation Inspection Checklist
A thorough post-installation inspection is vital to identify and rectify any potential issues before they become major problems. This proactive approach saves time and money in the long run.
Before considering the project complete, verify the following:
- All seams and joints are properly caulked and sealed. Check for gaps or inconsistencies in the caulk application.
- Siding is properly aligned and installed according to manufacturer specifications. Look for any misaligned panels or gaps between boards.
- Flashing is installed correctly around windows, doors, and other penetrations. Ensure flashing overlaps properly and provides adequate protection against water intrusion.
- All fasteners are properly secured and hidden. Check for any loose or protruding nails or screws.
- There is no visible damage to the siding. Inspect for cracks, chips, or other imperfections.
- Proper ventilation is maintained behind the siding. This prevents moisture buildup and potential mold growth.
Illustrative Examples
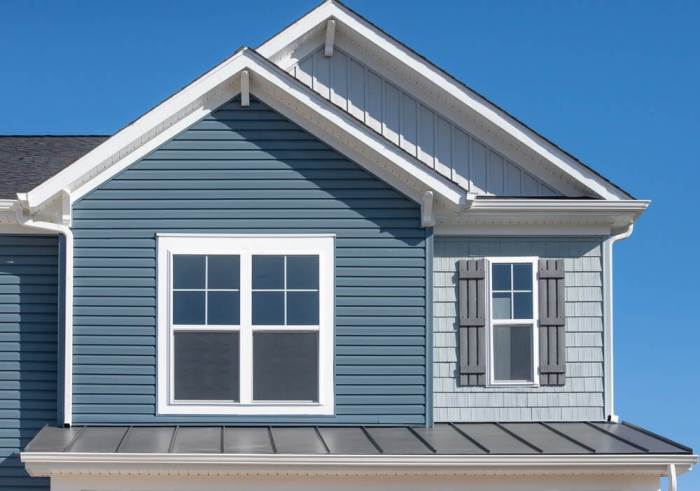
Understanding the nuances of Hardie Plank siding installation is crucial for achieving a professional, long-lasting result. This section provides detailed examples to illustrate the process in diverse scenarios, highlighting common challenges and their effective solutions. Mastering these techniques will significantly enhance your project outcomes.
Gable-Roofed House Installation
This common residential structure presents unique challenges, primarily due to the varying angles and lengths of siding required to cover the triangular gable ends. Precise measurements and skillful cutting are essential to ensure a clean, seamless finish. The most significant challenge often lies in managing the intricate cuts around the gable peak and the transitions from the gable to the main wall sections. Solutions involve using a high-quality measuring tape, speed square, and a sharp circular saw to create accurate cuts. Pre-drilling pilot holes before fastening is crucial to prevent splitting the Hardie Plank. Careful planning and methodical execution are key to success. Consider using a chalk line to mark consistent lines for cutting, and double-checking measurements to avoid costly mistakes. Remember to allow for expansion and contraction gaps as per manufacturer recommendations.
Hardie Plank Installation on a Gable-Roofed House
A typical gable-roofed house requires meticulous planning to achieve a flawless finish. Begin by measuring the gable end’s height and width. This measurement will determine the number and size of Hardie Plank pieces needed. Remember to account for overlaps and waste. Next, install the starter strip along the bottom edge of the gable. This provides a straight, even base for subsequent planks. Then, install the first course of Hardie Plank, ensuring proper alignment and spacing. Subsequent courses are installed, overlapping each other and aligning with the starter strip. Special attention must be paid to the cuts needed at the peak of the gable. Precise measurements and careful cutting are crucial here to maintain symmetry and visual appeal. For example, if the gable is 10 feet wide and the planks are 12 inches wide, you will need approximately 10 planks for each course. Accurate cuts are needed to ensure a tight fit at the top. These cuts may require multiple angles depending on the slope of the gable.
Hardie Plank Installation on a House with Multiple Angles and Projections
Houses with complex designs, including multiple angles and projections like bay windows or dormers, require a more sophisticated approach. The challenge lies in accurately measuring and cutting the siding to conform to these irregular shapes. Accurate measurements are critical; miscalculations will lead to gaps or overlaps, compromising the aesthetic appeal and potentially the structural integrity of the siding. It’s essential to use a combination of measuring tools, including a tape measure, speed square, and possibly a digital level, to obtain precise measurements for each section. The use of templates made from cardboard or plywood can aid in making accurate cuts for complex angles. For example, when working around a bay window, a template can be created to ensure each piece fits perfectly, avoiding gaps or unsightly seams. These templates can be traced onto the Hardie Plank and then cut using a circular saw with a fine-tooth blade.
Appearance of Correctly Installed Hardie Plank Siding
Correctly installed Hardie Plank siding presents a uniform, visually appealing façade. The planks should be evenly spaced, with consistent overlaps and aligned vertically and horizontally. The spacing between planks should be consistent and match manufacturer recommendations, typically around 1/8 inch to allow for expansion and contraction. Vertical alignment is crucial; any noticeable misalignment detracts from the overall aesthetic. Properly installed Hardie Plank exhibits a clean, professional finish, free from gaps, misaligned seams, or visible fasteners. The color should be consistent across the entire surface, free from noticeable variations or streaks. The overall impression should be one of seamless integration and a high-quality finish. A well-installed Hardie Plank siding system should showcase the quality of the material and the skill of the installer. This attention to detail significantly increases the home’s curb appeal and overall value.
Mastering Hardie Plank siding installation isn’t just about aesthetics; it’s about building a lasting, protective shell for your home. By carefully following the steps Artikeld in this guide, you’ll not only enhance your home’s beauty but also protect it from the elements for years to come. Remember, proper preparation and attention to detail are key to a successful installation. With the right tools, techniques, and a bit of patience, you can achieve a stunning, long-lasting result that significantly boosts your home’s value and curb appeal. So, roll up your sleeves, gather your materials, and get ready to transform your home’s exterior!
Popular Questions
What is the lifespan of Hardie Plank siding?
Hardie Plank siding, when properly installed and maintained, can last for 30 years or more.
Can I install Hardie Plank siding myself?
While DIY is possible, it requires skill and attention to detail. Consider your experience level before attempting the installation yourself. Professional installation ensures longevity and warranty validity.
How much does Hardie Plank siding cost?
The cost varies greatly depending on the type of siding, the size of your home, and labor costs. Get multiple quotes from contractors for accurate pricing.
What kind of warranty does Hardie Plank siding come with?
Hardie Plank siding typically comes with a 30-year warranty, but this can vary depending on the specific product and installer.
How often should I clean my Hardie Plank siding?
Regular cleaning, typically once or twice a year, with a garden hose and mild detergent, helps maintain its appearance and prolong its life.
