Cedar shake shingles: the epitome of rustic charm and enduring elegance. For centuries, these handcrafted roofing marvels have graced homes, adding a touch of timeless beauty and substantial value. But choosing the right cedar shakes involves understanding their nuances – from grade and profile to installation and maintenance. This comprehensive guide dives deep into every aspect, equipping you with the knowledge to make informed decisions for your next roofing project. We’ll explore the various types, installation techniques, aesthetic considerations, environmental impact, and long-term costs, leaving no stone unturned in our quest to illuminate the world of cedar shake shingles.
From hand-split to machine-sawn, thick to thin, the variations are numerous, each impacting the lifespan, cost, and overall aesthetic. We’ll dissect these differences, providing clear comparisons to help you navigate the selection process with confidence. Beyond the initial choice, we’ll guide you through proper installation, essential maintenance practices, and even address fire safety concerns, ensuring your cedar shake roof remains a source of pride and protection for years to come.
Types of Cedar Shake Shingles
Choosing the right cedar shake shingle for your project is crucial for both aesthetics and longevity. Understanding the various grades, profiles, and manufacturing processes will help you make an informed decision and ensure a roof that’s both beautiful and durable. The differences are more than skin deep; they impact cost, lifespan, and the overall look of your home.
Cedar Shake Shingle Grades
Cedar shake shingles are graded according to their appearance and structural integrity. Higher grades generally mean more uniform shakes with fewer imperfections, resulting in a more polished and consistent final look. Lower grades often contain more knots, splits, and variations in size and shape, which can impact cost but sometimes add to a rustic charm. Common grades include: Premium, Standard, and Economy. Premium grade shakes exhibit the least imperfections, while economy grade shingles are more affordable but might require more careful installation.
Cedar Shake Shingle Profiles
The profile, or shape, of a cedar shake shingle significantly influences its visual appeal and performance. Common profiles include: Tapered, which is the most common and creates a classic, staggered look; and Straight, which offers a more modern and uniform appearance. The choice of profile depends entirely on personal preference and the architectural style of the home. A tapered profile is generally better for shedding water, while a straight profile can provide a cleaner, more contemporary look.
Hand-Split vs. Machine-Sawn Cedar Shakes
The manufacturing process profoundly impacts the characteristics of cedar shake shingles. Hand-split shakes, created using traditional methods, possess a unique, rustic texture and irregular surface. This unevenness enhances their ability to shed water and snow. Machine-sawn shakes, on the other hand, offer a more uniform and consistent appearance, making them easier to install. Hand-split shakes often command a higher price due to their handcrafted nature and inherent variability. The choice between hand-split and machine-sawn depends on the desired aesthetic and budget.
Thickness and Taper Variations in Cedar Shake Shingles
The thickness and taper of cedar shakes influence their durability and lifespan. Thicker shakes are naturally more resistant to damage and offer better insulation. Taper, the gradual reduction in thickness from the butt to the tip, is crucial for proper water runoff. A steeper taper generally results in better water shedding. Variations in thickness and taper are common even within a single grade, adding to the unique character of hand-split shakes. Machine-sawn shakes tend to have more consistent thickness and taper.
Lifespan and Cost Comparison of Cedar Shake Shingle Types
The lifespan and cost of cedar shake shingles vary considerably depending on the grade, profile, and manufacturing process. While the exact figures can fluctuate based on regional factors and supplier pricing, a general comparison can be made.
| Type | Thickness (inches) | Approximate Lifespan (years) | Approximate Cost per Square |
|---|---|---|---|
| Premium Hand-Split | 5/8 – ¾ | 40-60 | $800 – $1500+ |
| Standard Hand-Split | ½ – ⅝ | 30-40 | $600 – $1000 |
| Premium Machine-Sawn | ½ – ⅝ | 25-35 | $400 – $800 |
| Standard Machine-Sawn | ¼ – ½ | 15-25 | $200 – $500 |
Installation Methods
Installing cedar shake shingles is a skilled process requiring precision and attention to detail. Proper installation ensures a long-lasting, aesthetically pleasing, and weather-resistant roof. Understanding the various steps, from underlayment to final shingle placement, is crucial for a successful project. Ignoring best practices can lead to costly repairs down the line, so meticulous work is key.
Cedar shake shingle installation begins with a thorough preparation of the roof deck. This involves ensuring the deck is clean, structurally sound, and free from any debris or damaged areas. Proper underlayment is essential for waterproofing and protection against moisture damage. Different types of underlayment exist, each offering varying levels of protection, depending on climate and budget. For example, synthetic underlayments provide superior water resistance compared to traditional felt, especially in areas with heavy rainfall. Flashing, crucial for sealing vulnerable areas around chimneys, vents, and valleys, should be installed before shingle application. Proper flashing prevents water penetration, preventing costly repairs and structural damage. Using high-quality flashing materials and adhering to manufacturer’s instructions is non-negotiable for a durable roof.
Gable Roof Installation
Installing cedar shake shingles on a gable roof involves working from the bottom up, starting at the eaves. Each course of shingles is installed with a specific overlap, ensuring proper weather protection. The first course, typically installed at the eaves, requires precise alignment to establish a straight line for the entire roof. Subsequent courses are carefully placed, maintaining consistent overlap and alignment. The nails should be driven straight, avoiding damage to the shingles and ensuring a secure hold. The process is repeated across the entire roof surface, carefully working around any obstructions such as chimneys or vents. Regular inspection and quality control throughout the process are vital to ensuring a successful installation.
Cutting and Fitting Around Obstructions
Cutting and fitting cedar shake shingles around chimneys and vents requires precision and careful measurement. Using a sharp utility knife or circular saw with a fine-tooth blade, cut the shingles to the required shape and size, ensuring a snug fit against the obstruction. Accurate measurements and precise cuts are critical to prevent gaps or overlaps that could compromise the roof’s weather resistance. For chimneys, a flashing system should be installed prior to shingle application, ensuring a watertight seal. Proper flashing installation involves carefully tucking the flashing under the shingles, creating a barrier against moisture penetration. Vents should also be properly flashed to prevent water ingress.
Visual Guide: Shingle Overlap and Nailing
Imagine a section of the roof showing three courses of cedar shake shingles. Each shingle is approximately 18 inches long. The bottom course is fully visible. The second course overlaps the first by approximately 6 inches, leaving about 12 inches of the second course visible. The third course overlaps the second course by another 6 inches, with about 6 inches visible. Each shingle is secured by two nails, placed approximately 1 inch from the top edge of the shingle and spaced about 6 inches apart. The nails are driven straight and flush with the surface of the shingle, avoiding over-driving which could split the wood. This staggered pattern ensures robust protection and a visually appealing finish. This consistent overlap and nailing technique is crucial for effective weather resistance and a professional look. Remember, accurate measurement and proper nailing are crucial to avoid leaks and structural damage.
Maintenance and Repair
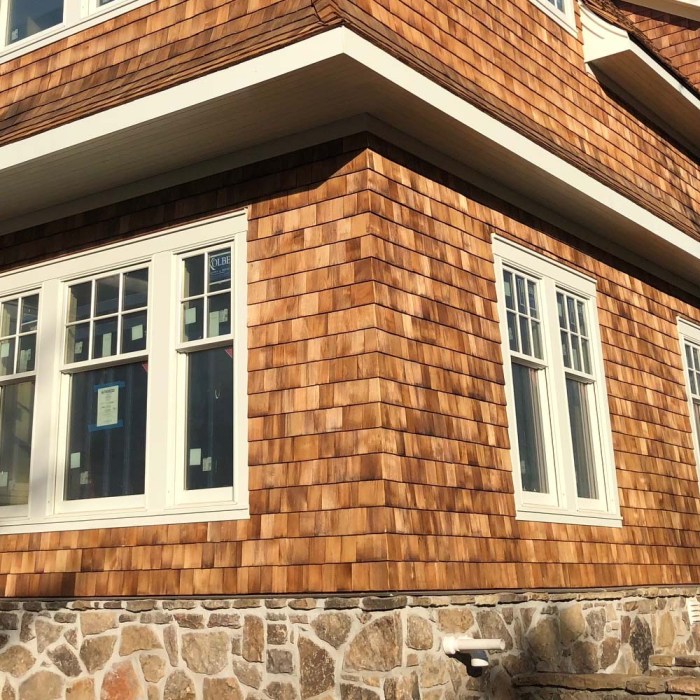
Proper maintenance is crucial for extending the lifespan of your cedar shake shingle roof, protecting your investment, and maintaining your home’s curb appeal. Neglecting routine care can lead to premature deterioration, costly repairs, and even structural damage. A proactive approach, however, can save you significant time and money in the long run.
Routine Maintenance Tasks
Regular inspections and simple maintenance tasks can significantly prolong the life of your cedar shake roof. These tasks are relatively easy to perform and don’t require specialized tools or expertise. Consistent attention to detail will prevent small problems from escalating into major, expensive repairs.
- Annual Cleaning: Remove debris such as leaves, twigs, and moss that can trap moisture and promote rot. A soft-bristled brush and a garden hose are usually sufficient. Avoid power washing, which can damage the shingles.
- Moss and Algae Removal: Moss and algae can retain moisture and damage shingles. For heavier infestations, consider a specialized moss killer specifically designed for cedar wood, following the manufacturer’s instructions carefully.
- Trim Overhanging Branches: Branches that touch the roof can cause damage during storms or simply by rubbing against the shingles. Regular trimming keeps them at a safe distance.
- Gutter and Downspout Maintenance: Ensure gutters and downspouts are clean and free-flowing to prevent water from pooling on the roof. Clogged gutters can lead to ice dams in colder climates.
- Inspection for Damaged Shingles: Regularly inspect the roof for cracked, curled, or missing shingles. Early identification allows for timely repairs before the damage worsens.
Repairing Common Damage
Identifying and repairing damage promptly is key to preventing more extensive and costly repairs down the line. Minor damage is often easily addressed, but ignoring it can lead to water infiltration and structural problems.
- Cracked Shingles: Small cracks can often be repaired using a high-quality wood filler specifically formulated for exterior use. Apply the filler, let it dry completely, and then sand smooth. For larger cracks or significant damage, shingle replacement may be necessary.
- Missing Shingles: Replacing a missing shingle requires careful matching of the existing shingles in terms of size, color, and texture. This often necessitates sourcing replacement shingles from the same manufacturer or a very close match. Use roofing nails appropriate for cedar shakes and seal the nail heads with roofing cement.
- Curled or Cupped Shingles: While sometimes caused by sun exposure, curled or cupped shingles often indicate underlying moisture problems. Addressing the source of moisture is crucial; simply replacing the shingles may not solve the problem. Professional inspection may be required.
Cedar Shake Shingle Cleaning Methods
The best cleaning method depends on the level of soiling. Gentle methods are preferred to avoid damage.
- Soft Brush and Hose: This is the gentlest method and ideal for routine cleaning. Use a soft-bristled brush to loosen debris, then rinse with a garden hose. Avoid high-pressure washing.
- Biodegradable Cleaning Solutions: For stubborn stains like moss or algae, use a biodegradable cleaning solution specifically designed for cedar wood. Always follow the manufacturer’s instructions carefully.
- Pressure Washing (Caution): Pressure washing should only be used as a last resort and with extreme caution. High pressure can damage the shingles, and improper technique can drive water under the shingles, leading to rot.
Annual Cedar Shake Roof Inspection Checklist
A thorough annual inspection is crucial for identifying and addressing potential problems early. This checklist can help guide your inspection.
- Overall Condition: Assess the overall condition of the roof for any signs of damage or deterioration.
- Shingle Condition: Check for cracked, curled, missing, or damaged shingles. Note their location and extent of damage.
- Flashing: Inspect all flashing around chimneys, vents, and valleys for any signs of rust, deterioration, or gaps.
- Gutters and Downspouts: Ensure gutters and downspouts are clean and free-flowing. Check for leaks or damage.
- Moss and Algae Growth: Look for any signs of moss or algae growth, which can indicate moisture problems.
- Attic Inspection: Check the attic for any signs of leaks or water damage.
- Photography: Take photos of any damage or concerns for future reference and to document repairs.
Cedar Shake Shingle Aesthetics
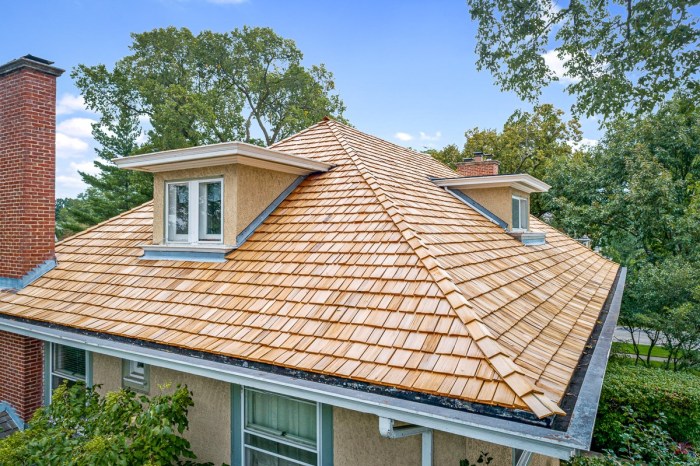
Cedar shake shingles offer a unique blend of rustic charm and sophisticated elegance, significantly impacting a home’s overall aesthetic. The right choice of stain, color, and pattern can transform a house from ordinary to extraordinary, enhancing its curb appeal and market value. Understanding the various aesthetic options available is crucial for achieving the desired look and feel.
The visual impact of cedar shake shingles goes far beyond just providing weather protection. They offer a rich textural element that can soften harsh lines or add visual interest to simpler architectural styles. The choice of finish and color directly impacts the overall mood and character of the home, ranging from a cozy, traditional feel to a modern, minimalist vibe. Careful consideration of these factors is essential for achieving a cohesive and visually appealing design.
Staining and Finishing Options for Cedar Shake Shingles
A wide array of stains and finishes are available to enhance the natural beauty of cedar shake shingles and protect them from the elements. Transparent stains allow the natural wood grain to show through while adding color and UV protection. Semi-transparent stains offer more color coverage while still showcasing the wood’s texture. Solid stains provide complete color coverage, ideal for a more uniform look. Each option provides a different level of protection and aesthetic effect, impacting the final appearance and longevity of the shingles. Oil-based stains are known for their deep penetration and durability, while water-based options offer lower VOCs (Volatile Organic Compounds) and faster drying times. Choosing the right finish depends on the desired aesthetic, level of protection, and environmental concerns.
Aesthetic Appeal of Different Shingle Colors and Patterns
The color of cedar shake shingles dramatically influences the overall mood and style of a home. Warm tones like browns, reds, and tans create a rustic, inviting atmosphere, often associated with traditional or craftsman-style homes. Cooler tones, such as grays and blues, can evoke a more modern or coastal feel. The pattern of the shingles also plays a role. The traditional staggered pattern creates a classic, textured look, while more contemporary designs might incorporate varied shingle lengths or even vertical patterns for a unique aesthetic. For instance, a dark gray shingle with a staggered pattern can create a sleek, sophisticated look on a modern farmhouse, while a warm brown shingle with a more random pattern might suit a rustic cabin in the woods.
Architectural Styles That Complement Cedar Shake Shingle Roofs
Cedar shake shingles are incredibly versatile and complement a wide range of architectural styles. Their natural texture and warm tones perfectly complement traditional styles such as Craftsman, Colonial, and Victorian homes. The rustic charm of cedar shakes also pairs well with more contemporary designs, including modern farmhouse, rustic chic, and even some minimalist styles. For example, a Craftsman home with its intricate detailing is beautifully enhanced by the rich texture of cedar shake shingles in a warm brown tone. Conversely, a modern farmhouse can achieve a striking contrast by using a darker, more contemporary gray or blue cedar shake roof. The key is to select a color and pattern that complements the overall architectural style and creates a visually cohesive design.
Mood Board: Diverse Applications of Cedar Shake Shingles in Residential Design
Imagine a mood board showcasing four distinct residential designs, each highlighting the versatility of cedar shake shingles.
Scene 1: A rustic cabin nestled in a mountain setting. The roof is covered in dark brown, almost black, cedar shake shingles, creating a dramatic contrast against the snowy landscape. The shingles are laid in a staggered pattern, emphasizing the texture and rustic charm. The cabin itself is made of rough-hewn logs, complementing the natural look of the shingles.
Scene 2: A modern farmhouse with a clean, white exterior. The roof features light gray cedar shake shingles, providing a subtle textural element without overpowering the minimalist aesthetic. The shingles are laid in a neat, even pattern, enhancing the home’s contemporary feel. Large windows and a spacious porch further emphasize the modern design.
Scene 3: A coastal home with a shingled exterior. The cedar shake shingles are a weathered gray-blue, reflecting the natural tones of the ocean and sky. The shingles are laid in a slightly irregular pattern, adding a touch of casual elegance. The home features a wrap-around porch and expansive windows, maximizing the views of the surrounding water.
Scene 4: A Craftsman-style bungalow with a warm, inviting exterior. The roof is covered in medium brown cedar shake shingles, creating a rich, textured surface. The shingles are laid in a traditional staggered pattern, complementing the home’s intricate detailing and handcrafted elements. The overall effect is one of cozy elegance, reflecting the classic charm of the architectural style.
Environmental Considerations
Cedar shake shingles, while offering undeniable aesthetic appeal and longevity, present a complex environmental profile. Understanding their sustainability requires a balanced assessment of their lifecycle, from sourcing the raw material to their eventual disposal. This section delves into the key environmental aspects of using cedar shake shingles, highlighting both their potential benefits and drawbacks.
Choosing cedar shake shingles involves a significant environmental footprint, encompassing the production process, transportation, installation, and eventual disposal or repurposing. Responsible sourcing and mindful lifecycle management are crucial to mitigating this impact and maximizing the long-term environmental advantages of this classic roofing material.
Sustainable Forestry Practices
Sustainable forestry is paramount to minimizing the environmental impact of cedar shake shingle production. Responsible harvesting ensures that cedar trees are replenished at a rate that doesn’t deplete forests. Look for certifications like the Forest Stewardship Council (FSC) label, which verifies that the wood comes from forests managed according to strict environmental and social standards. This certification guarantees responsible logging practices that protect biodiversity, soil health, and water quality. Choosing FSC-certified cedar ensures that your roofing choice contributes to the preservation of forest ecosystems rather than their degradation.
Environmental Impact of Production and Disposal
The manufacturing process of cedar shake shingles involves energy consumption for milling, shaping, and treating the wood. The treatment process, often involving preservatives, can also introduce chemicals into the environment if not managed responsibly. Disposal presents another challenge. While cedar is biodegradable, landfill disposal contributes to methane emissions, a potent greenhouse gas. However, responsible disposal methods, such as repurposing the shingles for landscaping or using them as mulch, can significantly reduce the environmental impact. Recycling programs for cedar shake shingles are still limited, but their potential should be explored to minimize waste.
Responsible Sourcing of Cedar Wood
Sourcing cedar wood responsibly is a critical factor in minimizing the environmental impact of cedar shake shingles. This involves choosing suppliers who adhere to sustainable forestry practices, such as selective logging, reforestation, and avoidance of endangered species habitats. By selecting shingles from suppliers committed to sustainable forestry, homeowners can contribute to the preservation of forest ecosystems and the long-term health of the planet. Traceability is key; inquire about the origin of the wood and the forestry practices employed by the supplier.
Long-Term Environmental Benefits
Despite the environmental considerations during production and disposal, cedar shake shingles offer several long-term environmental benefits. Their durability and longevity mean they require less frequent replacement compared to other roofing materials, reducing the overall environmental impact associated with manufacturing and transportation. Furthermore, cedar’s natural insulating properties can contribute to energy efficiency in the building, reducing the reliance on heating and cooling systems. The natural beauty of cedar also reduces the need for energy-intensive paint or coatings often used with other roofing materials. The aesthetic appeal, combined with the material’s durability, results in a lower overall environmental footprint over the extended lifespan of the roof.
Cost and Lifespan
Cedar shake shingle roofing is a significant investment, impacting both your home’s aesthetic appeal and its long-term protection. Understanding the cost factors and lifespan expectations is crucial for making informed decisions. This section will provide a clear picture of what to expect regarding the financial commitment and the longevity of a cedar shake roof.
Estimating the cost of a cedar shake shingle roofing project involves several key variables. The price fluctuates based on factors such as the size of your roof, the complexity of the installation (e.g., multiple slopes, dormers), the quality of the shingles chosen (thickness, grade), and regional labor rates. Material costs alone can vary considerably depending on the type of cedar and its sourcing. Add to this the labor costs, which are often the largest portion of the total expense, and you’ll quickly see why a detailed estimate is vital.
Cedar Shake Shingle Cost Estimation
Accurately estimating the cost requires a breakdown of materials and labor. Materials include the shingles themselves, underlayment, flashing, nails, and any necessary accessories. Labor costs depend on the roofing contractor’s rates and the complexity of the job. To illustrate, let’s consider a hypothetical 2,000 square foot roof. High-quality cedar shakes might cost $8-$12 per square foot for materials alone, while labor could range from $5-$10 per square foot, depending on location and contractor demand. This results in a potential material cost of $16,000 – $24,000 and a labor cost of $10,000 – $20,000. Adding these together, the total cost could range from $26,000 to $44,000. This is a broad estimate, and a professional consultation is always recommended for a precise quote.
Lifespan Comparison with Other Roofing Materials
Cedar shake shingles boast a remarkable lifespan compared to many other roofing materials. While asphalt shingles typically last 15-30 years, and tile roofs can last 50-100 years, cedar shake roofs, with proper maintenance, can last 30-50 years or even longer. This longevity is a significant advantage, although it comes at a higher initial investment. However, the extended lifespan often translates to lower long-term costs compared to more frequent replacements needed for shorter-lived roofing options.
Factors Influencing Cedar Shake Shingle Longevity
Several factors significantly influence the longevity of a cedar shake roof. Proper installation is paramount; improperly installed shingles are more vulnerable to damage from weather and pests. Regular maintenance, including cleaning and treating the shingles with preservatives, helps to extend their life. Climate conditions also play a role; harsh weather, such as intense sun, heavy snow, or frequent freeze-thaw cycles, can accelerate deterioration. Finally, the quality of the cedar shakes themselves is crucial. Higher-grade shakes, with thicker profiles and less knotting, tend to last longer.
Cost Breakdown Table for a Typical Cedar Shake Roof Installation
| Item | Cost Per Square Foot (Range) | Total Cost (2000 sq ft roof) | Notes |
|---|---|---|---|
| Cedar Shakes (Materials) | $8 – $12 | $16,000 – $24,000 | Price varies based on grade and thickness |
| Underlayment | $1 – $2 | $2,000 – $4,000 | Essential for moisture protection |
| Flashing & Accessories | $1 – $3 | $2,000 – $6,000 | Includes ridge vents, valleys, etc. |
| Labor | $5 – $10 | $10,000 – $20,000 | Highly dependent on location and contractor |
| Total Estimated Cost | $16 – $31 | $30,000 – $60,000 | This is a broad estimate; actual costs may vary. |
Fire Resistance and Safety
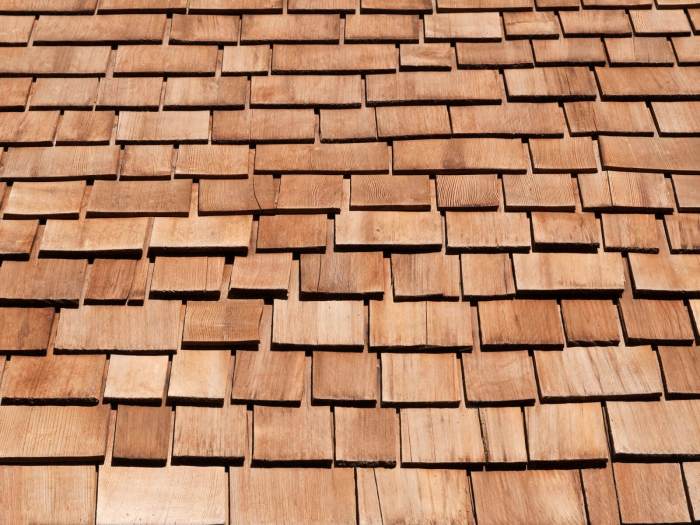
Cedar shake shingles, while offering undeniable aesthetic appeal and longevity, present inherent fire risks due to their natural wood composition. Understanding these risks and implementing appropriate safety measures is crucial for both installers and homeowners. This section details the fire-resistant properties of cedar shake shingles, fire codes, fire-retardant treatments, and essential safety precautions.
Fire-Resistant Properties and Fire Codes
Cedar shake shingles are naturally combustible. However, their inherent fire resistance can be enhanced through various treatments and installation techniques. The level of fire resistance is often dictated by local building codes, which frequently specify the type of treatment required and the allowable spacing between shingles. For instance, some codes might mandate the use of fire-retardant treated shingles in areas with high fire risk, such as regions prone to wildfires or near dry brush. These codes often classify shingles based on their fire resistance rating, which is determined through standardized testing procedures. Compliance with these codes is essential to ensure both safety and legal adherence. Failure to comply can lead to building permit rejection or even insurance complications.
Fire Retardant Treatments
Fire-retardant treatments are applied to cedar shake shingles to improve their resistance to ignition and flame spread. These treatments typically involve soaking the shingles in a chemical solution that penetrates the wood, altering its chemical composition to make it less flammable. Commonly used fire retardants include borates and other inorganic salts. The effectiveness of these treatments varies depending on the type of retardant used, the application method, and the subsequent exposure to weathering. It’s crucial to choose treatments that meet or exceed local building code requirements and to follow the manufacturer’s instructions carefully during application. Regular re-treatment may be necessary depending on the chosen product and environmental conditions. Untreated cedar shakes are significantly more susceptible to fire.
Safety Precautions During Installation and Maintenance
Working with cedar shake shingles requires adherence to strict safety protocols. The installation process involves working at heights, handling sharp tools, and exposure to potentially hazardous materials. Proper fall protection, such as harnesses and safety nets, is essential when working on roofs. Safety glasses and gloves should be worn at all times to protect against flying debris and splinters. Moreover, appropriate respiratory protection should be used when working with fire-retardant chemicals or when sanding or cutting shingles. Regular inspections for damaged or loose shingles are also critical for long-term safety and prevention of potential fire hazards. A well-maintained roof is significantly less prone to fire damage.
Safety Equipment
A comprehensive safety kit is essential for all cedar shake shingle installation and maintenance projects. This should include:
- Hard hat
- Safety glasses
- Work gloves
- Fall protection harness and lanyard
- Safety net (where appropriate)
- Respiratory protection (dust mask or respirator)
- Ladder with proper stabilizers
- First-aid kit
The specific equipment required will depend on the project’s complexity and the working environment. Always prioritize safety and use the appropriate personal protective equipment (PPE) for every task. Regular maintenance and proper use of the equipment are crucial for minimizing risk.
Investing in a cedar shake shingle roof is a commitment to quality, beauty, and longevity. Understanding the intricacies of these natural roofing materials—from selecting the right type to performing proper maintenance—is crucial for maximizing their lifespan and aesthetic appeal. This guide has provided a comprehensive overview, arming you with the knowledge to make informed decisions and enjoy the enduring charm of a cedar shake roof for years to come. Remember, proper installation and regular maintenance are key to reaping the full benefits of this timeless roofing choice. Don’t hesitate to consult with experienced roofing professionals to ensure a flawless installation and long-lasting beauty.
Answers to Common Questions
What is the average lifespan of cedar shake shingles?
The lifespan of cedar shake shingles varies depending on factors like grade, climate, and maintenance, but generally ranges from 30 to 50 years.
Are cedar shake shingles fire resistant?
While naturally more resistant than asphalt shingles, cedar shakes are still combustible. Fire-retardant treatments can significantly improve their fire resistance, and adhering to local fire codes is essential.
How much do cedar shake shingles cost?
The cost varies significantly based on shingle grade, region, labor costs, and project complexity. Expect a substantial investment compared to other roofing materials.
Can I install cedar shake shingles myself?
While DIY is possible for experienced DIYers, professional installation is highly recommended due to the complexity and safety considerations involved.
How often should I inspect my cedar shake roof?
Annual inspections are recommended to identify and address potential issues like damage, moss growth, or missing shingles early on.
