Boost your home’s curb appeal and energy efficiency with insulated siding. This isn’t just about aesthetics; it’s a strategic investment that pays dividends in lower energy bills and increased home value. We’ll dissect the various types, from durable vinyl to sleek metal, exploring their pros, cons, and installation processes. Discover how to choose the perfect siding for your climate, budget, and architectural style, transforming your home from drab to fab.
We’ll cover everything from selecting the right materials and mastering the installation techniques to understanding the long-term cost savings and maintenance requirements. This isn’t your average DIY guide; it’s a deep dive into the world of insulated siding, empowering you to make informed decisions that enhance your home’s beauty and value for years to come. Prepare to unlock the secrets to a more energy-efficient and aesthetically pleasing home.
Types of Insulated Siding
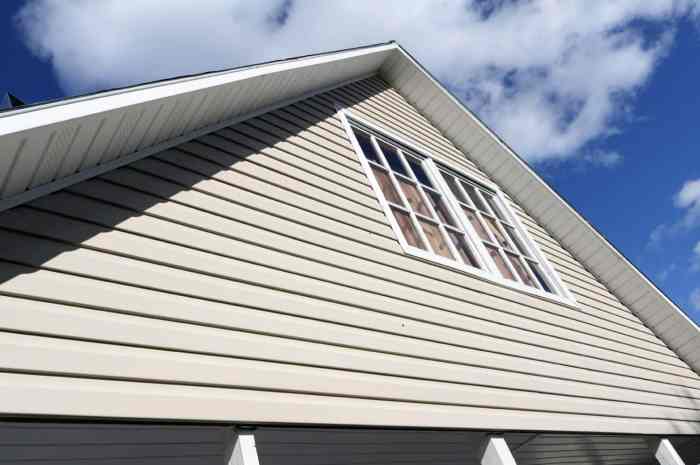
Choosing the right insulated siding can significantly impact your home’s energy efficiency, curb appeal, and long-term value. Understanding the various options available is crucial for making an informed decision. This section will delve into the specifics of different insulated siding materials, comparing their performance, cost, and maintenance requirements to help you navigate this important home improvement choice.
Insulated Siding Material Comparison
Selecting the ideal insulated siding hinges on a careful assessment of several key factors. The following table provides a direct comparison of popular options, allowing you to weigh their respective strengths and weaknesses based on your specific needs and priorities. Remember, prices can fluctuate based on location and supplier, so always obtain multiple quotes.
| Material | R-Value (Approximate) | Cost (per sq ft, approximate) | Lifespan (Years) | Maintenance Requirements |
|---|---|---|---|---|
| Vinyl | 2-4 | $3-$8 | 20-30 | Low; occasional cleaning |
| Fiber Cement | 0-2 (depending on thickness and insulation backing) | $8-$15 | 30-50 | Moderate; periodic painting and cleaning |
| Foam (Polyurethane, Polyisocyanurate) | 4-8 (depending on thickness) | $6-$12 | 20-30 | Low; occasional cleaning |
| Metal (Aluminum, Steel) | 0-2 (depending on insulation backing) | $10-$20 | 30-50+ | Low; occasional cleaning; potential for rust (steel) |
Vinyl Insulated Siding
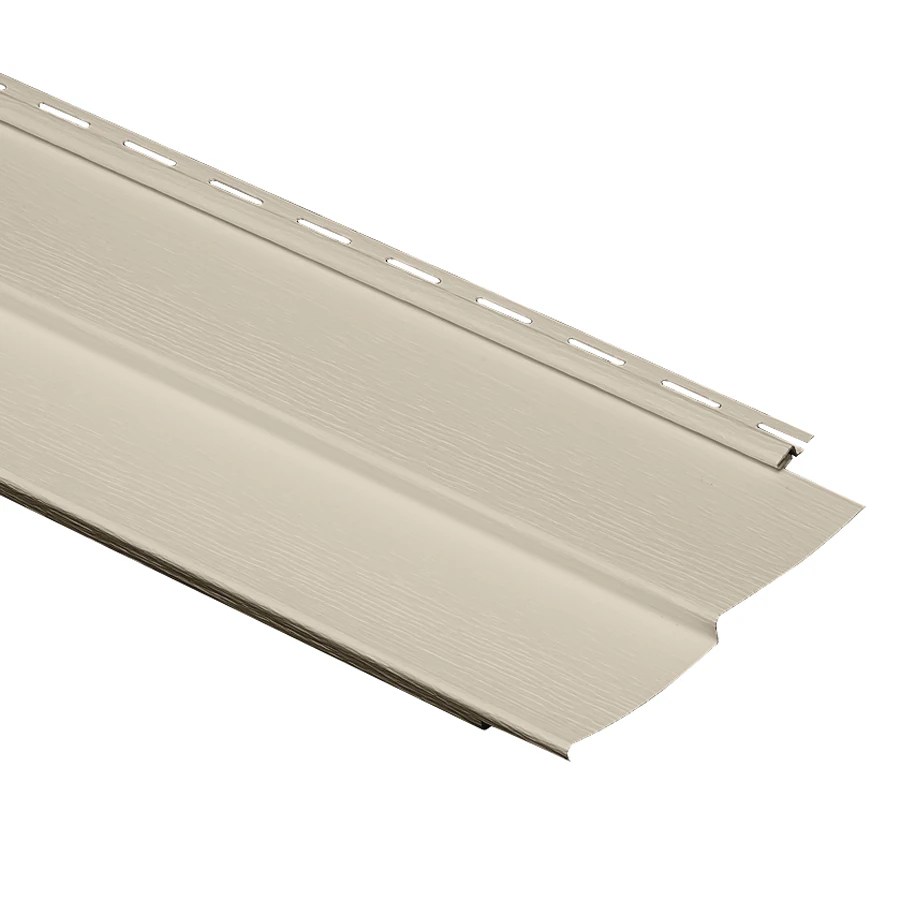
Vinyl siding, known for its affordability and ease of installation, offers a decent level of insulation, although its R-value is typically lower compared to other options. Its lightweight nature makes installation faster and less labor-intensive. However, it’s susceptible to damage from impact and extreme temperatures, potentially leading to warping or cracking. While low-maintenance, it may fade over time, requiring replacement sooner than more durable materials. A well-maintained vinyl siding installation on a suburban home in a moderate climate could last 25 years before showing significant signs of wear.
Fiber Cement Insulated Siding
Fiber cement siding offers superior durability and fire resistance compared to vinyl. Its higher initial cost is often offset by its longer lifespan and lower maintenance needs over the long term. While generally more resistant to damage, it can be susceptible to cracking if not properly installed. The R-value is often lower unless it incorporates a foam backing, which increases the cost and complexity of installation. A fiber cement house in a coastal area, known for harsh weather conditions, might easily last 40+ years with appropriate maintenance.
Foam Insulated Siding
Foam siding boasts excellent insulating properties due to its high R-value. This translates to significant energy savings, particularly in colder climates. However, its susceptibility to damage from impact and UV exposure necessitates careful handling during installation and potential for more frequent repairs over time. Its aesthetic appeal is often less versatile than other options, and it might not be suitable for all architectural styles. A properly installed foam system on a modern, energy-efficient home in a cold climate could yield significant long-term energy savings.
Metal Insulated Siding
Metal siding, often aluminum or steel, provides exceptional durability and longevity. It’s highly resistant to fire, insects, and rot. While generally low-maintenance, steel siding requires protection against rust. Aluminum is more resistant to corrosion but can dent. The initial cost is higher, but its long lifespan and low maintenance make it a worthwhile investment for many homeowners. A metal-clad building in a hurricane-prone region, designed to withstand high winds and heavy rain, can easily last for decades with minimal upkeep.
Installation Process of Insulated Siding
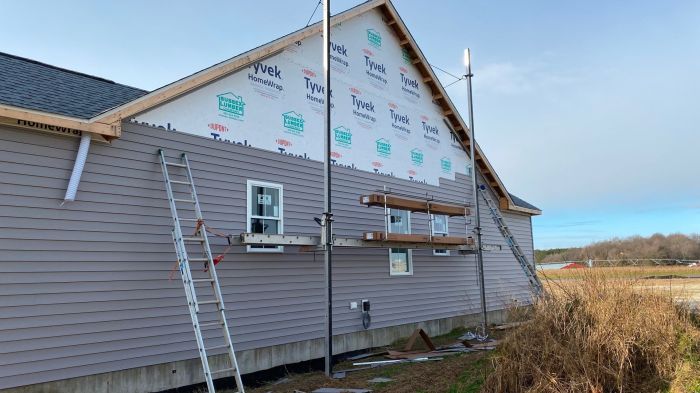
Installing insulated siding can significantly improve your home’s energy efficiency and curb appeal. However, a successful installation requires careful planning, precision, and the right tools. This guide will walk you through the process, ensuring you achieve professional results. Remember, safety is paramount; always prioritize your well-being and follow manufacturer instructions.
Tools and Equipment
The right tools are essential for a smooth and efficient installation. Investing in quality equipment will not only save you time but also ensure a superior finish. Skimping here can lead to costly mistakes and a less-than-perfect outcome.
- Measuring tape: A reliable, accurate measuring tape is crucial for precise cuts and measurements.
- Level: Ensuring your siding is perfectly level is vital for a professional appearance. Use a high-quality level to avoid unevenness.
- Circular saw with fine-tooth blade: A circular saw with a fine-tooth blade is ideal for clean cuts on insulated siding materials. Avoid using a dull blade, as this will result in ragged edges.
- Jigsaw: A jigsaw is useful for cutting intricate shapes and around corners where a circular saw might be cumbersome.
- Hammer: A sturdy hammer is necessary for driving nails or staples securely.
- Nail gun (optional but recommended): A nail gun significantly speeds up the installation process and provides consistent fastening.
- Safety glasses and gloves: Protecting your eyes and hands is non-negotiable. Always wear appropriate safety gear.
- Caulk gun: Caulk is essential for sealing gaps and ensuring a weathertight installation.
- Utility knife: A sharp utility knife is helpful for trimming and making small adjustments.
- Ladder: A sturdy ladder is crucial for reaching higher areas of the house safely.
Preparation and Measurement
Thorough preparation is key to a successful siding installation. Taking the time to properly prepare the surface will save you time and frustration in the long run. This step is often overlooked, but it’s the foundation of a quality installation.
- Inspect the existing wall: Check for any damage, rot, or loose areas. Repair any issues before starting the installation.
- Clean the surface: Remove any dirt, debris, or loose paint. A clean surface ensures proper adhesion of the siding.
- Measure the wall: Accurately measure the height and width of each section of the wall. This will help you determine the amount of siding needed and plan your cuts.
- Plan your layout: Sketch a plan of your siding layout to minimize waste and ensure a consistent look.
Cutting and Handling Insulated Siding
Cutting insulated siding requires care to avoid damage and ensure a clean finish. Different materials require different techniques, so understanding these nuances is crucial.
- Vinyl siding: Vinyl siding is relatively easy to cut with a sharp utility knife or circular saw. Use a straight edge as a guide for clean cuts.
- Foam-backed siding: Foam-backed siding requires a bit more care. Use a sharp blade to prevent crushing or tearing the foam backing. A fine-tooth blade on a circular saw or a jigsaw is recommended.
- Fiber cement siding: Fiber cement siding is denser and requires a more robust cutting tool, such as a circular saw with a carbide-tipped blade. Always wear a dust mask when cutting fiber cement.
- Waste Management: Plan your cuts carefully to minimize waste. Use scraps for smaller areas or to practice your cuts before tackling larger sections.
Fastening and Finishing
Proper fastening and finishing touches ensure a durable and aesthetically pleasing installation. Using the correct fasteners and techniques is essential for longevity.
- Fastening: Use appropriate fasteners for your siding material. Follow the manufacturer’s recommendations for spacing and penetration depth.
- Overlapping: Overlap siding panels according to the manufacturer’s instructions to ensure proper weather protection and a clean look.
- Caulking: Caulk all seams and joints to prevent water infiltration. Use a high-quality, exterior-grade caulk.
- Finishing touches: Inspect your work carefully for any gaps or imperfections. Make any necessary repairs before moving on.
Energy Efficiency and Cost Savings
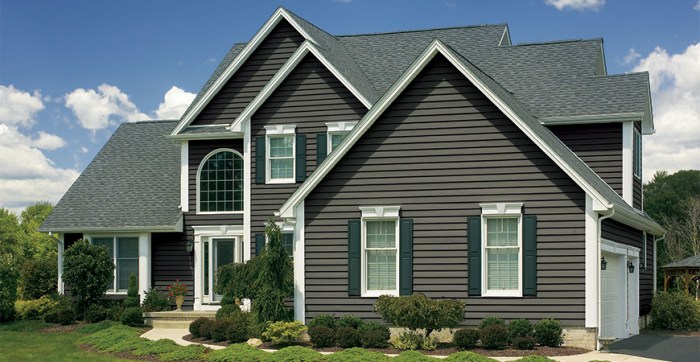
Insulated siding offers a significant return on investment by dramatically improving your home’s energy efficiency. This translates to lower heating and cooling bills, a more comfortable living environment, and increased property value. Let’s delve into the specifics of how this translates into tangible cost savings.
Insulated siding works by creating a thermal barrier between your home’s interior and the outside elements. This barrier significantly reduces heat transfer, meaning less energy is needed to maintain a comfortable temperature year-round. The reduction in heat transfer is directly proportional to the R-value of the siding; a higher R-value indicates better insulation and greater energy savings. For example, a home with traditional vinyl siding might have an overall wall R-value of R-13. Upgrading to insulated siding with an R-value of R-5 or higher effectively increases the overall wall insulation, potentially leading to a combined R-value of R-18 or more. This improvement drastically reduces the amount of energy lost through the walls, resulting in substantial savings on your energy bills.
Insulated Siding’s Impact on Energy Bills
The potential energy savings from insulated siding can be substantial. Consider a typical 2,000 square foot home in a moderate climate. Let’s assume that without insulated siding, the annual heating and cooling costs are $1,800. By upgrading to insulated siding with a significantly higher R-value, this cost could be reduced by 15-25%, resulting in annual savings of $270 to $450. This savings is a direct result of reduced heat loss in winter and heat gain in summer. The exact percentage of savings will vary based on factors such as climate, home size, existing insulation levels, and the R-value of the chosen siding. However, even a modest reduction in energy consumption translates to significant long-term cost savings.
Long-Term Cost Comparison: Insulated vs. Traditional Siding
While the initial investment for insulated siding is higher than traditional siding, the long-term cost-effectiveness is significantly better. The following table illustrates this comparison:
| Feature | Traditional Siding | Insulated Siding |
|---|---|---|
| Initial Cost | Lower | Higher |
| Installation Cost | Lower | Higher |
| Energy Savings (Annual) | Low | High |
| Maintenance Costs | Moderate | Low |
| Longevity | Moderate | High |
| Resale Value Increase | Low | High |
Return on Investment (ROI) Across Climate Zones
The ROI on insulated siding varies significantly based on climate. In regions with extreme temperatures, the energy savings are more substantial, leading to a quicker ROI. For example:
Scenario 1: Cold Climate (Minnesota): A homeowner in Minnesota with high heating costs might see annual savings of $500-$700. With an initial investment of $15,000 for insulated siding, the ROI could be achieved within 3-5 years.
Scenario 2: Moderate Climate (Pennsylvania): A homeowner in Pennsylvania might see annual savings of $300-$400. With a similar $15,000 investment, the ROI might take 5-7 years.
Scenario 3: Mild Climate (California): In a mild climate like California, the energy savings might be lower, around $200-$300 annually. The ROI might take longer, potentially 7-10 years or more, depending on the initial investment.
These are hypothetical scenarios; actual ROI will depend on numerous factors including specific energy costs, home size, climate, and the R-value of the siding.
Maintenance and Repair of Insulated Siding
Proper maintenance is crucial for extending the lifespan of your insulated siding and preserving its energy-saving benefits. Neglecting maintenance can lead to costly repairs and reduced efficiency. A proactive approach, including regular cleaning and inspections, will ensure your siding remains a valuable asset to your home for years to come.
Insulated Siding Maintenance Schedule
Regular maintenance varies depending on the type of insulated siding installed. This table provides a recommended schedule to keep your siding in optimal condition. Remember, environmental factors like harsh weather conditions may necessitate more frequent cleaning and inspections.
| Siding Type | Cleaning Frequency | Inspection Frequency |
|---|---|---|
| Vinyl | Twice yearly (spring and fall), using a mild detergent and soft brush. Power washing should be done carefully to avoid damage. | Annually, checking for cracks, dents, or loose panels. |
| Fiber Cement | Annually, using a pressure washer with a low-pressure nozzle. Avoid harsh chemicals. | Semi-annually, inspecting for cracks, chips, or signs of moisture penetration. |
| Metal | Annually, using a mild detergent and soft brush or pressure washer. Pay attention to areas prone to staining. | Annually, checking for rust, dents, or loose panels. |
Common Issues and Problems with Insulated Siding
Several factors can contribute to problems with insulated siding. Understanding these issues allows for timely intervention and prevents escalating damage.
- Weather Damage: Extreme temperature fluctuations, hail, and strong winds can cause cracking, dents, and warping in siding panels. Coastal areas may experience salt damage, leading to corrosion and discoloration.
- Pest Infestation: Wood-boring insects or rodents can create holes and weaken the structural integrity of the siding, especially in fiber cement or wood-based insulated siding. Regular inspections are essential to detect early signs of infestation.
- Improper Installation: Faulty installation is a leading cause of siding issues. Inadequate flashing, gaps around windows and doors, and improperly secured panels can lead to water infiltration, mold growth, and structural damage.
- Moisture Problems: Water penetration, whether from rain, snow, or poor drainage, can cause significant damage. This can lead to rot, mold, and the deterioration of the underlying insulation.
Repair Procedures for Common Insulated Siding Problems
Addressing problems promptly is crucial for preventing further damage and costly repairs.
Replacing damaged panels usually involves removing the affected panel and its surrounding fasteners. The new panel should be carefully installed, ensuring proper alignment and secure fastening. For water infiltration, identifying the source is critical. This may involve checking flashing, caulking, and drainage systems. Repairing gaps and cracks often requires applying appropriate sealant or caulk. In severe cases, professional assistance may be necessary.
Addressing pest infestations requires professional pest control services. Treatment may involve targeted insecticide application or removal of infested areas. For significant water damage, remediation may involve drying out the affected area, replacing damaged insulation, and treating for mold growth. In such instances, consulting a professional contractor is strongly recommended.
Aesthetic Considerations and Design Options
Insulated siding offers a remarkable opportunity to enhance your home’s curb appeal while boosting its energy efficiency. The wide array of color, texture, and style options available allows for seamless integration with diverse architectural styles, transforming your house from ordinary to extraordinary. Choosing the right siding isn’t just about functionality; it’s about creating a visually stunning and lasting impression.
The versatility of insulated siding allows for a personalized aesthetic that reflects your unique taste and complements your home’s architectural features. From classic to contemporary, the possibilities are virtually limitless, offering a blend of beauty and practicality. Careful consideration of color palettes, textures, and styles will ensure your home stands out for all the right reasons.
Color, Texture, and Style Options for Insulated Siding
Insulated siding comes in a vast spectrum of colors, textures, and styles, mirroring the diversity of natural materials like wood, stone, and brick. This allows homeowners to achieve a specific aesthetic without the maintenance burdens of traditional materials. The color choices range from subtle neutrals to bold, vibrant hues, offering endless possibilities for personalization. Textures vary from smooth and sleek to deeply embossed, providing depth and visual interest. Styles can mimic the look of traditional clapboard, shingle, or even contemporary paneling, ensuring a perfect match for any architectural style. Consider the overall color scheme of your home and neighborhood when making your selection.
Examples of Insulated Siding in Different Home Designs
The following examples illustrate how insulated siding can dramatically enhance the curb appeal of various home styles:
- A Victorian-style home clad in dark brown insulated siding with a deeply textured, wood-grain finish. The intricate detailing of the home’s trim is highlighted by the siding’s rich color, creating a sophisticated and timeless look. The deep brown complements the dark roofing and window frames, creating a unified and cohesive design. The wood-grain texture adds a touch of rustic charm, balancing the formality of the Victorian architecture.
- A Ranch-style home featuring light gray insulated siding with a smooth, contemporary finish. The clean lines of the siding perfectly complement the ranch’s simple, unfussy design. The light gray creates a bright and airy feel, while the smooth finish gives the home a modern, updated look. The subtle color allows the landscaping and other architectural features to take center stage.
- A Cape Cod-style home accented with white insulated siding and dark blue shutters. The classic combination evokes a sense of traditional charm and coastal elegance. The crisp white siding brightens the home, while the dark blue shutters add a pop of color and visual interest. The simple yet elegant design enhances the home’s overall character and creates a welcoming atmosphere.
Accentuating Architectural Details with Insulated Siding
Insulated siding can be strategically used to emphasize and enhance a home’s architectural details. For instance, using a contrasting color or texture on window and door surrounds can draw attention to these key features. Similarly, highlighting trim work with a different color or material can add depth and visual interest. Consider using darker siding around windows and doors to create a frame effect that emphasizes their importance in the overall design. Conversely, lighter siding around windows can make them appear larger and brighter. The use of contrasting colors or textures in the trim allows for a subtle yet effective way to draw attention to the architectural elements, enhancing the home’s overall visual appeal.
Upgrading your home with insulated siding is more than just a cosmetic improvement; it’s a smart investment that offers substantial long-term returns. By carefully considering the various types of siding, understanding the installation process, and planning for proper maintenance, you can significantly enhance your home’s energy efficiency, curb appeal, and overall value. Remember, the right siding choice not only protects your home but also reflects your personal style and commitment to sustainable living. So, are you ready to transform your house into a stunning, energy-efficient haven?
Question Bank
Is insulated siding difficult to install?
While DIY is possible, professional installation often ensures a better, longer-lasting result. The complexity depends on the siding type and your home’s structure.
How often should I clean my insulated siding?
Regular cleaning, typically once or twice a year, depending on your climate and environment, helps maintain its appearance and prolong its lifespan. Use a gentle cleaner and soft brush to avoid scratching the surface.
Can insulated siding withstand extreme weather conditions?
The durability varies depending on the material. Some, like fiber cement, are exceptionally resistant to harsh weather, while others may require more maintenance in extreme climates.
What’s the warranty on insulated siding?
Warranties vary significantly by manufacturer and material. Check the specific warranty details before purchasing.
Does insulated siding increase my home’s resale value?
Yes, energy-efficient improvements like insulated siding are highly valued by potential buyers, potentially increasing your home’s resale value.
