Tired of that faded, cracked siding? Upgrading to vinyl siding offers a transformative boost to your home’s curb appeal and value. But navigating the world of vinyl siding replacement can feel overwhelming—from choosing the right material and contractor to understanding the costs involved. This comprehensive guide cuts through the confusion, providing you with the essential knowledge to make informed decisions and achieve stunning results.
We’ll delve into every aspect, from meticulously analyzing costs and comparing different vinyl siding types to mastering the selection of a reputable contractor and understanding the environmental impact. By the end, you’ll be equipped to confidently manage your vinyl siding replacement project, transforming your house into the home of your dreams.
Cost Analysis of Vinyl Siding Replacement
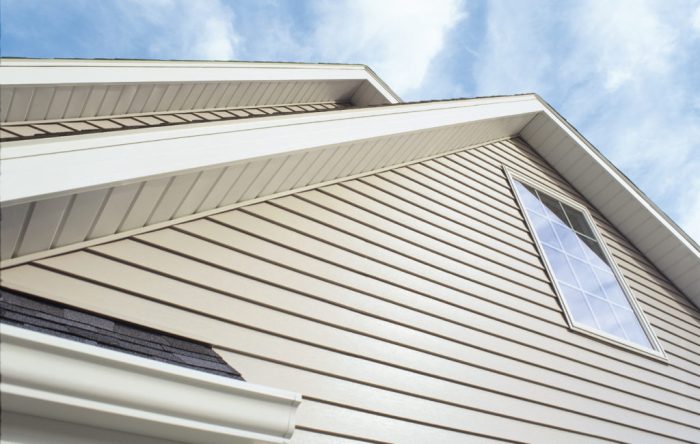
Replacing your vinyl siding is a significant home improvement project, and understanding the costs involved is crucial for effective budgeting and planning. This analysis will break down the average expenses, helping you make informed decisions before embarking on your renovation. Accurate cost estimations are vital to avoid unexpected financial burdens and ensure a smooth project execution.
Vinyl Siding Replacement Cost Breakdown
The total cost of vinyl siding replacement varies considerably depending on several factors. Let’s examine a typical breakdown of expenses. Remember, these are averages and your actual costs may differ.
| Cost Item | Average Cost (Low) | Average Cost (High) | Factors Affecting Cost |
|---|---|---|---|
| Materials (Siding, Trim, etc.) | $2,000 | $8,000 | Siding quality, quantity needed, style choices, and additional trim requirements. Premium brands and specialized profiles will increase costs. |
| Labor | $3,000 | $12,000 | Project size, complexity (e.g., removal of existing siding, underlying repairs), labor rates in your region, and contractor experience. More intricate designs and larger houses necessitate more labor. |
| Permits | $100 | $500 | Local regulations and the scope of the project. Larger projects or those requiring significant structural modifications will incur higher permit fees. |
| Waste Removal | $100 | $500 | Amount of old siding removed, local disposal regulations, and contractor’s disposal practices. Proper disposal of materials is crucial for environmental responsibility. |
| Total Estimated Cost | $5,200 | $20,500 | All factors listed above contribute to the overall cost variability. |
Factors Influencing Vinyl Siding Replacement Costs
Several key factors significantly impact the final cost of your vinyl siding replacement. Understanding these allows for better budget allocation and realistic expectations.
House Size: Larger homes naturally require more materials and labor, directly increasing the overall cost. A 2,000 square foot house will cost considerably more than a 1,000 square foot house.
Siding Quality: Vinyl siding comes in various grades and thicknesses. Higher-quality siding offers durability and longevity but comes with a higher price tag. Lower-grade siding may offer lower upfront costs, but it might require replacement sooner.
Complexity of the Project: Projects involving significant repairs to underlying sheathing or intricate design elements will increase labor costs. Removing existing siding, especially if it’s damaged or difficult to remove, also adds to the labor expense.
Regional Labor Rates: Labor costs vary significantly by location. Areas with high demand for skilled labor will have higher rates than areas with lower demand. This is a factor you can’t control directly, but it’s crucial to consider when budgeting.
Contractor Selection: Choosing a reputable and experienced contractor is essential. While a lower bid might seem appealing, it’s important to balance cost with quality and expertise. An inexperienced contractor might lead to unforeseen issues and increased costs down the line. Always get multiple quotes before making a decision.
Cost Comparison of Different Vinyl Siding Materials
Vinyl siding isn’t a one-size-fits-all product. Different types offer varied aesthetics, durability, and, consequently, cost.
Standard Vinyl Siding: This is the most common and generally the most affordable option. It provides a basic, functional look and decent durability.
Premium Vinyl Siding: Premium siding often features thicker profiles, enhanced color stability, and improved resistance to impact and fading. These superior features translate to a higher price point but often justify the added expense with their extended lifespan and superior performance.
Insulated Vinyl Siding: This type of siding incorporates an insulating foam backing, providing added energy efficiency. The added insulation leads to a higher initial cost, but the long-term energy savings can offset this over time. This is particularly attractive in climates with extreme temperatures.
Vinyl Siding with Stone or Brick Accents: Adding stone or brick accents to vinyl siding creates a more luxurious and visually appealing look. However, these additions will significantly increase the overall cost of the project. The price increase depends heavily on the quantity and type of accent materials used.
Choosing the Right Vinyl Siding
Selecting the perfect vinyl siding isn’t just about aesthetics; it’s a crucial decision impacting your home’s curb appeal, energy efficiency, and longevity. The right choice depends on a careful consideration of several factors, from the siding profile and color to your local climate and building codes. Making informed decisions in this area can save you significant money and headaches down the line.
Understanding the nuances of vinyl siding options empowers you to make a choice that perfectly complements your home’s architectural style and your personal preferences. Let’s dive into the key aspects to consider.
Vinyl Siding Profiles
Vinyl siding comes in a variety of profiles, each offering a unique look and feel. The profile you choose significantly influences the overall appearance of your home. Understanding the differences between these profiles is vital for achieving the desired aesthetic.
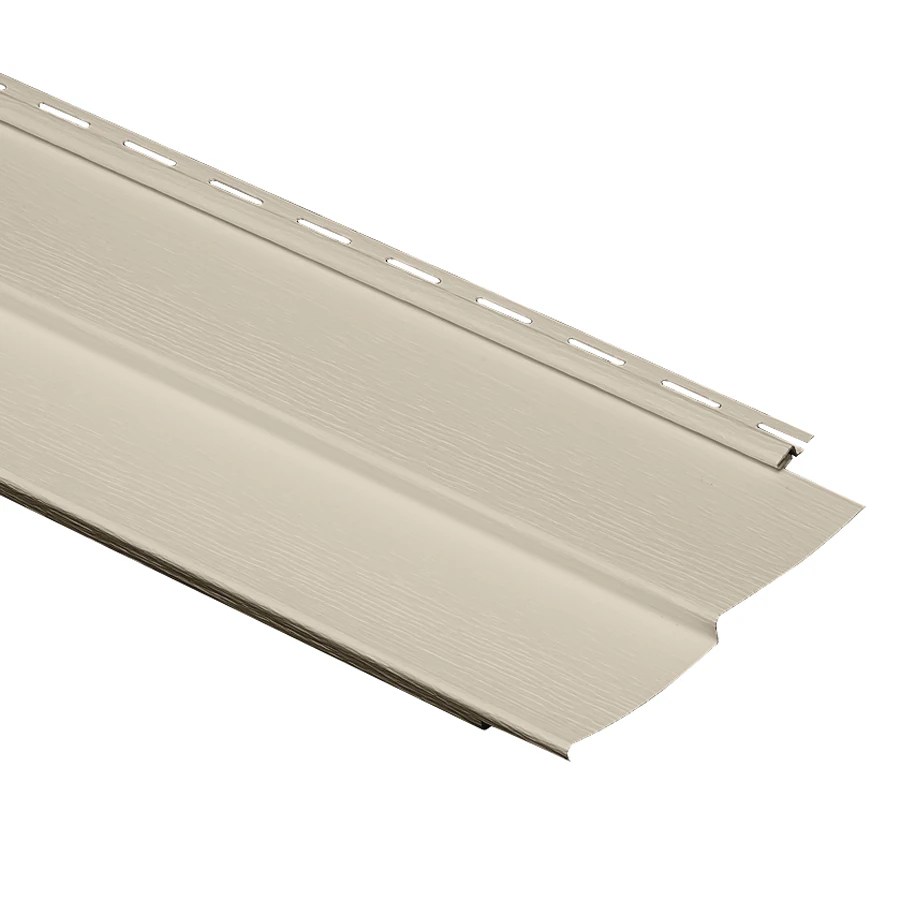
- Clapboard: This classic profile mimics traditional wood clapboard siding, featuring horizontal panels with slightly overlapping edges. It offers a clean, timeless look that suits a wide range of architectural styles. The subtle texture and traditional appearance make it a popular choice for both modern and historical homes.
- Shake: Designed to replicate the look of wood shakes, this profile features a textured, rough-hewn appearance. The irregular edges and varied lengths create a rustic and natural look, often preferred for homes with a more casual or craftsman-style aesthetic. It adds a sense of warmth and character to the exterior.
- Shingle: This profile imitates the look of asphalt shingles, with individual panels that overlap to create a layered effect. It’s often used to create a more textured and dimensional appearance, particularly on homes with a more traditional or Victorian style. The varied lengths and staggered arrangement add visual interest and depth.
Vinyl Siding Colors and Finishes
The color and finish of your vinyl siding play a crucial role in the overall look and feel of your home. Beyond simple aesthetics, the finish can also impact the siding’s durability and maintenance requirements.
Vinyl siding is available in a vast array of colors, from classic whites and creams to bolder shades like deep blues, reds, and greens. The color you choose should complement your home’s architecture, landscaping, and surrounding environment. Consider the long-term impact of your color choice; a vibrant color might be trendy now but could become dated over time. Many manufacturers offer color swatches and virtual home design tools to help visualize different options.
Finishes range from smooth to textured, influencing both the appearance and the siding’s ability to hide imperfections. Textured finishes often better mask minor scratches or imperfections, providing a more forgiving look over time. Some finishes also offer enhanced fade resistance, extending the lifespan of the siding.
Climate and Building Codes Considerations
Choosing vinyl siding requires careful consideration of your local climate and building codes. Ignoring these factors can lead to premature siding failure and potential legal issues.
In regions with extreme temperature fluctuations, it’s crucial to select vinyl siding with a high resistance to expansion and contraction. Extreme heat can cause the siding to expand, while extreme cold can cause it to contract. Siding that can’t handle these fluctuations can crack or warp. Look for siding with a good warranty that specifically addresses climate performance. For example, in areas prone to extreme snowfall, ensure your siding is resistant to damage from ice and snow buildup.
Local building codes dictate specific requirements for exterior materials, including vinyl siding. These codes might specify minimum thicknesses, fire ratings, or color restrictions. Before making your final selection, check with your local building department to ensure the siding you choose meets all applicable regulations. Failure to comply with building codes can result in costly fines and delays in your project.
The Vinyl Siding Replacement Process
Replacing your vinyl siding is a significant home improvement project, demanding careful planning and execution for optimal results. This process, while seemingly straightforward, involves a series of crucial steps, from initial assessment to final cleanup, each contributing to the longevity and aesthetic appeal of your new siding. Understanding these steps empowers you to make informed decisions and ensure a successful project.
Pre-Installation Preparation
Thorough preparation is paramount to a smooth and efficient vinyl siding installation. This phase sets the stage for a flawless final product and minimizes potential problems down the line. Neglecting this crucial step can lead to costly delays and compromised results. The preparation phase typically involves several key activities.
- Assessment and Measurement: Accurate measurements of the house’s exterior are essential to determine the quantity of siding needed. This includes accounting for windows, doors, and other architectural features. Detailed measurements prevent material shortages or excessive waste.
- Removal of Existing Siding: Carefully removing the old siding is critical. This often involves loosening nails and gently prying off the panels. Proper disposal of the old siding is important, adhering to local waste management regulations.
- Inspection and Repair of Underlying Structure: Once the old siding is removed, a thorough inspection of the house’s exterior wall is necessary. This involves checking for any rot, damage, or insect infestation. Any necessary repairs, such as replacing damaged sheathing or addressing water damage, must be completed before installing new siding.
- Preparation of the Surface: After repairs, the surface should be cleaned to remove any loose debris or dust. This ensures proper adhesion of the new siding. A clean surface also contributes to a more professional-looking final product.
Vinyl Siding Installation
The installation process itself is a meticulous undertaking, requiring attention to detail and adherence to best practices. Proper installation techniques ensure the longevity and weather resistance of the new siding. Improper installation can lead to premature failure and costly repairs.
- Starting the Installation: Installation typically begins at a corner of the house, using a starter strip to establish a straight, level baseline. This ensures the alignment of subsequent panels and contributes to a neat, uniform appearance.
- Panel Installation: Vinyl siding panels are installed horizontally, overlapping each other and securely fastened to the wall using nails or staples. It’s crucial to maintain consistent spacing between panels and ensure proper alignment. Overlapping panels provide protection against moisture intrusion.
- J-Channel and Accessories: J-channels are used around windows, doors, and corners to create a clean, finished look. Other accessories, such as trim and fascia, are installed to complete the project and enhance the overall aesthetics.
- Securing and Sealing: Nails or staples should be driven in carefully to avoid damaging the siding. Proper sealing around windows, doors, and other openings prevents water infiltration. Caulk or sealant should be used to create a weathertight barrier.
Post-Installation Cleanup
After the installation is complete, a thorough cleanup is essential to remove any debris or leftover materials. This final step ensures a professional finish and leaves the property looking its best.
This involves removing all debris, including discarded siding, nails, and packaging materials. The surrounding area should be swept clean, and any necessary landscaping restoration should be undertaken. A post-installation inspection ensures that all work has been completed to the highest standards.
Maintenance and Longevity of Vinyl Siding
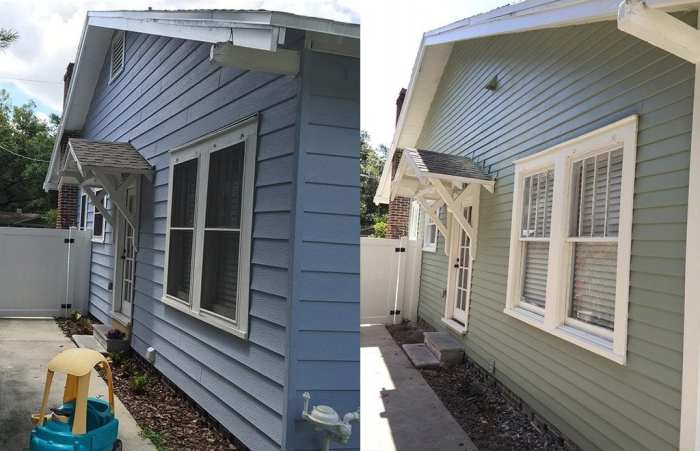
Vinyl siding, when properly maintained, offers a remarkably long lifespan, significantly enhancing your home’s curb appeal and protecting its structure. Regular care prevents costly repairs and ensures your investment retains its value for years to come. Understanding the maintenance requirements and common issues will empower you to maximize the longevity of your vinyl siding.
Vinyl Siding Maintenance Guide
Consistent maintenance is key to extending the life of your vinyl siding. A simple, proactive approach will yield significant long-term benefits. The following table Artikels a recommended maintenance schedule:
| Maintenance Task | Frequency |
|---|---|
| Inspect siding for damage (cracks, holes, loose panels) | Annually, after severe weather |
| Clean siding with water and a soft brush or pressure washer (low pressure) | Twice yearly (spring and fall) |
| Remove dirt, cobwebs, and other debris | As needed |
| Repair or replace damaged panels promptly | As needed |
| Trim overhanging branches that could scratch the siding | Annually |
Common Vinyl Siding Issues and Solutions
While durable, vinyl siding isn’t impervious to problems. Understanding common issues and their solutions allows for timely intervention, preventing escalation and costly repairs.
For example, consider warping or buckling. This often stems from improper installation or exposure to extreme temperatures. Addressing this requires carefully examining the affected area to identify the root cause. Sometimes, simply loosening and re-securing the panels can resolve the issue. In more severe cases, replacement of the affected panels may be necessary. Another common problem is fading. This is often caused by prolonged sun exposure. While you can’t prevent fading entirely, choosing higher-quality, UV-resistant vinyl siding can mitigate this effect. Regular cleaning can also help to maintain the color vibrancy. Finally, cracks and holes can occur due to impacts or age. Small cracks can often be repaired with caulk designed for vinyl siding. Larger holes or significant damage usually necessitate panel replacement.
Vinyl Siding Lifespan
The lifespan of vinyl siding is significantly influenced by several factors. High-quality vinyl siding, properly installed and maintained in a moderate climate, can last for 30-50 years or even longer. However, exposure to harsh weather conditions, such as intense sun, extreme temperature fluctuations, and frequent hailstorms, can shorten its lifespan. For instance, a home in a coastal area with constant salt spray might experience degradation more quickly than a home in a sheltered inland location. Similarly, neglecting regular maintenance can accelerate deterioration, leading to a shorter lifespan. Conversely, diligent maintenance and the selection of superior-quality, UV-resistant materials can significantly extend the life of your vinyl siding, potentially exceeding the typical lifespan estimates.
Finding and Selecting a Contractor
Choosing the right contractor is crucial for a successful vinyl siding replacement project. A poorly chosen contractor can lead to subpar workmanship, cost overruns, and protracted timelines. Thorough research and careful selection are key to avoiding these pitfalls and ensuring a smooth, high-quality renovation.
Selecting a qualified and reputable contractor involves more than just checking online reviews. You need to delve deeper to assess their experience, licensing, insurance, and overall business practices. Remember, this is a significant investment in your home, so due diligence is paramount.
Contractor Qualification Verification
Before engaging any contractor, verify their qualifications. This includes checking their licensing with your state’s contractor licensing board. Confirm they hold the necessary insurance, including liability and workers’ compensation, to protect you from potential accidents or damages. Look for contractors with a proven track record of successful vinyl siding installations, evidenced by positive reviews, testimonials, and a portfolio of completed projects. A reputable contractor will readily provide this information. Consider requesting references from past clients to further assess their performance.
Contractor Question Checklist
A well-structured checklist of questions helps you assess the contractor’s suitability and professionalism. The questions should cover various aspects of the project, from initial consultation to post-installation support. This proactive approach minimizes misunderstandings and ensures clarity throughout the process.
- The contractor’s experience in vinyl siding installation, including the number of years in business and the number of similar projects completed.
- Details of their licensing and insurance coverage, including policy numbers and expiry dates.
- Their process for obtaining necessary permits and inspections.
- Their project timeline and anticipated completion date.
- Their payment schedule and terms, including any upfront payments or deposits.
- Their warranty or guarantee on the materials and workmanship.
- Their plan for handling potential issues or delays during the project.
- Their method for managing waste disposal and cleanup.
- The names and contact information of at least three previous clients for references.
The Importance of Multiple Quotes
Obtaining multiple quotes from different contractors is a fundamental step in ensuring you receive competitive pricing and the best value for your money. Comparing quotes allows you to evaluate different approaches, materials, and timelines, ultimately leading to a more informed decision. Don’t solely focus on the lowest price; consider the overall package, including the contractor’s reputation, experience, and the quality of materials proposed. For example, a quote that appears significantly lower might reflect the use of inferior materials or a lack of proper insurance coverage, potentially leading to higher costs in the long run. By comparing several quotes, you can identify any discrepancies and ensure you’re making a well-informed choice based on both price and quality.
Environmental Considerations
Vinyl siding, while offering durability and low maintenance, presents environmental considerations throughout its lifecycle, from manufacturing to disposal. Understanding these impacts is crucial for making informed decisions about home exterior choices. This section will examine the environmental footprint of vinyl siding and compare it to alternatives.
The manufacturing process of vinyl siding is energy-intensive, relying heavily on fossil fuels to produce the polyvinyl chloride (PVC) resin. PVC production releases volatile organic compounds (VOCs) and other pollutants into the atmosphere, contributing to air pollution and greenhouse gas emissions. Furthermore, the extraction and processing of raw materials, such as petroleum and chlorine, also have significant environmental consequences. The longevity of vinyl siding, while a benefit in terms of reducing the frequency of replacements, means that its environmental impact is spread out over a longer period.
Vinyl Siding Manufacturing and Disposal Impacts
The environmental impact of vinyl siding extends beyond manufacturing. Disposal poses a significant challenge. Landfills are often the final destination for discarded vinyl siding, contributing to the growing problem of plastic waste. Vinyl siding does not readily biodegrade, and incineration can release harmful dioxins and furans into the air. The sheer volume of vinyl siding used in construction translates to a substantial amount of waste accumulating in landfills over time. For example, a large suburban development with hundreds of homes will generate tons of vinyl siding waste over its lifespan. This contributes to long-term land pollution and resource depletion. Sustainable disposal practices are therefore essential to minimize the negative environmental consequences.
Comparison to Alternative Cladding Materials
Compared to other exterior cladding options, vinyl siding’s environmental impact varies. Wood siding, while a renewable resource, requires significant energy for harvesting, processing, and transportation. Furthermore, the use of treated lumber often involves the application of chemical preservatives that can have negative environmental consequences. Metal siding, primarily made from aluminum or steel, is recyclable but requires substantial energy for production. Fiber cement siding, a composite material, has a lower carbon footprint than vinyl but still involves manufacturing processes with some environmental impact. The overall “best” option depends on a holistic life-cycle assessment considering factors like material sourcing, manufacturing processes, transportation, lifespan, and end-of-life management. A comparative analysis using standardized environmental impact assessment tools would provide a more precise comparison.
Proper Disposal of Old Vinyl Siding
Proper disposal of old vinyl siding is critical to minimizing its environmental impact. Recycling options are limited for vinyl siding, although some regions have programs to recycle PVC. Check with your local waste management authority to determine available recycling options. If recycling isn’t feasible, responsible disposal in a landfill is preferable to illegal dumping or burning. Removing nails and other hardware before disposal can help facilitate recycling or improve landfill management. Exploring alternatives such as repurposing or donating usable vinyl siding to construction projects could further reduce waste. For example, some contractors may reuse salvaged siding for smaller projects, minimizing landfill contributions.
Visual Examples of Vinyl Siding Replacement Projects
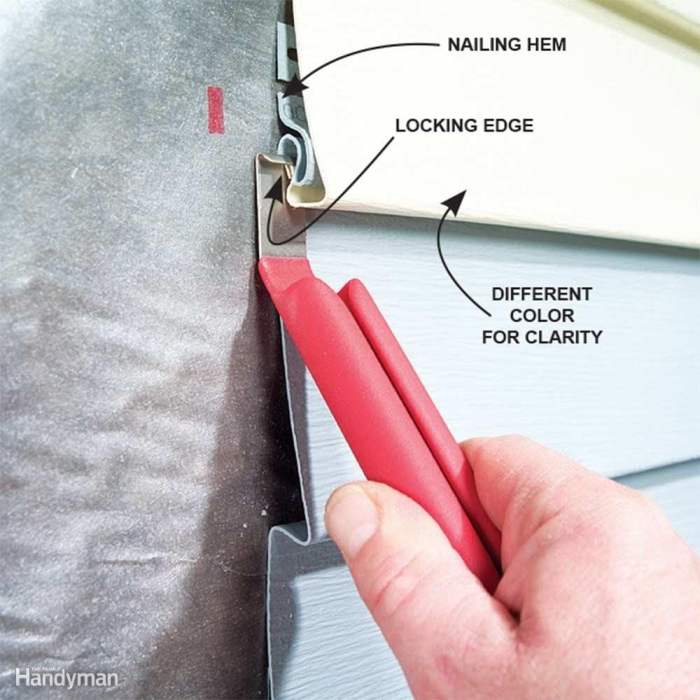
Transforming a home’s exterior with new vinyl siding can dramatically enhance curb appeal and property value. The following examples illustrate the power of a well-executed vinyl siding replacement, showcasing diverse styles and problem-solving approaches. Each project highlights the before-and-after impact, the chosen siding, and the challenges overcome during the installation.
Project 1: A Ranch-Style Home Revitalization
This project involved a 1950s ranch-style home with aging, faded aluminum siding. The homeowner desired a more modern, energy-efficient look. We replaced the aluminum siding with a double-4″ clapboard vinyl siding in a warm, earthy tone. The new siding mimicked the look of natural wood, creating a classic yet updated aesthetic. The transformation was striking. Before, the house appeared dated and dull; after, it boasted a refreshed, inviting façade. A significant challenge was removing the old aluminum siding, which was stubbornly attached and required careful work to avoid damaging the underlying sheathing. This was addressed by employing specialized tools and techniques, ensuring a clean and efficient removal process. The result was a significant increase in curb appeal, complementing the home’s landscaping and overall neighborhood style.
Project 2: A Victorian Revival with Dutch Lap Siding
This project focused on a Victorian-era home with severely damaged wood siding. The homeowner wanted to retain the home’s historical character while improving its durability and energy efficiency. We opted for a premium vinyl siding that emulated the look of traditional Dutch lap siding in a deep, charcoal gray. The intricate detailing of the Victorian architecture was carefully preserved, with the new siding seamlessly integrating with the existing window frames and trim. The before-and-after photos highlight the dramatic improvement. The dilapidated wood siding, showing signs of rot and water damage, was replaced with a robust, weather-resistant vinyl alternative. The biggest challenge was navigating the complex angles and intricate details of the Victorian design. This was overcome through meticulous planning, precise measurements, and skilled craftsmanship, resulting in a flawless installation that perfectly complemented the home’s historical charm. The final product showcased a beautiful balance of historical accuracy and modern practicality.
Project 3: A Contemporary Condo Complex Upgrade
This project involved a multi-unit condo complex with outdated and mismatched siding. The homeowners association sought a solution that would improve the overall aesthetic appeal and enhance the property value. We installed a sleek, contemporary vinyl siding in a clean, light gray color. The choice of a smooth, vertical panel design modernized the look of the building, creating a uniform and visually appealing façade. Before, the complex appeared dated and lacked cohesion; after, it presented a unified, contemporary appearance. The primary challenge was coordinating the project across multiple units, ensuring consistent installation quality and minimizing disruption to residents. This was accomplished through detailed scheduling, clear communication with the homeowners, and a well-organized team effort. The result is a significantly improved curb appeal, enhancing the property’s value and creating a more desirable living environment for residents.
Replacing your vinyl siding is a significant investment, but one that delivers substantial returns in enhanced curb appeal, increased home value, and long-term protection. By carefully considering the factors Artikeld in this guide—from cost analysis and material selection to contractor vetting and environmental awareness—you can ensure a smooth, successful project. Remember, your new siding is not just a material upgrade; it’s a statement of your home’s enduring style and your commitment to its lasting beauty.
FAQ Overview
Can I replace vinyl siding myself?
While possible, it’s generally not recommended for DIYers without significant experience. Professional installation ensures proper techniques for fastening, sealing, and preventing future issues.
How long does vinyl siding replacement typically take?
The timeframe varies based on the size of your home and project complexity. Expect a range from a few days to several weeks for larger projects.
What is the warranty on vinyl siding?
Vinyl siding warranties vary by manufacturer, typically ranging from 20 to 50 years. Check the specific warranty details before making a purchase.
Does vinyl siding increase home value?
Yes, replacing outdated or damaged siding with attractive, high-quality vinyl siding can significantly boost your home’s market value.
How often should I clean my vinyl siding?
Regular cleaning, ideally once or twice a year, using a garden hose and mild detergent, helps maintain its appearance and longevity.
